Sony's Vegas Pro is one of the most capable non‑linear editors — but the cut-down Vegas Movie Studio offers many of its facilities at a more wallet-friendly price.
 An example of VMS in action. The Trimmer is in the upper left, the video preview window in the upper right, and the track view in the lower half. The 'Glow' video plug‑in is being edited.
Vegas Movie Studio Platinum 9 Pro Pack (VMS for short, Windows only) is one of three 'lite' versions of Vegas Pro, a program that has earned hordes of devotees for its ease of use, extended audio-editing abilities and cost effectiveness. VMS is based on Vegas Pro's code, but costs considerably less. So does it offer sufficient facilities and flexibility to allow you to create decent videos? To help you decide, and to get a feel for the Pro Pack (which is actually a suite of programs including the Vegas Movie Studio video editor, DVD Architect 4.5 and Sound Forge Audio Studio 9), you can download a fully functional 30-day demo of the software (and its other variants) from www.sonycreativesoftware.com. In this introductory review, I'll concentrate on the general approach of the Movie Studio family of programs and aim to provide some musician‑friendly education about getting into video.
Overview
Vegas's audio‑centric orientation stems from its origin as an audio program with video support, and VMS works very much like a DAW, but with the addition of four video tracks and the limitation of only four audio tracks. However, since you can have an unlimited number of audio and video clips (objects) per video and audio track, this is less inhibiting than it seems. Video tracks allow plug‑ins, cutting and pasting, trim and crossfades, and act very much like audio tracks. You'll notice a timeline (see main screen, left) and a file browser too.
The flagship Vegas Pro has unlimited video and audio tracks, so you have to consider how much the four-track limitation will cramp your style. Typically, you'd have a two‑camera shoot (or would simulate it with one camera), which uses two tracks. Throw on titles, and that's another track, leaving one track for captions, cutaways, stills, or whatever you fancy. Is that enough? Well, I produced video coverage of the Frankfurt Musikmesse show a couple of years ago, and edited the videos on location using an earlier version of VMS, which had the same four‑track limitation. I was able to upload about 35 videos during the show, so to me, VMS proved itself up to the task of efficiently throwing together video, audio, narration and music. If you're making a basic music video, it's unlikely you would need more than four video tracks either.
Even if you think four video tracks might be a little tight, Vegas software offers a solution by being both object‑ and track‑oriented so, as in the days of four‑track audio tape recorders, one track can serve multiple purposes: title at the beginning, cutaway shots in the middle, and copyright notices at the end. Track‑oriented processing means that you can apply a plug‑in to an entire track. For example, suppose one track consists of clips from a low‑light situation; you can use a track plug‑in to boost the brightness and/or the contrast.
With object‑oriented editing, you can apply processing to individual clips. So, for example, if one clip is unusually lighter or darker, you can edit just that clip, leaving the track processing alone. This CPU-friendly feature is available in many DAWs.
If you need more than four audio tracks, there is a workaround in the fact that Vegas can render a mix as a WAV file, which you can then bring in to the program as a single track, freeing up the three other audio tracks. This also works for video, although to save rendering time I'll usually render to a high-quality Windows Media Video (.WMV) file, as Vegas can import these files and the quality is fine. Vegas doesn't erase the source files unless you tell it to, so if you find the rendered 'premix' contained an error, you can reload the original files and try again.
Capturing Video
Unless you're using only pre-recorded footage and images, you'll probably be transferring material from a camcorder to Vegas. Vegas accommodates DV and MiniDV formats, as well as HDV (a high‑resolution format that relies on highly compressed MPG2 files but records to standard DV tape) and AVCHD, Sony's camcorder format (but note that AVCHD capture is restricted to the Platinum version of Movie Studio).
Some camcorders save to solid‑state memory cards, so if you have an appropriate card reader, you can bring video and audio files directly into a project. For tape‑based camcorders, you'll need to use the included Vidcap 6.0 aplication, which is located in the Sony/Vegas Movie Studio folder on Drive C.
Vidcap is basic but effective. When Windows recognises your camcorder (which typically plugs in to your computer's FireWire port), it can be controlled via the Vidcap transport, and you can start transferring video and audio from tape. This is a data‑intensive operation, so you really need to devote your computer to the capture process, which happens in real time (so it takes 60 minutes to transfer 60 minutes of footage from tape, for example). If there are problems with transfers, as usually manifested by dropped frames, the blame almost certainly lies with your computer rather than Vidcap. It's definitely best if you can capture to a separate, defragmented hard drive.
Getting Started
Once you have video and audio footage to edit, it's time to create a project. VMS has 'wizards' to help you along, although these can be cryptic if you haven't checked out the manual or have not worked with video before. But it's difficult to get into trouble if you just follow the default in the event that you don't know what something means.
When setting up a project, you have the option to specify the picture width, height and frame rate (NTSC mainly for the Americas and parts of Asia, at 29.97 frames per second; PAL mainly for Europe, at 25fps; or 'multimedia', a jerkier frame rate for low‑bandwidth streaming, at 15fps).
You're not committed to the settings you choose and can bypass the wizard entirely by going to the Project Properties dialogue box. Here you'll find 12 templates, for DV, HDV, PAL, NTSC, multimedia, and so on. Choosing a template fills in values for all other parameters, such as Field Order and Pixel Aspect Ratio, which might be a bit intimidating to video newbies. Note, though, that because you can see what's happening on screen, if you're not sure what a parameter does you can always try a different value and see if the video looks right. For example, if a picture looks squashed or stretched, you can try a different pixel aspect ratio.
You can also choose an appropriate time ruler at any moment. When you're laying in video clips, you might want them referenced to absolute time, but if creating a soundtrack, a 'measures and beats' ruler might be more suitable (I actually know several musicians who use Vegas Pro as their multitrack host for audio and don't even do video; they like the workflow, and don't find the lack of MIDI support problematic).
VMS's user interface divides roughly into halves (see main screen on first page): the lower half resembles a DAW's arrangement view, while the upper half offers several palettes that are selectable from a menu. Whatever is selected for viewing will have an associated tab, so you can tab through different views within a single palette, or detach a palette and re‑dock it as a separate, variable-width pane. I'll cover the 'utilitarian' palettes briefly, before going on the the ones that need deeper explanation.
Explorer: Very similar to Windows Explorer, you use it to locate video or audio files you want to use and drag them from the Explorer into your project. You can also drag from the desktop into VMS.
Project Media: This keeps an inventory of all files used in a project, lists the number of clips based on a specific file, file length, size, path, timecode in and out, and so on. If you're pulling in clips from multiple drives, it can be very handy to see where they come from; this also lets you clean up a project by noting unused clips.
Trimmer: As a 'mini‑editor' for audio and video, you can drag a file in here and define start and end times. You can then drag the trimmed segment into your project.
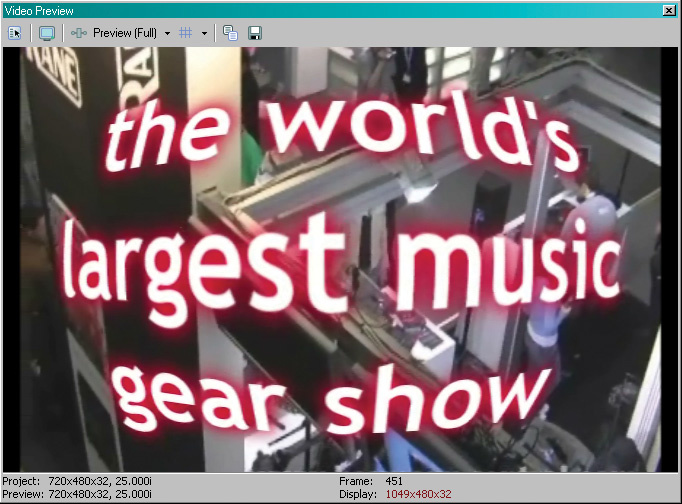
Video Preview: Here you can preview the results of your editing, resize the preview and define the quality trade-off (for example, sharp or smooth image). In a preview, what you see is not what you get. Many audio time‑stretch functions work on the same principle, where for maximum quality you render the clip 'off-line' using a high‑quality, computation‑intensive algorithm. So it is with video. You can also capture what's in the preview as a BMP file (which can be very useful when you need still shots), as well as sending video to an external monitor.
Mixer: This shows the master audio levels, and includes a way to insert audio 'master' plug‑ins. You can also add a preview channel, where you can set levels independently of the main mixer for previewing media files from the Explorer or Project Media window. This is important because source-media levels can vary wildly, and it saves changing the master level.
Now we can take a look at the palettes that offer the really creative options...
The Transitions Palette
Transitions determine how one video clip changes to another. A transition can be something as simple as a crossfade, or more complex — like a virtual door that opens to reveal the next clip, or a clip that dissolves into another clip. Drag these on top of video‑clip crossfades and the transition will occur over the crossfade duration.
There are 25 simple crossfade choices in VMS, from linear to logarithmic to S‑shaped, with separate curves going in and going out of the fade. For crossfade effects (see screen below), there are 23 main algorithms, and most offer a high degree of variability. When you call up a particular algorithm, you'll see example presets to the right. When you pass your mouse over the preset, it gives a little preview of what to expect when the 'A' clip transitions into the 'B' clip.  The Transitions window has been undocked so you can see all algorithms on the left, and the previews to the right show what to expect from a particular transition. The front window shows the parameters for editing the Cross Effect preset. Edits can be saved as custom presets.
This is extremely handy, as you don't have to try out every transition on an actual crossfade. Instead, you can narrow things down to a few likely candidates based on the preview, then apply them to the actual clips. But it's important to remember that these are only representative presets; if you click on the transition once it's in place, a dialogue box opens up that lets you further modify the preset effect, for many of the presets. If you save this, it will show up with the 'factory previews' for future use. Nice.
I rarely use the crossfade effects, because they can seem gimmicky. However, there are a few subtle ones, such as dissolve, that are appropriate for a variety of circumstances. Try them for yourself, and see what you think. Just remember that if you're creating videos for the web, not everybody has a super‑high‑speed Internet connection — so you don't really want to create excessively ornate effects anyway. Most of the time I'll use a simple crossfade, or even a butt splice, where one video clip simply ends and another begins. If you keep things simple, when you do add something complex, it will have more impact. Hmm…kind of like music!
The Video Effects Palette
These are called up similarly to transitions, with a list of video plug‑in algorithms toward the left, and presets with preset previews toward the right. If you see a preset you like, you can drag it (or the effect type from which the preset is drawn) to a track's effects chain button. As with transitions, you can generally edit these and tweak them so they function exactly as desired; the presets are there as starting points, although some do work just fine without additional modifications.
The range of effects is impressive, going from the simple (like Brightness and Contrast) to light rays, blurs, glows, swirls, and even a TV Simulator, so you can make the video look like a 1950s television with bad reception (remember the scene in the movie Independence Day when the aliens are messing with the TV programs because they're generating static and such? That's the kind of thing you can do, as well as adding film‑grain effects). VMS has a ton of algorithms, many more than I would expect at this price, and they can do everything from colour correction to chroma key (a technique where you film in front of a 'green screen', drop out the green, and replace it with something else).
One of my favorite uses of chroma key was when covering the latest NAMM show. I found a wall that was painted in a light-green colour so repulsive no rational person would ever wear a garment with the same colour. I shot people talking about products against this wall, then dropped out the wall in post‑production and replaced it with product shots behind the presenter's head. Fun stuff.
Keyframes (see the 'About Keyframes' box) really come into their own with effects. If the lead guitarist has a close‑up and is taking a brilliant solo, you could add some glow and increase the glow amount as the solo got faster and faster. Light rays can add cool effects to titles by sweeping behind the letters, and pinch/punch can make things look fatter or thinner. Also remember that effects have the equivalent of a blend control; like a delay unit where you blend in just a little bit of delay, you can blend in just enough of an effect to give a bit of a lift without dominating the image. Toward the left you can see Video FX algorithms, with the presets toward the right. The video window shows yours truly playing guitar at a festival, with glow added to compensate for the sun having been behind the shot, and a lens flare added to the guitar neck for visual interest. Using keyframes, the lens flare appeared only as the guitar rotated briefly, making it look like a reflection off the neck.
Also, creating effects chains for video is just as cool as it is for audio. When shooting under low‑light conditions, I often end up adding a brightness and contrast plug‑in, a saturation plug‑in to make colours more colourful, and a colour balance control to compensate for fluorescent lighting.
The Media Generators Palette
This palette allows you to create solid colors, credit rolls, noise textures, and so on. As these are actual video clips, you drag them into tracks, not effect chains.
These can be far more useful than you might think at first. To provide a dramatic transition between scenes, sometimes I'll insert a very short flash of a solid colour, like white — and, when possible, try to have this land on the first beat of a measure if there's a soundtrack going on. You can also create rectangles and ellipses with a generally translucent color but transparency in a rectangular or circular shape — which is great for drawing attention to, or framing, a particular part of a video. It's also possible to create synthetic, moving backgrounds that can look like anything from puffy clouds to flames.
 The front window shows the end result of picking a colour gradient from the Media Generator section, opening up the dialogue box and choosing the gradient's shape, colorisation and degree of transparency.With generated media, though, you'll need to have a dedicated track available. In the case of highlighting something, the generated media track will need to be 'higher' in the hierarchy so that the section being highlighted is behind it. Conversely, if you want to generate a puffy clouds”background and put text on top of it, that requires two tracks, with the text being higher so that the background is behind it (see the introductory video article starting on page 192 for more about this).
Yes, Audio Too
Everyone knows that good audio is essential for a good video experience, and in that respect, VMS shines. It can accept both VST and Direct X plug‑ins, so when you first load the program, it scans for VST plug‑ins like any other DAW. This takes a while if you have lots of plug‑ins, but once scanned, the start-up process is much faster the next time you load, as it only checks for new plug‑ins. The Platinum version comes with a variety of useful Direct X effects, such as equalisation, dynamics control (including multiband compression), modulation effects, reverb, noise gate, wah‑wah, distortion, and so on. These are useful, but relatively basic, and are derived from the original Sound Forge XFX packages. Still, considering the number of free and shareware VST effects available on the web, and ever‑decreasing costs for commercial plug‑ins, you're unlikely to be stuck for processing.
There are some limitations, of course. VMS supports audio up to 16‑bit/48kHz, whereas Vegas Pro does 24‑bit/192kHz. There's no bussing for aux or effects (everything dumps into the master out), no recordable automation or effects envelopes (although you can use volume and pan envelopes), and no on‑the‑fly punch‑in recording. Like many DAWs, VMS doesn't support VST3‑style side-chaining. However, there's a workaround for automation, using object‑oriented editing. You can cut a clip into multiple pieces and insert the same effect in each piece, but use different settings. Crossfading, splicing, zooming, and all those other expected audio operations, are covered.
Conclusions
If you're just getting into video, it's hard to imagine a more cost‑effective option for Windows, yet there's enough depth that VMS is hard to outgrow. Vegas Pro has always had a reputation for being particularly easy to use for musicians, due to its heritage as a hard disk audio recording program. VMS continues that tradition, and you'll find yourself thinking of video and audio as pretty much interchangeable entities.
Unlike Vegas Pro, which assumes you're, well, a pro, VMS has several little touches that make life easy. For example, if you want to make a movie, just click on the 'Make Movie' button and you're presented with eight choices for exactly what you want to do: email it, save it to a DV or HDV camera, save it to your hard drive, burn it to a DVD or Video CD, publish it to the web, or save it to a Sony PSP. If you choose email, for example, you're given a default rendering screen and the option to choose a target bit rate: DSL, ISDN, 56k dial‑up, and so on.
While VMS is pretty easy to get into, there are also some features I'm surprised to see in a product at this price, such as time‑stretching for slow/fast motion, DVD authoring, audio and video scrubbing, both track‑at‑once and disc‑at‑once (Red Book) CD burning, envelope thinning, add closed‑captioning, and the like. You'll find out more if you download the trial version I mentioned earlier and check it out!
Hopefully, by now not only will VMS seem unintimidating, but so will the process of making a video. It's really not that hard, and a good video can take you, your band, or your business to the next level. As far as I'm concerned, for Windows users, VMS is not only the fastest, least expensive, and most capable way to get you started, but will also take care of your video needs for quite some time. And should you outgrow it, well, there's always Vegas Pro…but that's another story, for another time.
System Requirements
Windows XP SP 2, Vista or 7 (runs as 32‑bit app with 64‑bit systems); 800MHz processor (2.8GHz recommended for HDV and AVCHD); 200MB program disk space; 256MB RAM (512MB RAM recommended for HDV and AVCHD); OHCI‑compatible i.LINK connector1/IEEE‑1394DV card (for DV capture and print‑to‑tape); Windows‑compatible sound card; Microsoft Direct X 9.0c and .NET Framework 2.0.
Vegas Variations
There are four main versions of Vegas (see comparison chart at www.sonycreativesoftware.com/moviestudiopp/compare). Generally, there's not that much difference between the three Movie Studio versions in terms of the editing feature set, so check the chart to see if you really need a more costly version.
For example, one of the Pro Pack's main points of differentiation is that it has Sound Forge Audio Studio 9 for detailed audio editing, comes with a CD of sound effects, and can burn Blu‑Ray discs. If you already have a good audio editor, don't need sound effects, and don't need to burn Blu‑Ray discs, the Pro Pack features may not be compelling enough for you to stretch your budget. You can also download trial versions and decide for yourself which suits you best.
Help!
VMS's help is a notch above average, including what Sony calls 'Show Me' interactive tutorials. A lot of tutorials I've seen aren't done well, but these are a major exception: spend a day with the help and tutorials, and you'll quickly get up to speed.
About Keyframes
Keyframes are the key (sorry!) to effects that change over time. For example, VMS has an effect plug‑in that can turn video from colour to black and white, but this needn't be an abrupt transition, thanks to keyframes and the use of object‑oriented editing.
Keyframes are created along a secondary timeline toward the bottom of an effect's dialogue box; you can see it in the Glow plug‑in in the header screenshot. The timeline duration is the same as the clip being processed. If you wanted to use the 'black and white' plug‑in to recreate the famous moment in The Wizard of Oz where the picture changes from black and white to colour, you'd place a keyframe at the beginning of the clip, and set the effect's Blend Amount to 1.000 (ie. full black and white), then place a second keyframe where you want the clip to be in full colour; here you would set the Blend Amount to 0.000 (no black and white effect). Keyframes define the start and end points (or midpoints, if applicable) and the effect morphs between these points. It's just like drawing an envelope, placing a node at minimum volume and a few seconds later, a node at maximum volume. In between the two nodes, the volume would ramp up from minimum to maximum.
Keyframes are very versatile. With text, you can specify the placement and use keyframes so that the text 'crawls' from, say, left to right. And of course, you can apply multiple effects to one clip, each with its own keyframes. So you could have something like the brightness change while adding lighting effects, independent of each other.
Pros
- Unusually deep feature set for a 'lite' program.
- Good selection of effects and transitions.
- Familiar, DAW‑type interface.
- Supports VST and Direct X audio plug‑ins.
- Extremely cost‑effective.
- Pro Pack includes Sound Forge Audio Studio 9.
Cons
- Maximum of four video and four audio tracks.
- No audio effects automation.
- No MIDI support.
Summary
Vegas Pro has been used to make feature‑length movies and won multiple awards, but perhaps surprisingly, Vegas Movie Studio has far more similarities than differences. The audio and video track count is limited but the palette of effects, transitions, and editing options is first‑class. Perhaps of greater interest to musicians is that Vegas feels like a DAW, with video handled in very much the same way as audio.
information
SCV London +44 (0)208 418 1470.
Sony Creative Software +1 608 256 3133