I became interested in Arabic geometry and zilij around the same time that the “Moroccan trellis” type of quatrefoil pattern started showing up everywhere. I’ve got a camera case, computer screen wipes box, and even a kitty litter mat with variations of this pattern on them. I’m both delighted by the availability of this design, and afraid I’ll end up buying things I don’t need because I’m pathologically attracted to it.

While I had a subscription to Adobe Creative Cloud, I wanted to make my own planner with InDesign. Part of that involved finding pretty images to put in the background and on the cover. I couldn’t find free quatrefoil images online that were high-res enough to print well for sure, so I decided to make them myself!
Though this particular shape always seemed so fancy to me and impossible to draw at first glance, when I stopped to really look at it, I realized it was just an oval over an upright rectangle with concave corners. Knowing that, making it in Illustrator was a breeze. I only know Illustrator from a summer computer graphics class; the coursework in it consisted of just five chapters from the Illustrator Classroom in a Book training guide, but that was enough to do this.

The Super Easy Way To Make This Moroccan Trellis In Illustrator (CC 2018) Without Paying Attention to the Exact Geometry Yourself:
- Make an oval and a rectangle, either with the Ellipse & Rectangle tools, or with the Shaper tool.
- Overlap these shapes. Use the Align options to make sure they’re centered against each other.
- Change the corners on the rectangle so they’re all concave. You might have to make the rectangle longer if you’re losing the new, lower right angles within the oval.
- Play with the shapes. Make the oval fatter, or thinner. Make the rectangle longer, or shorter. Play until you get a silhouette that speaks to you.
- Use the Shape Builder tool or the Shaper tool to join the two shapes into one.
- Go to Patterns, then choose a Hex layout. Bada-bing!
- Different proportions in the base shapes will generate a different line between the shapes once the pattern’s in place, so you might want to go back and play some more at Step 4, or start all over in a fresh file to keep experimenting.
Actually, you can use two overlapped rectangles as well for a boxier look, just that the horizontal one would have convex corners whose curvatures don’t meet. (Sorry if that’s not the proper Math—or Illustrator!—way to describe it.)
This is the way that I came up with to do this based on my knowledge of Illustrator. I really wanted to see if I could figure it out myself so I didn’t look at any tutorials specifically for this pattern, though I did find this one after the fact which is perhaps a more “pure” quatrefoil geometrically speaking since it is based on circles even to create the points on the rectangle. Doing it my way, you probably won’t get the convex edge of the oval to have the exact same curve as the concavities on the rectangle. This creates more movement within the pattern, which might not be what you want if you prefer a more monumental, meditative steadiness.
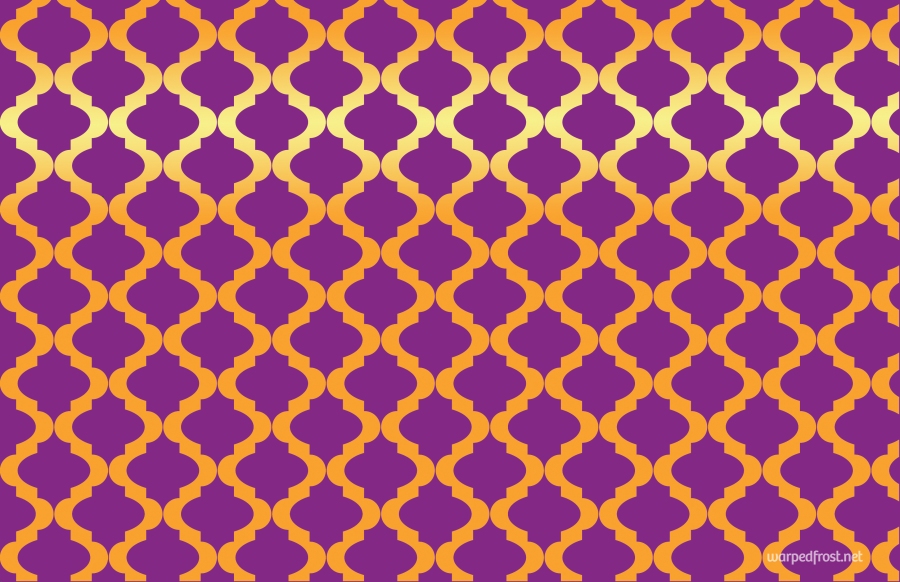
After creating the pattern in Illustrator, I went into Photoshop to create different color variants. (Thank goodness for “Save Selection” and “Inverse Selection”!) I went a little overboard and, before I knew it, had 15 different versions. Since these are so big and I took the time to make them, and think they’re rather nice if I do say so myself, I figured I’d share some of them. These are 11 x 17 inches (for a double page spread basically) at 200ppi. I had to convert the files to RGB from CMYK though since now that my CC subscription is canceled, I’m limited to PS Elements 8, which doesn’t like CMYK. Feel free to use these quatrefoil/ Moroccan trellis images for your own personal, non-commercial use.


How sweet of you to share your work 🙂 Yeah, it’s not easy with the free stuff and right stuff and then the resolution. Sometimes it’s really easier to do things yourself. I’m always gathering free tools and parts for photoshop etc. to then reshape them to completely different things for whatever I require (and I’m really doing 99% non commercial fun stuff for myself and family etc.). Yet, sometimes there’s just no way around the DIY. Though in my case I’d often needed to use myself as model and be my own photographer just to get the template for some arm or leg or pose or whatever X’DDDDDDDDDD It takes time but on the other hand it helps to stay humble and appreciative. There’s so much we can learn on the way and so much joy in seing the results, too. Creativity is Life!
Totally understand having to be your own model! Every now and then someone’s near that I can ask for a favor and have them pose for me, but when I’m drawing for fun, it’s usually the middle of the night and I have no choice but to pose myself. LOL
Creativity is definitely Life! 🙂
Pingback: Cozyroth | Warped Frost