In the spring of 2022 Lamazi launched their first range of exclusive design fabrics called Garden of Dreams which proved to be a big hit with customers so now, in Spring 2023, they are launching a second range called Summer Party. This collection includes printed linen and viscose marrocain and has been created by super-talented surface pattern designer Rachel Parker using vibrant shades and subtle pastels.
This is the Garden of Dreams fabric which I used to make McCalls Marina #8090 last summer. It’s a Tencel with Lyocel Sateen and an absolute delight to sew and even nicer to wear, it has the most beautiful weight and drape. I squeaked this dress out of 2m of fabric and it was worth the head-scratching because I’ve worn it a lot.
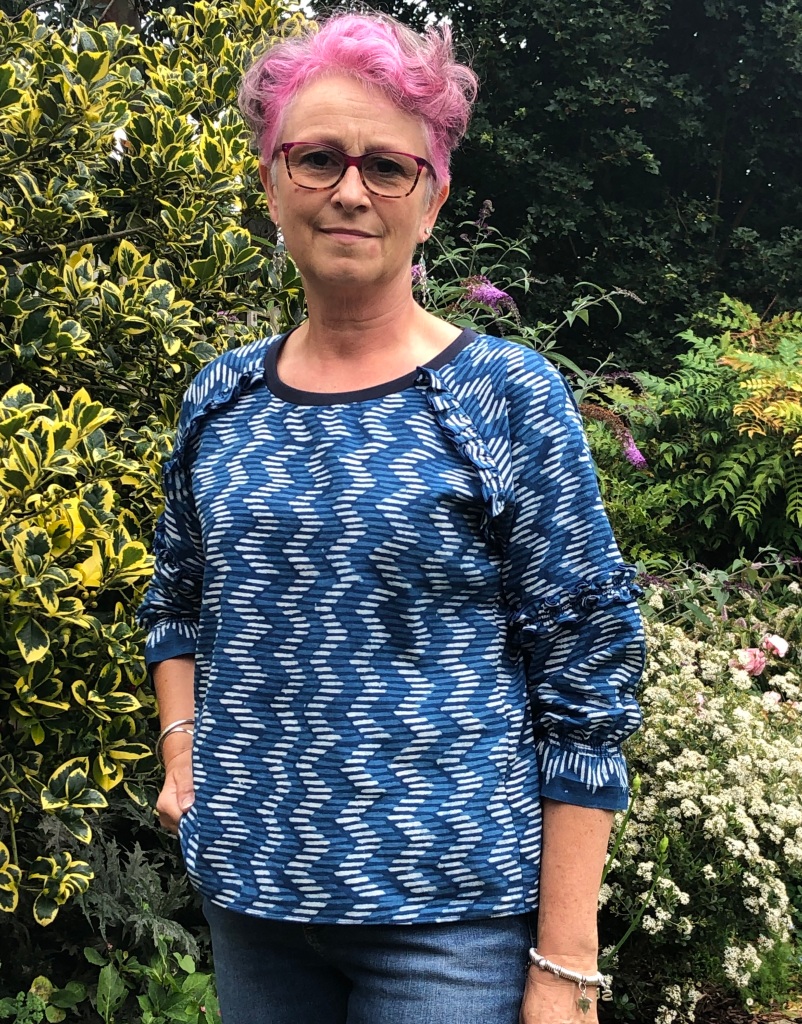
Liana at Lamazi generously gave me my choice from the new collection so I opted for the gorgeous Painted Foliage design which comes on a fine, more environmentally-friendly mill-washed linen, it is semi-sheer and reminds me of beautiful stained glass windows with the sun shining through them. It’s been lovely to work with so I’ll share some of my experiences of sewing with it you.
Because the linen has been mill-washed it’s already beautifully soft but I gave it a pre-wash anyway for my own peace of mind, habit I guess plus I’ve learned the hard way over the years!
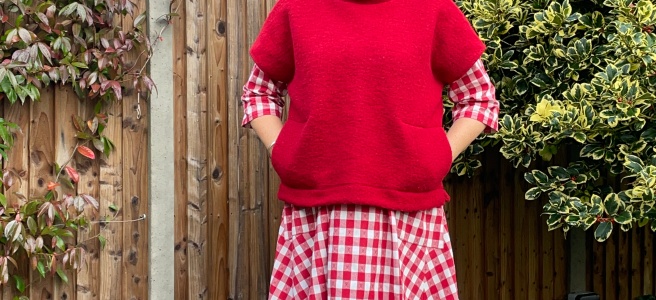
Like the Marina dress I wanted to use every possible scrap of the 3 metres of fabric so I chose to use the Maven Wendy smock top (which I already had) for the bodice and then a simple tiered skirt attached at the bottom. A tiered skirt is an excellent way to use every bit of fabric because, with a few calculations, you can simply cut (or tear with certain fabric types) strips across the full width of the fabric available, gather them up and attach to the layer above/below.
I chose to cut a size medium for the blouse although I probably could have sized down to a small, I actually reduced it though the underarm seam after trying it on the first time. I shortened the length by about 30cms too, the amount you need to shorten by will vary depending on the look you’re after. I also wanted more fullness in the sleeve so I ‘slashed and spread’ a traced-off copy of the sleeve pattern to give added volume.
Divide the sleeve pattern vertically into a number of even-width strips (not including the armhole edge though, that remains unchanged) and cut from the hem to just before the top leaving a tiny amount of paper still attached. Pivot each strip open to add fullness at the hem, plus an additional 3cms to the length for a longer finished sleeve. When you’re happy with the shape retrace the new configuration.
By folding the selvedges into the centre fold I could cut the front and back bodice pieces side by side [this is also useful when you need to ensure the good pattern match on a print] I used the various gaps between the sleeves and bodice pieces for the two small patch pockets and the front neck facing. So that I kept the remainder of the fabric as untouched as possible I had to cut and join lots of bias strips for the neck binding. From everything that was left I cut (across the fabric width) two strips measuring approximately 30cms deep and three strips approximately 40cms to form the skirt. [I could have simply cut the remaining fabric into two equal rectangles and made a gathered skirt from that but I wanted a more interesting skirt and sewing the skirt in tiers like this gives a fuller hem] Eventually there were only very small scraps left.
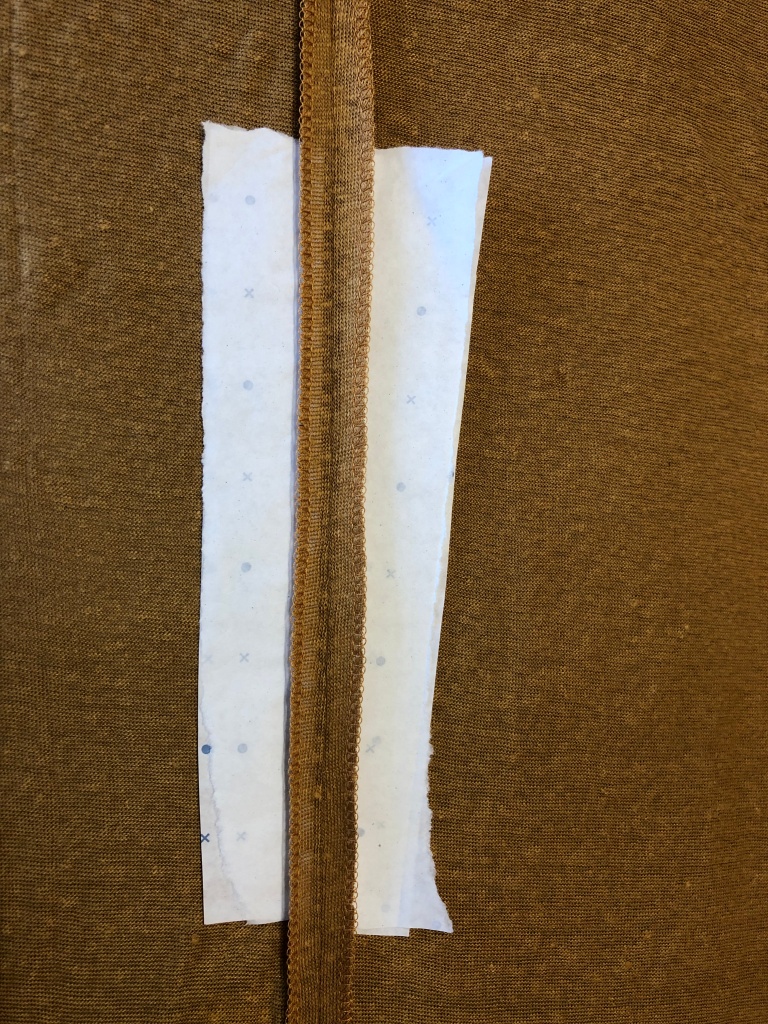
I opted to add some decorative stitching using this Gutermann Deco Stitch 70 thread. The trailing leaf design seemed appropriate from the wide selection my discontinued Pfaff Quilt Ambition 2.0 offers. Attaching the V neck facingMore trailing leaf embroideryAdding the neck binding-I gently pulled up the edge with two rows of gathering stitches first then attached the binding. Because the linen frays a bit (it’s a loosely-woven fabric so this tends to happen and is to be expected) I overlocked the edge before turning the binding over it to finish.I secured the binding in place with more embroidery which ran right through to the tie ends as well.
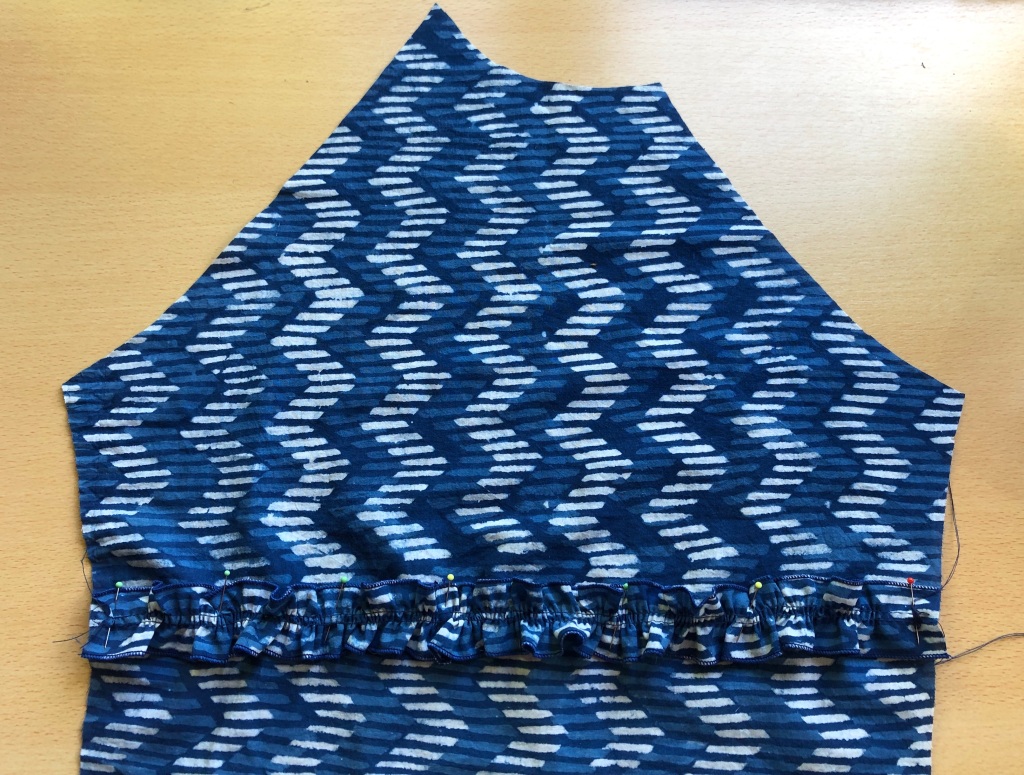
Next I constructed the skirt, I opted to overlock the cut edges before gathering because of the potential for fraying-I would normally overlock afterwards.
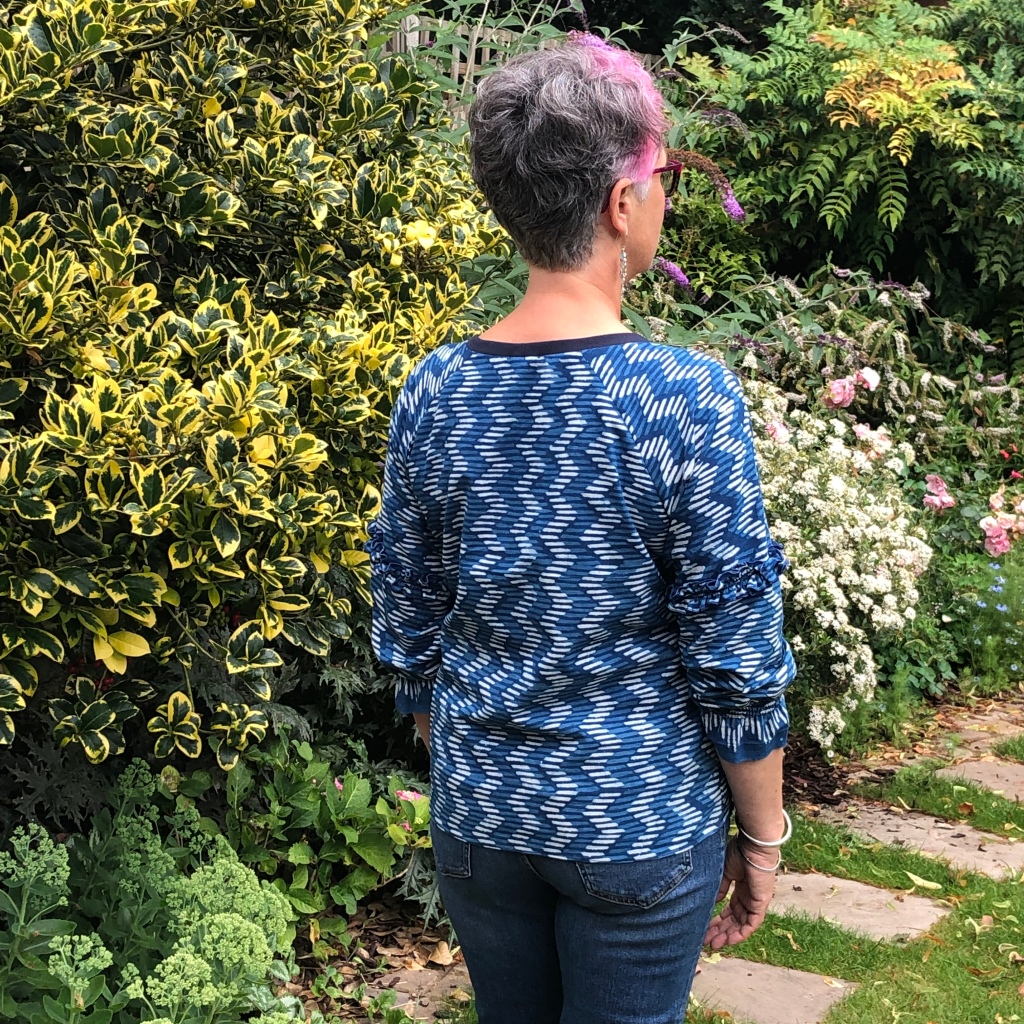
I simply joined the two 30 cms strips at the short ends to form a loop, these seams would eventually match the side seams on the bodice. The three deeper strips were also joined at the short ends to form an even longer loop. I turned one long edge of this section and hemmed it using the trailing leaves embroidery and on the remaining long edge I sewed two rows of gathering stitches, this was pulled up and attached to the shorter skirt section. Finally I gathered the remaining top edge of the smaller loop and attached the whole skirt to the bottom of the bodice, no pattern needed!
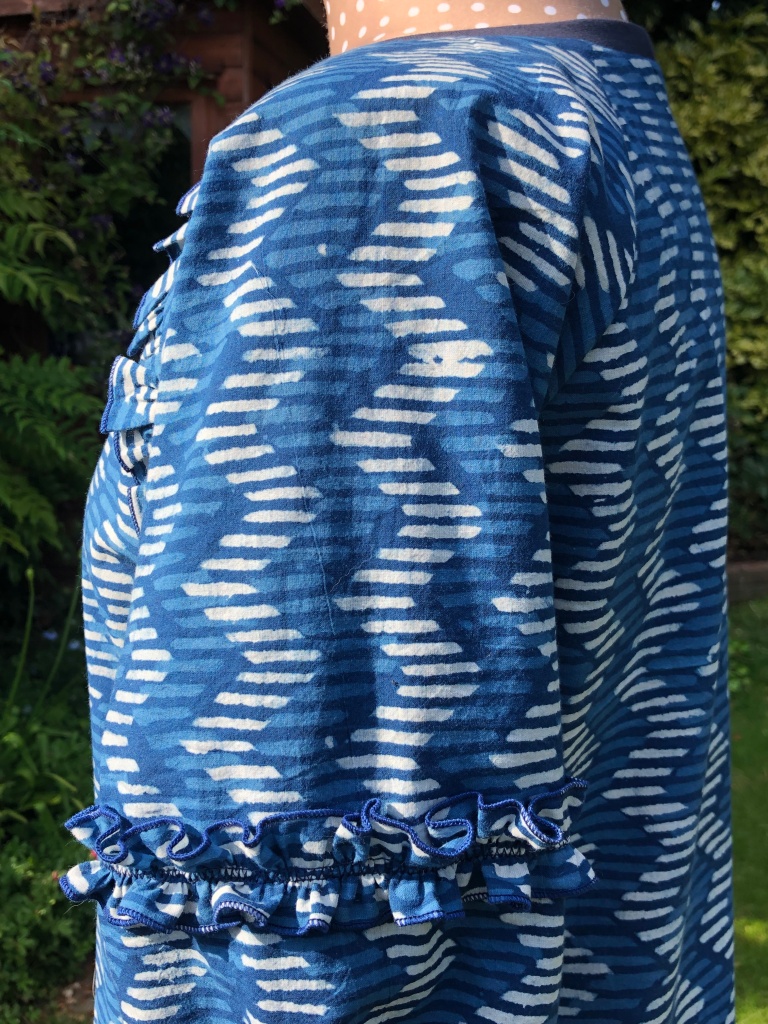
Lastly, I created a casing on the bottom of the sleeves and ran elastic through them.
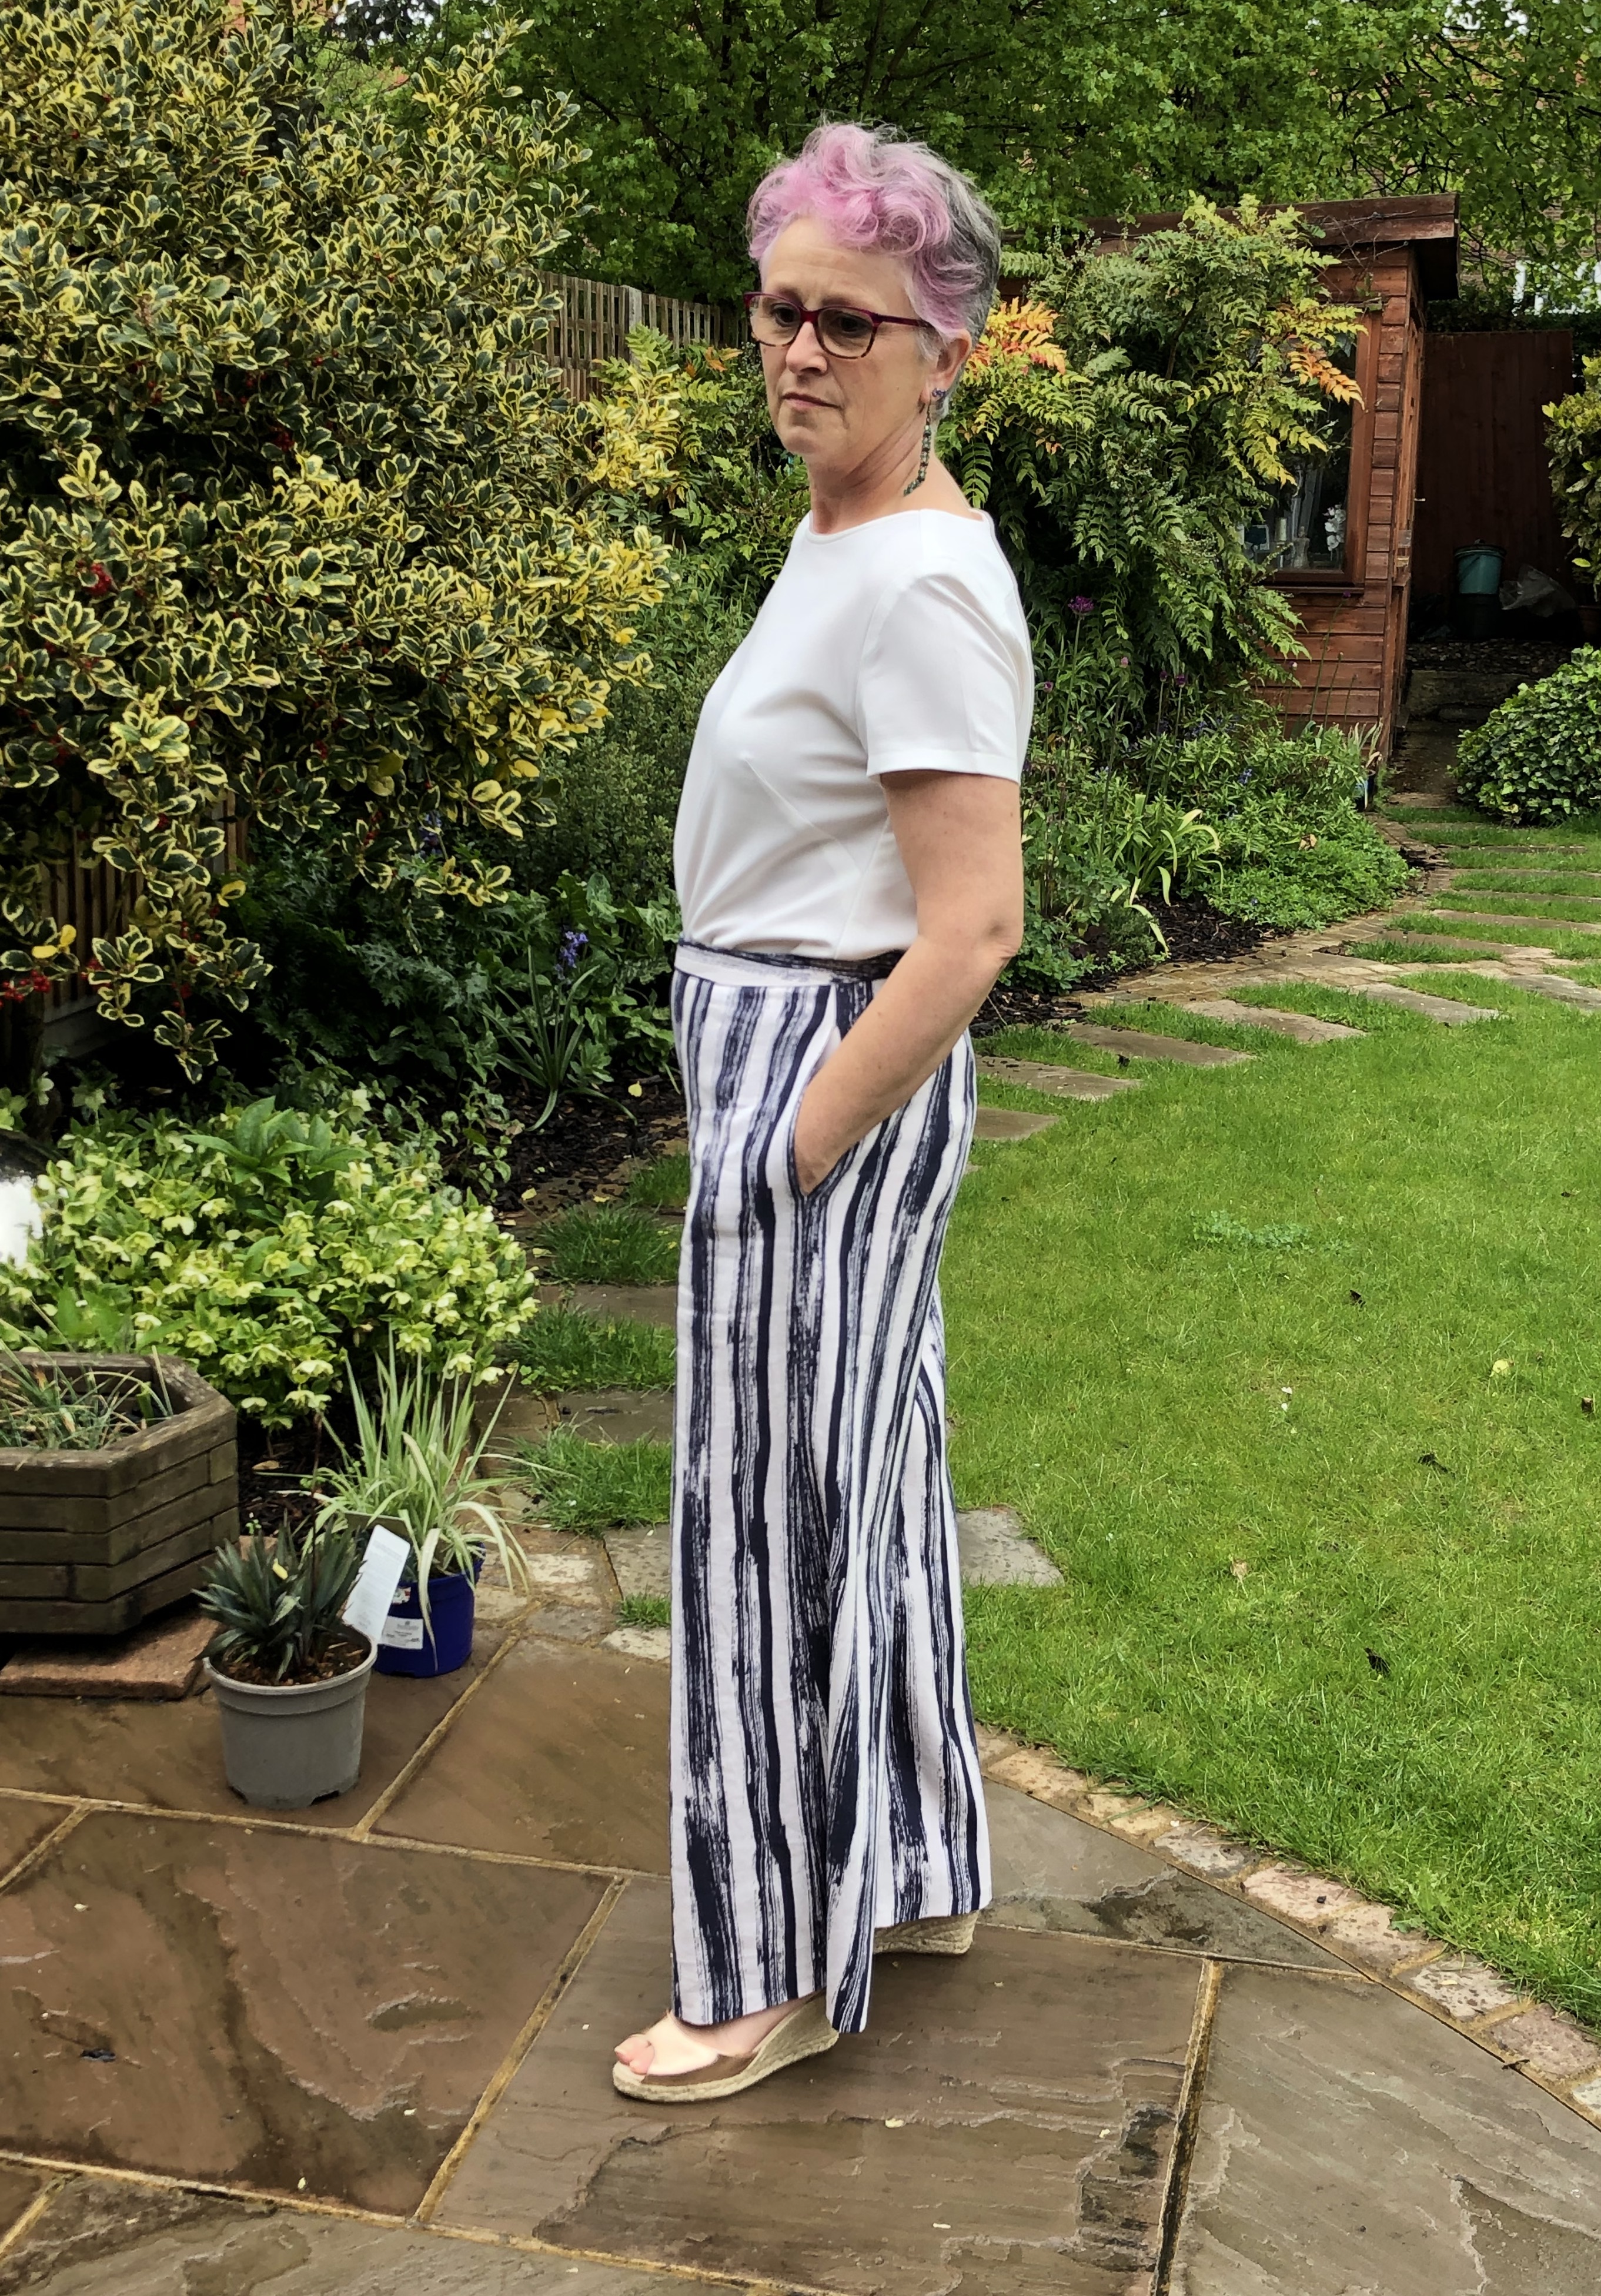
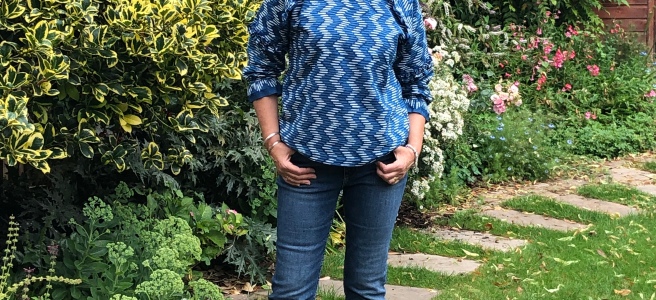
The fabric is semi-sheer and I’m wearing a nude slip underneath it but I didn’t feel the need to line it.Like almost any linen some crumpling develops but I really don’t think it’s excessive or unsightly.Lots of lovely volume for swishing aboutI can’t wait to waft about in this over the summer months
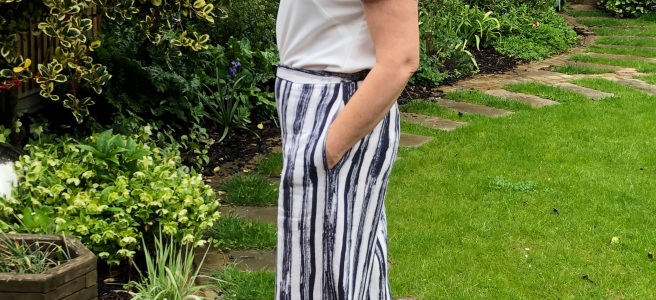
Because of its semi-sheer quality I don’t think the fabric is particularly suitable for trousers or shorts, at least not without lining or mounting it first. It’s a softer linen which lends itself to more unstructured shapes, maybe with gathering, pintucks or soft pleats so shirts. blouses and dresses are ideal. It doesn’t have much drape though unless cut on the bias.
Thank you once again to Lamazi for providing me with this beautiful cloth, I know there are still a few more exclusive collaboration fabrics to come into stock so do keep an eye on the website or sign up for the newsletter. Small businesses are having a very tough time at the moment and I have no qualms about the quality of cloth and the standards of service that Liana and James continue to offer at Lamazi. I was given the fabric but have not received a payment for this article.
Well, here we are at the end of another year which has not been without its challenges again. We’ve been learning to live with Covid 19 as a fact of life but 2022 has been tumultuous in terms of other world events, including the beginning of the war in Ukraine, multiple Prime Ministers here in the UK, the Platinum Jubilee and then the death of Queen Elizabeth, and a worsening cost-of-living crisis, to name but a few.
You haven’t come here to read my personal thoughts on any of these though, there are many who have or will continue to comment more eloquently, passionately or noisily, than me and my blog is for me to detail my sewing.
I began the year with sewing a few garments for the book written by Juliet Uzor to accompany the spring series of the Great British Sewing Bee. The series didn’t air until the late Spring so I wasn’t able to share these photos at the time. In total I sewed five garments which featured, some of which were Juliet’s original designs and others were pattern challenges from the new or previous series of GBSB. Obviously when I’m making these samples I’m sworn to secrecy and I’m rarely told anything more about them anyway until the book comes out. I really enjoy sewing for this though and whilst there are time pressures and it has to be my best possible sewing that’s a challenge I’ve enjoyed rising to. [I’ve sewn for a few books now so I know what’s expected] I have to say that I have no idea how the Bees manage to complete the pattern challenges in the time allowed because they took me a jolly sight longer than a couple of hours!!
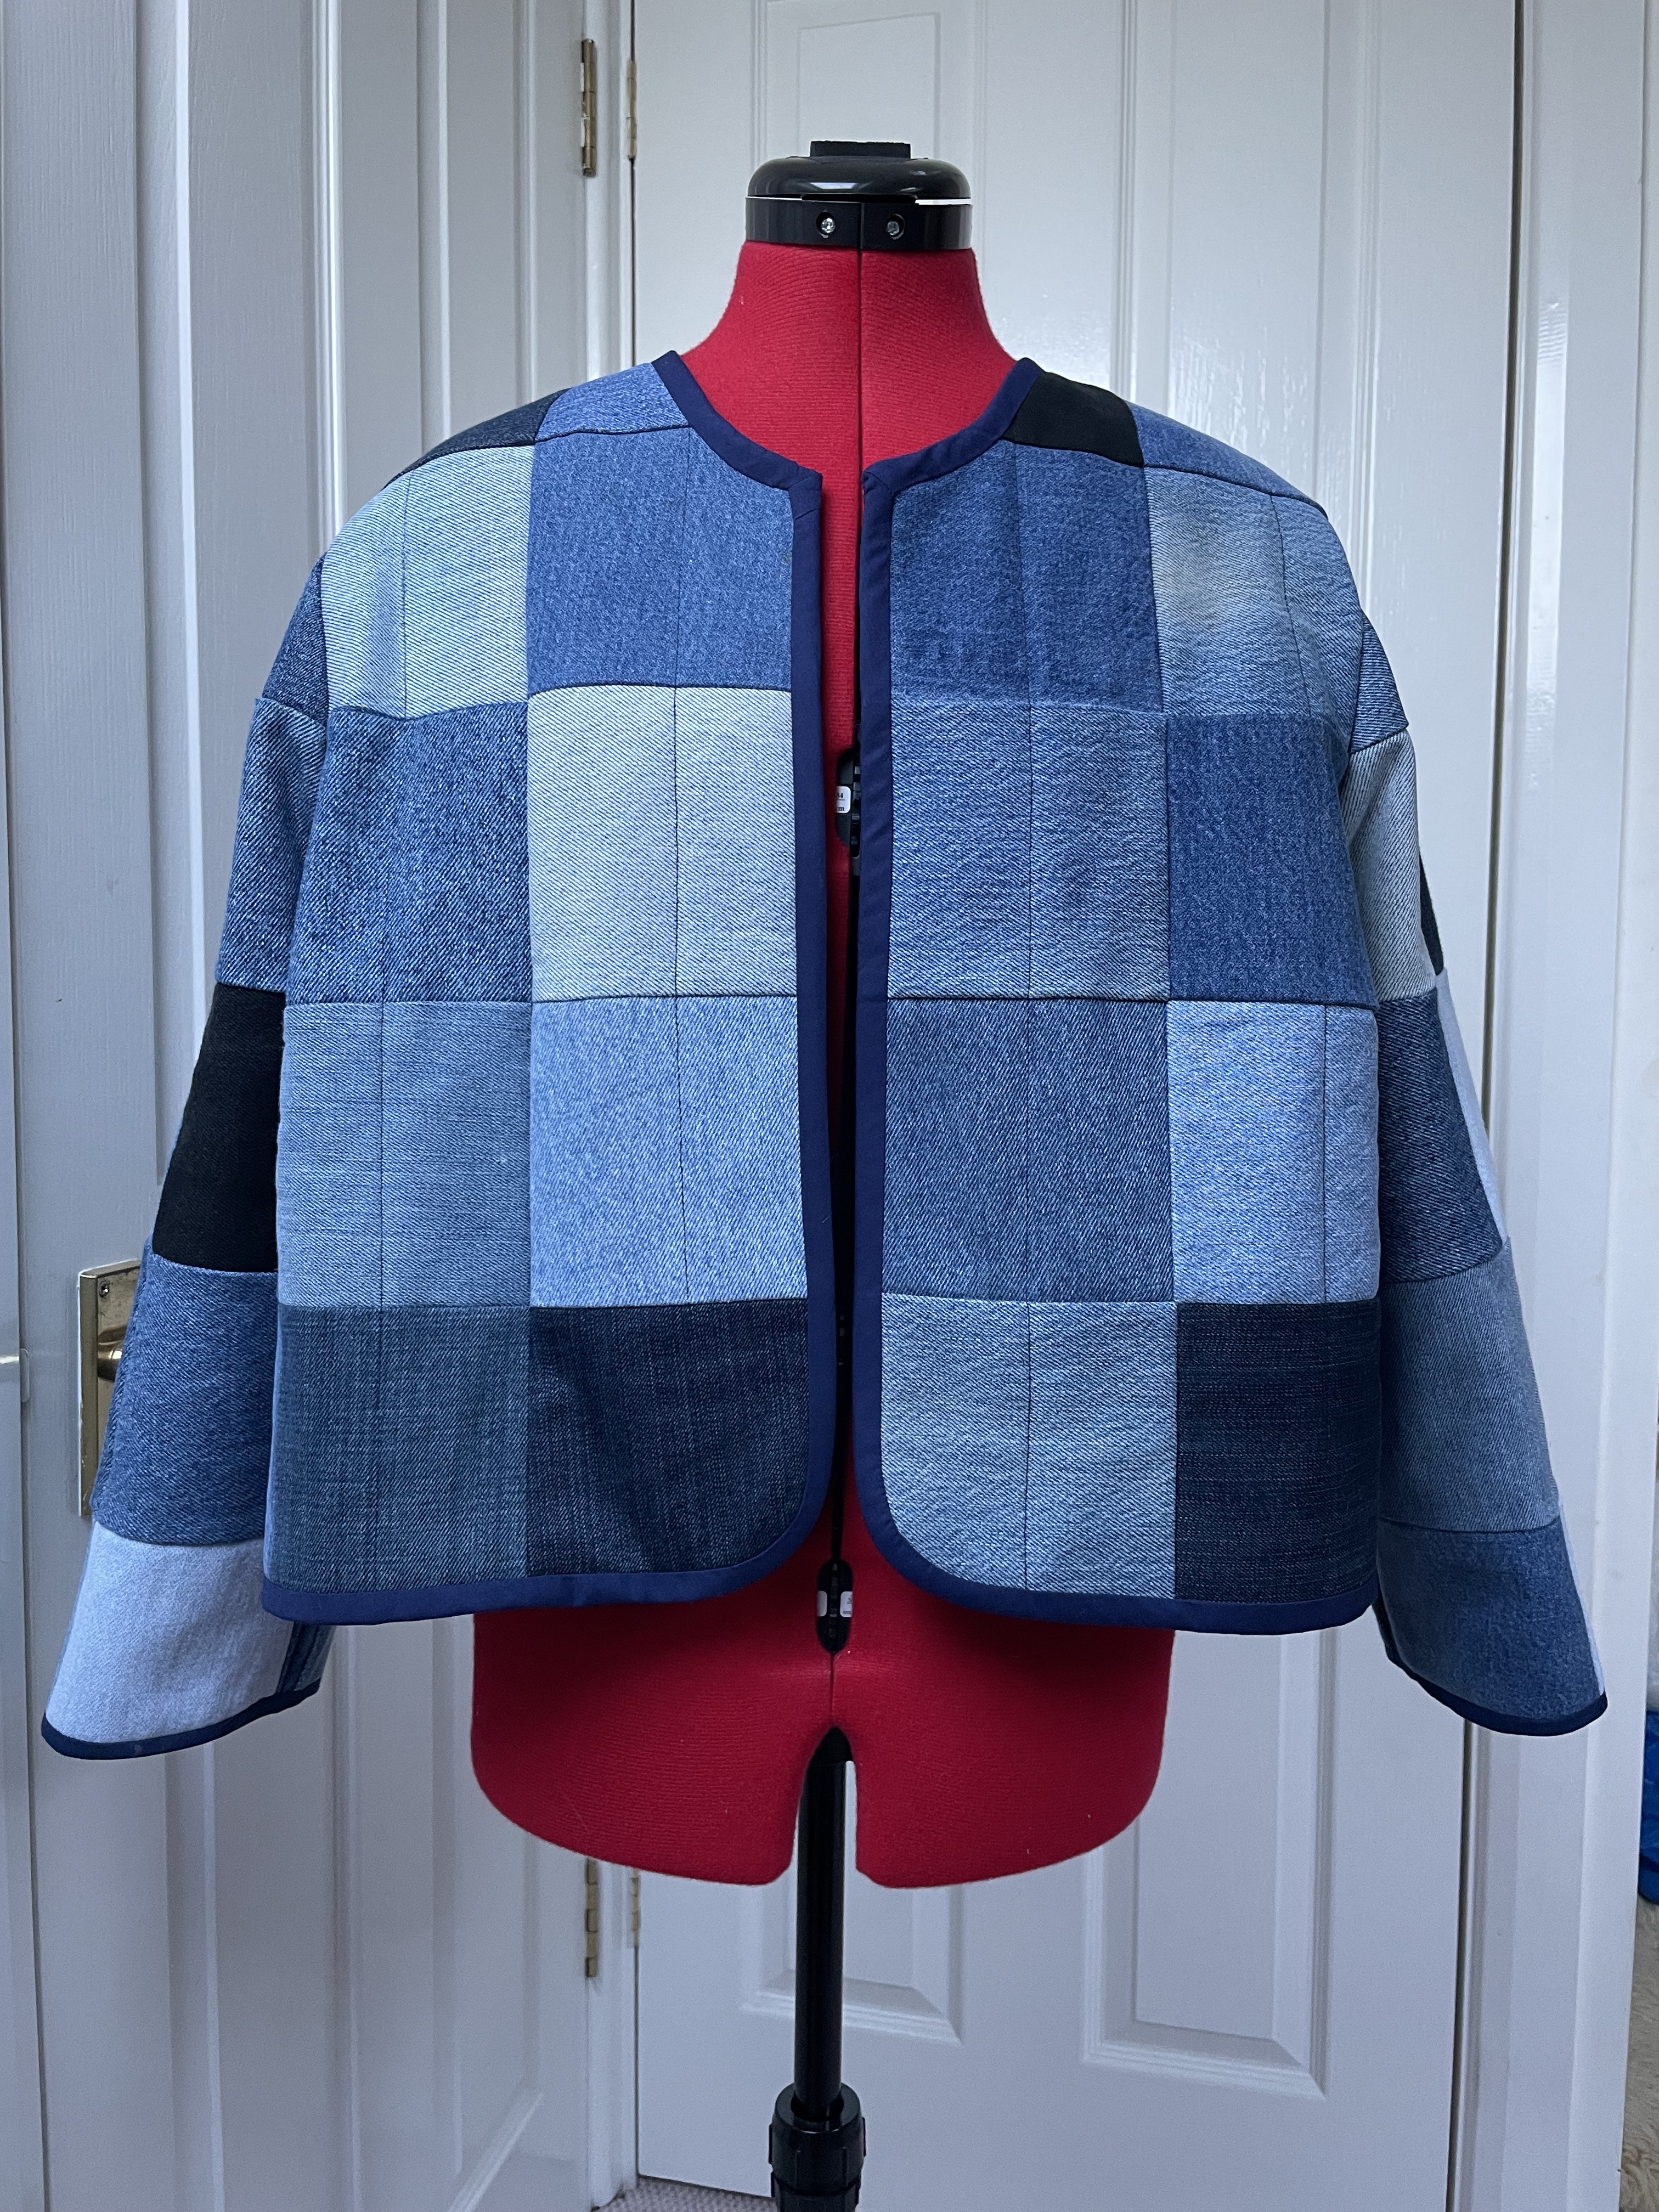
a silk organza blouse with shirred detailsOne of Juliet’s original designsthe patchwork jacket which featured as a pattern challenge. Juliet modelling the patchwork jacket
Immediately I finished these garments I became a Backstitch Ambassador and sewed up my first Merchant and Mills Ellsworth shirt. You can read my review of it here, it’s proven to be the most popular post of the year.
The Ellsworth shirt for Backstitch, plus I’m wearing the Eve trousers also by Merchant and Mills. I’ve sewn 5 iterations of them in 2022, it’s such an adaptable pattern.
Next I sewed a Paper Theory LB Pullover from a herringbone tweed wrap which I made a few years ago and then never wore, this became the first of 4 LB Pullovers this year. It’s occurred to me that I haven’t blogged this top yet so I need to put that right in 2023. The trousers are another pair of Eves in soft corduroy and they featured in a Sew Over 50 post I wrote early in the year with many of your favourite trouser patterns in.
An upcycled LB pullover with cord Eve trousers.I sewed this Named Talvikki sweater in a really thick sweatshirting I bought at 1st for Fabrics. I wrote a review of it over on the Fold Line website if you’re interested.
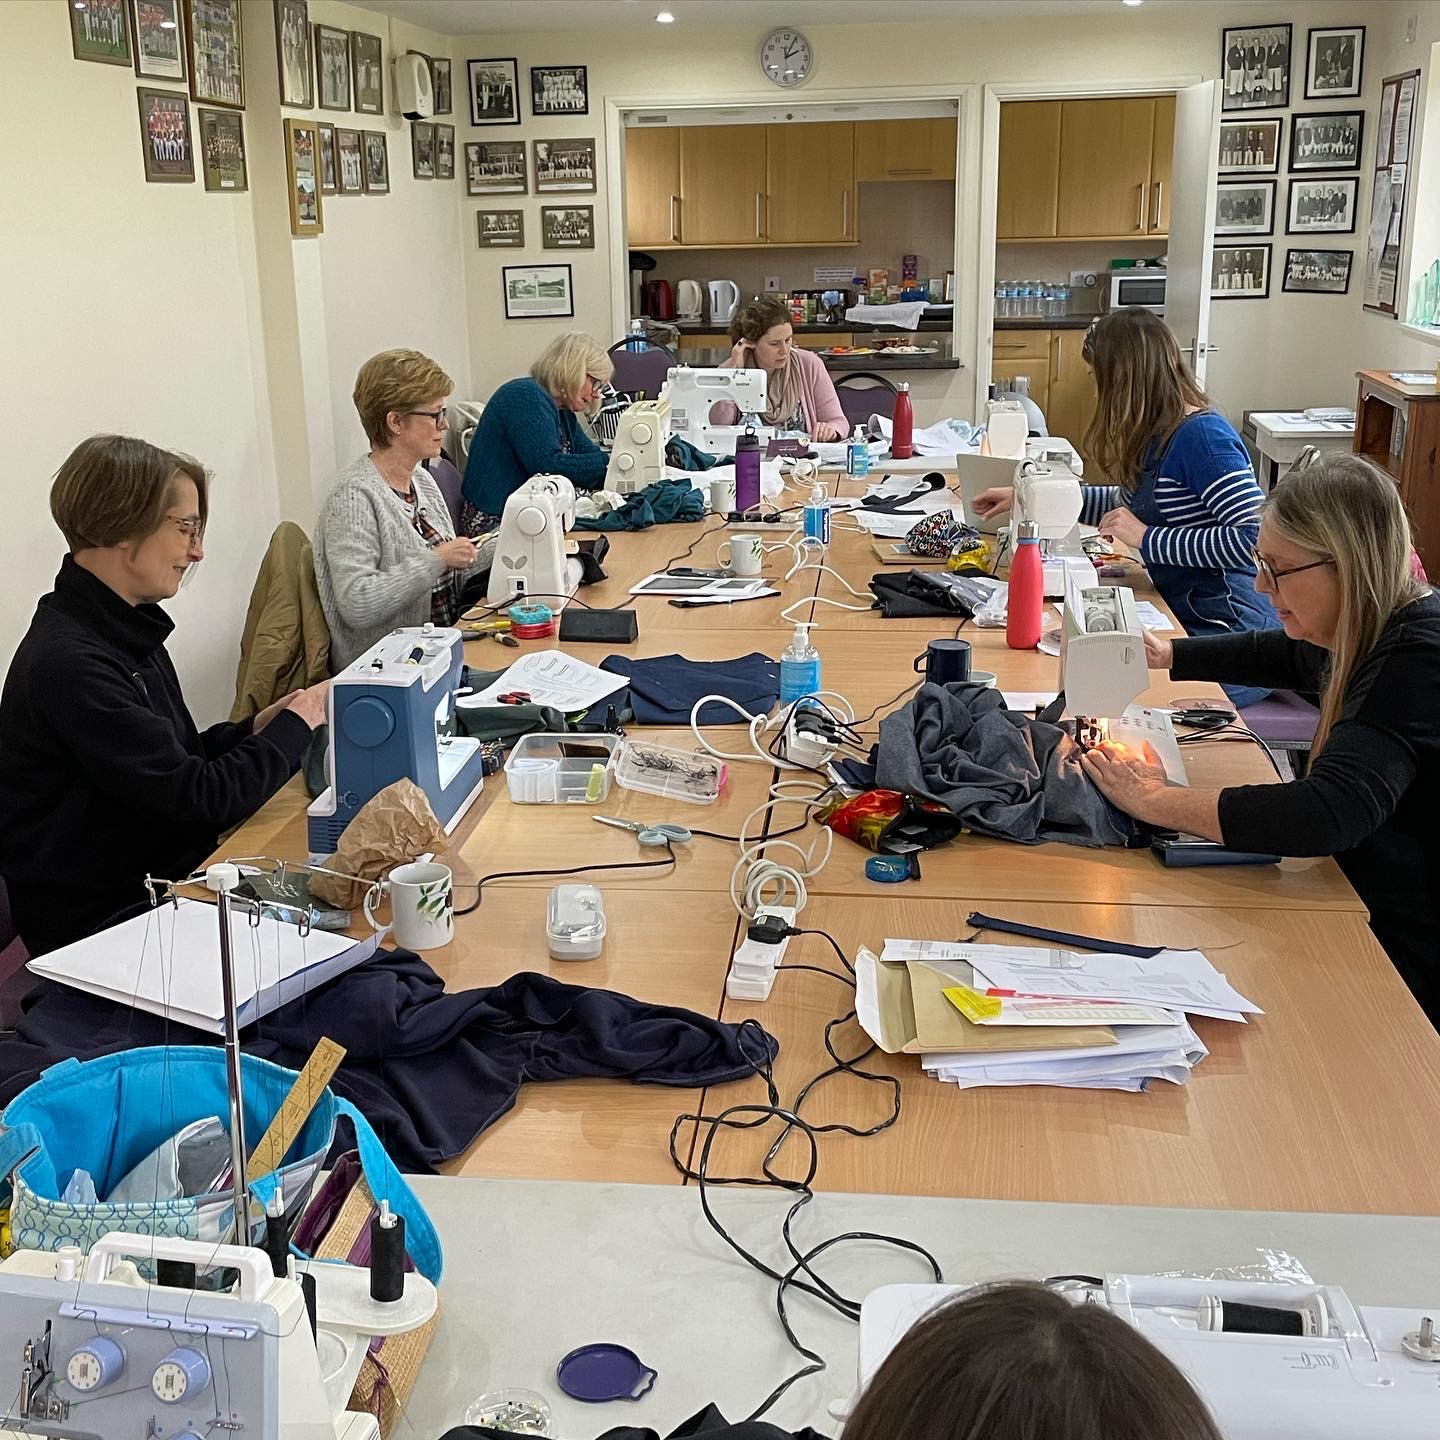
I also hosted a couple more of my Herts Sewcials before the lawn bowls season started again and we had to stop until early October. They have been such a source of fun and sewing camaraderie and I hope to announce some other sewing days later this year. It all takes time to find a suitable venue, make bookings, advertise etc etc though
I was (finally) struck down by the first of two bouts of covid in late February which meant I had to miss out on the The Stitch Festival show in London and being in the first ever Sew Over 50 lounge. This was particularly gutting because I had organised the whole rota of people who had generously volunteered to ‘woman’ the space over the four days and I couldn’t share all the fun and chat, and the fashion show which I could only watch unfolding on social media from home.
I sewed a Tilly and the Buttons Nora cardigan using another of the fabrics I bought from 1st for Fabrics and it’s been in regular use on chilly days (I’m wearing it again right now)
I diversified a little after that when I made a fabric roll to keep our ‘good’ cutlery in. It’s only ever lived in a box with bits of tissue and an elastic band around the items so I finally got around to making something more suitable. I used a couple of fat quarters and some Liberty off-cuts in the stash, plus some wadding to go inside. The embroidery function on my machine was very handy for making the labels for each pocket too, all in all a very satisfying make.
Dhurata Davies had very generously gifted me a copy of her Overlap pattern in 2021 and I bought this silk habutai fabric from Hasan, the Man Outside Sainsbury’s in Walthamstow specifically to make it. However, it took me until March 2022 to actually do so! I’m so glad I finally did because it’s been absolutely lovely in warm weather and on holidays, it’s so light and folds up very small. The construction of the collar and facings on it are things of beauty too.
I used a ‘vintage’ 80’s blouse pattern in my collection to sew a shirt dress for our delayed holiday to Antigua in March. We should have gone in March 2021 to celebrate Mr Y’s 60th birthday but world events scuppered that. In spite of my having Covid just two weeks before we were due to go I was cleared to fly at the last minute and thankfully we all made it there-and back-without further problems.
I sewed the first of two Elbe Textiles Serpentine hats, the first from Ellsworth leftovers. Because I hadn’t been able to leave the house in the lead-up to our trip I had to make do with the interfacing I already had so the brim wasn’t really stiff enough. It was shady and kept the sun out of my eyes though. Mask-wearing was still strictly enforced in Antigua.
As soon as I got back from holiday I chatted on Instagram live with Gabby of Gabberdashery on her Quick Unpick feature. It was nerve-racking to start with but I quickly forgot that people were watching and just enjoyed nattering with Gabby. It wasn’t as bad as all that!
I had been wanting some kind of vest or tank top for a while and then Charlotte Emma patterns released the Clove Vest which was exactly what I wanted! I bought, printed, stuck together and sewed one in double-quick time and I have been using it ever since. In fact I’ve just made another using small leftovers of another project so it’s a good way to use remnants up.
The Clove Vest in action on a walking trip to the Yorkshire Dales, Swaledale to be exact.
From Yorkshire we continued north to Scotland where we had the huge pleasure of staying with Sew Over 50 Supremo Judith Staley. The OHs went off to play on trains while Judith I went first to the V&A in Dundee and the following day we visited the Great Tapestry of Scotland which we would both highly recommend.
In April I organised a quick, low key, visit to Walthamstow market where I caught up with friends old and new. Not too many purchases on my part, I’m more of an enabler…
I delved into the remnants box and found enough of this linen to make a short-sleeved Fantail Top by The Sewing Revival, I love the gathered elastic hem detail on this pattern. Using fabric I bought at Walthamstow I sewed this shorter, wider pair of Eve trousers.
I returned soon after to Walthamstow and the William Morris gallery to catch the small-but-perfectly-formed exhibition of Althia McNish’s work. Until I listened to the very first Haptic and Hue podcast nearly 3 years ago I had never heard of this wonderful textile designer. I’m very glad I know about her now because her designs are so full of life, colour and vibrancy.
I hadn’t sewn anything for Lamazi as a blogger for a while but I was able to make this McCalls 8090 using their beautiful own design Tencel Lyocell ‘Garden of Dreams’. It has the most gorgeous handle and drape, and I love the vibrant colours of the print. It worked beautifully for this pattern and I’ve worn it loads, plus I’ve layered long-sleeved tops under it this autumn/winter, and with tights and a cardigan over the top too. I really must write this pattern up as a proper blog post in 2023!
In late April myself and my fellow Love Sewing modelsfinally FINALLY got to Thirkelow in Derbyshire for our sewing retreat. I can’t tell you how many times this got pushed back and pushed back because of the pandemic and we were all just so thankful to be together as planned and have a wonderful time chatting, sewing, walking, laughing, eating and drinking at last. We booked for 2023 before we even left, and 2024 is in the diary too!
I made my second LB Pullover while I was in Derbyshire (yes I actually got some sewing done…)These are the Trend Utility trousers from a couple of years ago.
Another departure was a waistcoat for Mr Y, everything except the buttons (ironic when you see how many buttons I have) came from the stash. I first used the pattern over 20 years ago for some wedding ushers.
I don’t think these Marcy Tilton trousers have been my biggest success…I’ve met someone since who was wearing them and they looked great so if I size down by at least 3 sizes (or more) they won’t look so voluminous, I hope.
I made my second Serpentine hat which worked better than the first, I wore it loadsClaire and I went to both Africa Fashion and Fashioning Masculinities at the V&A on the same day and unexpectedly bumped into Barbara so we all had a lovely outing together
Farie from GBSB Series 7 was a work colleague of my friend Jane who kindly hosted a lovely lunch so we could all meet Farie and have a good old chat about all things Bee and sewing!
I spend a good deal of time sewing this jacket for my dear friend Sue for her son’s wedding in July, we bought the stunning fabric from Misan in the Goldhawk Road. It all got rather more complicated after she broke her wrist on holiday and I had to make the whole outfit because she couldn’t get to the shops!
The ridiculous steaming heat of July meant I moved everything indoors where it was only marginally cooler. Sue’s top was the Maker’s Atelier gathered top from their spring/summer magazine sewn in crepe-back satin.
I was asked by a friend if I could replicate a dress she had seen last year online so eventually I was able to create this dress partly utilising an existing 1980s pattern and partly by pattern cutting other elements myself. Our measurements are very similar so I dug this cotton fabric out of the stash and made a version for myself first which Lynn then tried on as a toile. Astonishingly it was all perfect so I made her own dress without any need for further fittings!
I’ve made a second version for myself using some very inexpensive fabric from Walthamstow. This time I made a new cropped bell-shaped sleeve and altered the front to add a shirt collar.
After my second bout of Covid (thank you MR Y) June saw us able to travel on a long-planned trip to Tuscany in Italy. We had a wonderful stay in Florence which included a visit to Bacci Tessuti which was chock-full of beautiful fabrics. I bought myself a lovely piece of fine linen and Mr Y treated me to two pieces of Liberty Tana lawn. I also bought a remnant of Pucci silk/cotton which was just enough to make a short version of my own Dexter pattern.
I added a button backThis was the first version of a short Dexter in fabric that had sat in the stash for a while.
And then in August I turned 60…
Afternoon tea at Cliveden was one of my treats over a wonderful weekendAt the end of August we had the opportunity to get up close and personal with several hives full of honey beesThe exhibition celebrating 150 years of the Royal School of Needlework at the Fashion and Textiles museum was well worth a visit with many beautiful exhibits including this stunning Red Dress
At the end of September was the event many of us had been waiting months for, it was the very first Sew Over 50 Frocktails event held in Edinburgh and hosted by both Judith and Sandy! I suggest you pop over to the blog post I compiled afterwards to get the full rundown with loads more pictures.
The beginning of October saw my Herts Sewcials recommence again. I didn’t have a project to sew until the day before, there was lots to organise and I became so indecisive! At the last minute I settled on the Portobello Trousers by Nina Lee in a bright pink crepe and what a good choice they were, I’ve really enjoyed wearing them!
Next up I headed to London and the autumn Knitting and Stitching show, not once but twice!
Catching up with Maria from the Sew Organised Style podcast and Sewing Bee alumnus Mercedes Another Bee, Jen Hogg on her own Jenerates stand this time along with Sew Over 50 stalwart Sue Stoney, also visiting from AustraliaI was the only non-Australian here at the Tessuti stand!Trying out a Simplicity PDF for the first time
In October I treated myself to a Sew Me Something retreat in Stratford upon Avon which was so enjoyable and I met some lovely people while we all sewed together.
Day 1 hotel mirror selfie, the Olya shirt by Paper Theory and those pink Portobellos again.On day one I completed this Tessuti Lily Linen dress in red check bought at the K&S show a few weeks earlier. I love this dress but sadly I’ve got to do some fixing because somehow a pen I was using sprang a leak and blobbed ink down the front skirt! I’m very upset about it and I think I’m going to have to cover it with a patch of fabric if I can match it successfully.Fun times with CL @thriftystitcher and my chum Elizabeth came to visit on day twoThird LB pullover of the year, a sleeveless one this time and completely influenced by Sandy @sunnydayz and her holiday wardrobeI popped pockets into the side seams
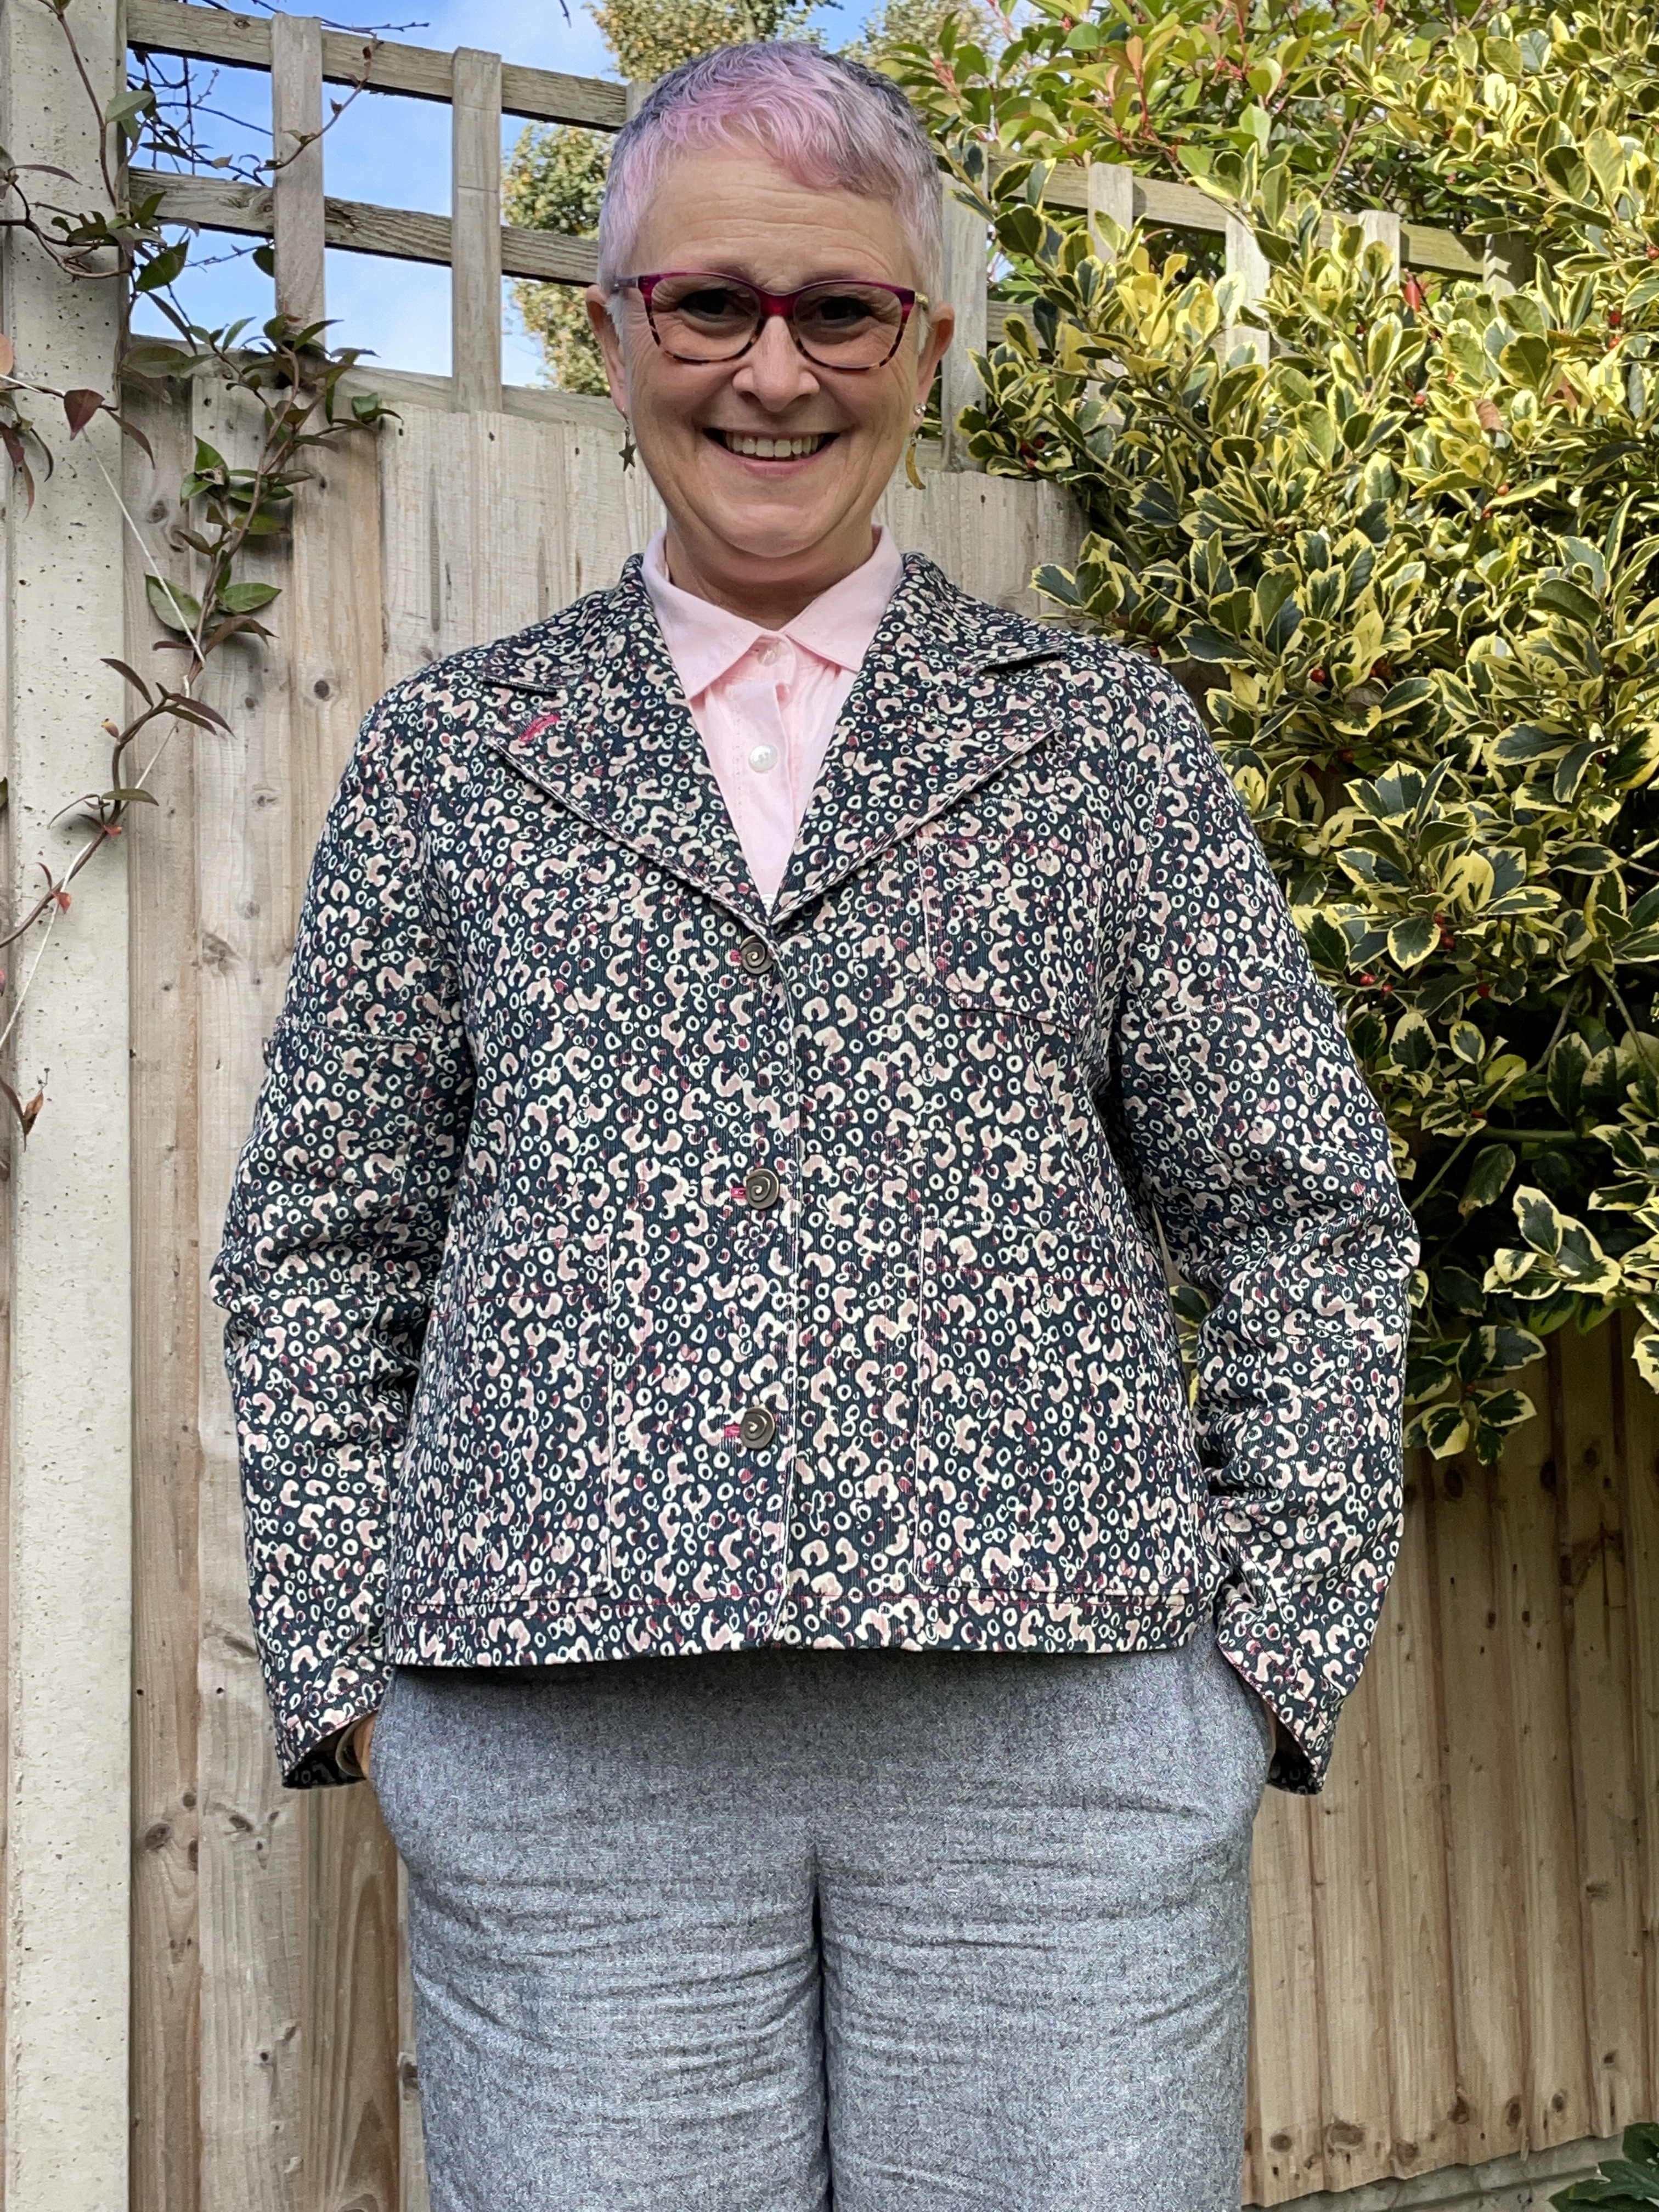
I also started a Closet Core Sienna Maker jacket while I was in Stratford but I didn’t finish it until after I got home. I’ll blog this one in the new year, I’m really pleased with it though and, weather permitting, it’s had a good number of wears so far. After this I also compiled a Sew Over 50 blog post rounding up lots of your favourite casual jacket patterns
In November I had a massive tidy up and sort out in Threadquarters and as a result I made this Fehrtrade Tessalate Tee for yoga from various jersey scraps.
This gorgeous lawn was one of my purchases from the K&S show, as soon as I saw it I knew it would be perfect for another M&M Ellsworth.
Sue treated me to afternoon tea at the Lanesborough Hotel in London and we both proudly wore our me-mades for the occasion.
My next Backstitch blog came at the end of the year when I sewed this cheerful saffron Ingrid by Homer and Howells.
Nearly there, honestly….I constructed another ‘tree’ for the local Christmas Tree festival at the beginning of December, she was called ‘Etoile de Noel’ this year because almost everything came from recycled toiles
We had loads of snow in late December (unusual for this part of the UK) and I took the opportunity to take pictures of this full circle skirt sewn using a vintage Vogue Claude Montana pattern from the early 80s.
A bit more crafting before Christmas with these Festive oven gloves, I found a tutorial on’t t’internet which helped with fabric requirements and measurements but actually you could copy a pair if you have them.
And so to the final two makes of 2022, first was another LB Pullover, this time in ruby red velour-so comfy!
And the absolute final make was another Charlotte Emma Clove vest in stash remnants (from a sweatshirt for Mr Y in 2020)
This wasn’t absolutely everything I sewed in 2022 but most items are there, not all of it was for me by any means. It looks like I need to write up a few more reviews though, they have definitely not been happening so much in the previous twelve months. In November and December I did some teaching for Backstitch which was very enjoyable, I’ll be doing some more in 2023 too. There will be new exhibitions to look forward to in London including one featuring the work of Gabrielle Chanel in the autumn.
Thank you for following my activities this year, it’s been great to meet more of you in real life and I hope we’ll get the chance for more meet-ups again in 2023. I don’t have any sewing resolutions for next year, we’ll just have to see how it all unfolds I reckon.
Until next time, happy sewing
Sue
PS as I was writing this the news about the death of fashion great Vivienne Westwood came through, I wrote a post reviewing her autobiography which I would highly recommend if you want to learn more about her.
In the summer of 2021 Simply Sewing magazine invited me to choose an Indie brand pattern to sew and review for them. After some deliberation I settled on the Maker’s Atelier Asymmetric Gather dress which they generously provided me with free of charge. The article was published a year ago now but if you didn’t see it then I’m sharing some of my thoughts about the pattern here.
I like Maker’s Atelier patterns because they are deceptively simple to look at but many of them have stylish details such as notched hems, interesting seam lines, button-up backs or gathered sections which can elevate the garment out of the ordinary. On their website, and also in their newsletter, they always illustrate how much variety you can create from reusing a single pattern simply by sewing it in different fabric-types. I’ve made numerous iterations of their Holiday Shirt and Top using a number of different fabrics and embellishments for example.
If you’ve seen my various makes of Trend Patterns you’ll already know I’m rather fond of an asymmetric style and although the Maker’s Atelier one is a simple cocoon-shaped shift dress the gathered features really lift it out of the ordinary.
Because the front pattern piece is cut as a whole ‘right side up’ by flipping the piece over you can have the gathered neckline to the right or left depending on your preference. I love how the back is given shape and definition by adding the wide elastic at waist level too.
I made this first version in gingko-printed crepe fabric bought at least four years ago from Fabrics Galore.
The style works best using a fabric that gathers softly and has some drape which is why the viscose twill kindly given to me by Sew Me Sunshine worked well. I wanted a fabric with a little bit of weight to it so that the elastication looked right, a stiff fabric without any fluidity would not flow nicely over the contours of the body. I really wanted a design that would look interesting whether it was gathered or not. This particular fabric from Mind the Maker contains 100% LENZING™ ECOVERO™ Viscose, which is a sustainably certified viscose fibre by LENZING™ with minimal environmental impact in the production process (compared to production of traditional viscose fibres). Some fibre and fabric production methods can be very damaging to the environment and the work force so this is at least a step in the right direction.
It was very satisfying to see the shape come together once I’d inserted the elastic, I know it probably sounds odd but I do love a bit of understitching on a facing. However I’ve found the back neck facing keeps creeping up though so I need to find a way to fix that.
Viscose often shifts around quite a lot so it’s important to not pull or drag it too much while you’re laying it up so that your pieces aren’t distorted once you’ve cut them out. If you have to cut on a table which isn’t quite big enough make sure the overhanging fabric is at least supported on a chair to prevent it pulling the fabric on the table out of shape. If you can manage to cut on the floor that would probably be preferable. Thankfully there aren’t many pattern pieces though so it isn’t a complex lay-plan.
My measurements at the time fell between a UK 12 and 14 so I measured the front and back pattern pieces to work out what the finished bust and hip sizes would be, from these I opted to sew a UK12. I was happy with the final fit, there’s just enough fullness without becoming too voluminous and baggy. I’m 5’5” tall and a little ‘pear-shaped’ but this style would suit a variety of body shapes because it skims over the waist and thigh area, it isn’t a ‘fitted’ style. The elasticated sections on the hip and back give the slightly-cocoon shape some definition and this could be adjusted to your personal preference. I’ve gained few pounds since I last summer but the dress still looks okay I think.
At Eltham Palace in south London, summer 2021
The one major adjustment I made was to shorten the pattern by 5cms before cutting out. I read a few online reviews before I started which all said they wish they had, or they did, make it shorter. I’m happy with how the finished length looks on me, it would definitely not have looked right if I’d left it as it was. I took the 5cms out horizontally across the front and back just below the hip/knee area, not from the hem. If you shorten it from the hem you will make the shape at the bottom a little wider which might result in it losing a little of its ‘peg’ shaping. The only other thing I did was to slightly raise the position of the elastic channels on the back and hip by approximately 1.5cms so that proportionately they sit a little higher on me, I think it looks better.
An easy hack would be to use a narrower elastic than suggested, or sew two or more rows of narrower elastic into channels, you could even use shirring elastic. Instead of elastication how about slotting ribbon or tape through the channels, sew buttonholes for the tape and leave the ends dangling so that they are decorative and adjustable, perhaps finish the ends with small toggles to make a feature of them? Leave the sleeves off completely maybe or turn them into full-length sleeves with elasticated cuffs, or a cap sleeve. If you’re feeling adventurous you could even elasticate the hem! What about having fun playing with the grain line, especially if you use a check or striped fabric. There aren’t any pockets so you could add at least one in-seam pocket, probably on the non-elasticated side seam.
As well as viscose-types like I’ve used you could also choose fabrics such as handkerchief or washed linens, crepe, softer types of satin, crepe de Chine, challis and wool crepe. Softer cottons like lawn or chambray-types would all work well too. You don’t want anything overly stiff or thick because you wouldn’t get the lovely definition to the elasticated folds, they could become a bit clunky. Ideally avoid fabrics which crease badly if you might be sitting in it for any length of time, creases would spoil the look of the front.
I chose to trace off the pattern, I find I’m doing this more and more often even though I’m not a big fan of doing so. Take your time if you’re tracing the pattern, transfer all the markings accurately. Because the neckline is asymmetric make sure you cut the neck facing to match and double check you have a mirrored any pieces that are a pair before cutting into your fabric. Read through all the making instructions before you start and highlight any areas that you think are, or might be, trickier for you.
The Asymmetric Gather dress isn’t a difficult garment to sew up, I would say anyone from an adventurous beginner upwards would enjoy making it. It certainly took me less than a day to make, especially as there are no openings like zips or buttons to construct.
I’ve found it entertaining to see my changing hairstyle since I first made this! I was paid for the original article last year but all thoughts, advice and opinions are my own.
Well that was another weird year wasn’t it!? I’m not gonna lie but I’ll be glad to see the back of 2021. For every good event there seemed to be two or three stinkers which I found made it really hard to see positives anywhere. I know that there were some good things though and I’m incredibly grateful to have the life that I do so I don’t want to dwell on the downside, let’s move into 2022 with an air of cautious optimism!
I entitled my round up for 2020 as ‘sewing in a time of pandemic’ and I’m so glad I didn’t know then that 2021 was going to be ‘part two!’ Anyway, I’ve collected a few photos to round up my sewing and other events I was able to get up to during 2021 although I’m not sure if they are particularly chronological…the length and colour of my hair at any given time will give you a bit of a clue!
I’ve decided that the Trend Utility pants are definitely my favourite trouser pattern of the year-I had made two pairs by the end of 2020 and finished a third, in orange linen, in spring 2021 and I’ve worn them all fairly constantly. I find them interesting to make, they aren’t a completely straightforward sew and need a bit of concentration but they are all the better for that. The leg flaps are their USP and they are a design feature that make me very happy! I was wearing them in the late summer when we finally escaped with one of our daughters on a week’s holiday, along with another favourite, the Maker’s Atelier Holiday Shirt.The orange linen pair were perfectly autumnal at Kew Gardens in November, and the colours were absolutely stunning.This hacked Sewing Revival Heron dress was one I finished in 2020 but wore a lot in 2021, and will do in 2022 as well.I’m still not convinced about the ribbon bow but I haven’t actually done anything about changing it.
I was looking for new sewing challenges early in the year during the next long lockdown and Mr Y was the lucky recipient of a few items including this Carmanah sweatshirt by Thread Theory. The fabric was kindly provided for me as I’m part of the Lamazi blogger team.
This is the Thread Theory Finlayson sweatshirt I made for Mr Y at the start of the year and he’s worn it on heavy rotation. These items of menswear led to me writing an article for Love Sewing magazine about sewing for men, and by men, in the spring and I joined Maria at Sew Organised Style podcast to chat about it too.Mr Y celebrated his 60th birthday quietly at home in March, we both wore hand-mades!…and we celebrated a second wedding anniversary in lockdown too. Cabin fever had taken hold a bit as I dug out my wedding dress and flounced around the garden in it! I really hope our 33rd anniversary this year can be outside of the house!!Let joy be unconfined because mid-March saw us going for our first vaccination and I wore entirely hand sewn garments to mark the occasion, including a Holiday Shirt, a Nora sweatshirt and my self-drafted rain coat.
I was selected to contribute some articles offering sewing tips and advice for an online sewing project in the early spring but after just two such items they just stopped contacting with me or replying to my emails. Bit rude I’d say, I’ve no idea what was wrong because they never had the courtesy to tell me, and I’ve no intention of wasting more time on them frankly.
Moving on…
Lucy at Trend generously gifted me the kit for the Box Pleat shirt from her capsule shirt collection. Like all her patterns it is so well drafted, I should have gone down at least one size though (my fault for being overly-cautious) There are currently three patterns in the shirt collection but I know there are more in the pipeline. I only made two Minerva projects in 2021 and this Tabitha dress from Tilly and the Buttons book ‘Make it Simple’ was one of them. I really like the Art Gallery fabric and I’ve had plenty of wear from it.I was so happy to see my dear sewing chum Claire after far too long at the Alice in Wonderland exhibition at the V&A in the summer. It was an interesting show although I suspect we nattered all the way around it! [it seems there was a ‘wear checks’ memo sent out too!]
As you know if you read my posts I like to reuse patterns if they have lots of options so I’ve sewn several variations of a number of Sewing Revival patterns during the year, including the Fantail top below which I made in an ancient remnant in my stash which I believe somebody once paid 90p for!
The wide elastic casing in the front hem is such an interesting detail.This is another version of the Fantail featuring jersey cuffs and back hem.This Sewing Revival Kingfisher top was made using the fabric from a summer dress which I never wore. It’s been a satisfying project because I worn it often (I‘d had a haircut by this point too!)I enjoyed the challenge that this Heron adaptation presented because I used linen jersey provided for me by Lamazi fabrics. It was a learning experience and I shared lots of hints and tips in the accompanying post. It’s been such a lovely fabric to wear, it’s very comfortable and it has a beautiful sheen which is not particularly obvious in this photo.I made another pair of Simple Sew Palazzo pants in a linen remnant I bought from Lamazi, they are comfortable and very nice to swoosh about in! That’s a M&M Camber Set top with them.I sewed a third version of the Trend Bias T-shirt dress which I made specifically for an occasion at Capel Manor College in north London when the Japanese ambassador to the UK came to plant cherry trees. I’ve only had a chance to wear it once so far because the weather was getting colder but I have every intention of wearing it a lot in 2022-you know I love a floaty dress and this pattern is perfect for that! I managed to get an outing to the Fashion and Textiles in the autumn to see ‘Beautiful People’ and it was well worth it because the colours and fashions were so uplifting. One of my personal favourite posts of the year was this one where I had rediscovered lots of my college work and sketches from the 1980s. It was so much fun to find them unexpectedly and it seems it was a trip down memory lane for many of you too.
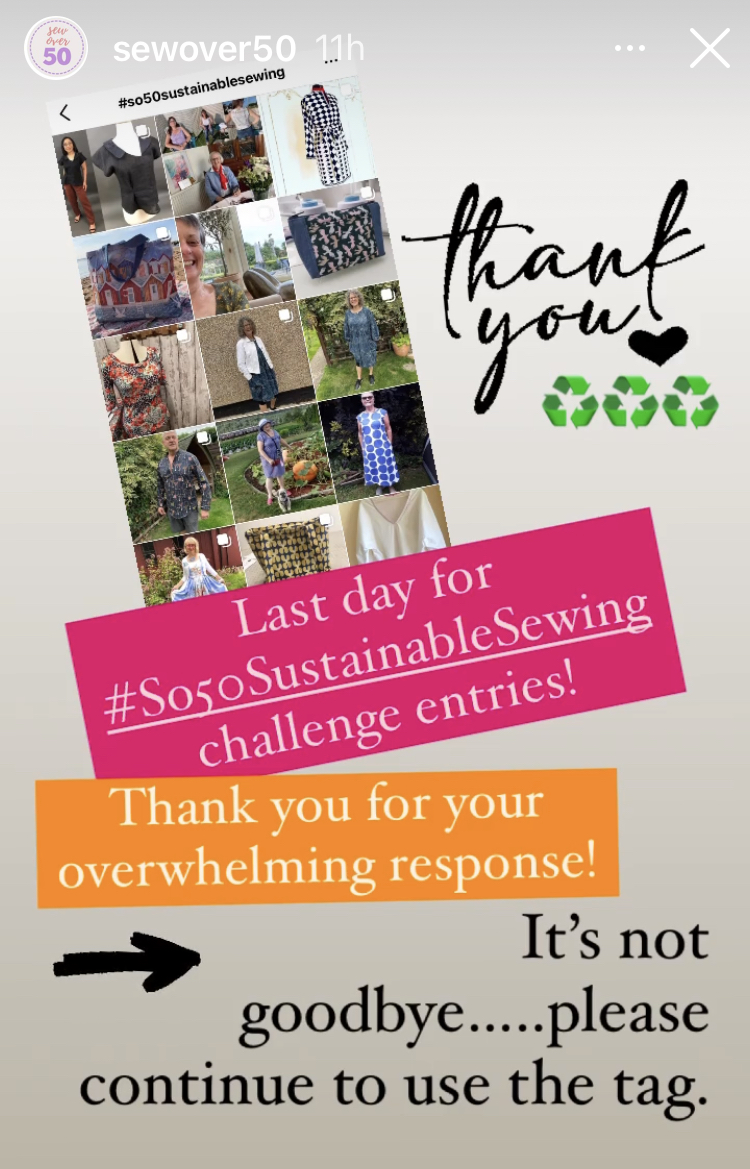
I wrote just three specific Sew Over 50 blog posts in 2021, the first was a summing up of lots of ideas and inspiration for how to sew more sustainably which the followers of the Sew Over 50 account contributed. There was a lot of it and it definitely worth a read.
Judith Staley joined Maria on the podcast to chat about it too.
I was a guest editor on the Sew Over 50 account in the autumn when we chatted about mannequins in our sewing practice. Many of you contributed some brilliant and insightful comments, I wonder how many people have gone on to buy a dress form, or use the one they have differently, or more often, as a result?
Sew Over 50 stalwart Tina generously shared with us the many resources she has gathered together over the last couple of years for sewing and adapting patterns and clothing after a breast cancer diagnosis. It has been one of my most read articles on the blog since it was published in the autumn and I know Tina is happy for followers to contact her via Instagram for any advice or support she can offer them. For me, she very much represents the positive aspects of being a part of this worldwide community.
One of my favourite ‘in person’ events in the sewing calendar, Sew Brum, quietly took place in the autumn and my lovely mate Elizabeth kindly put me up overnight and we had some quality shopping and sewing time together. Our friend Melissa even joined us for a couple of hours for a Zoom sew! Plus I ran in my first (and so far, only) Park Run too! phew, it was a busy and almost-normal 48 hours.
We got VERY wet at the Park Run but we earned extra smug points in our me-made Fehrtrade running kit! [I wrote a post about the Tesselate Tee that we’re both wearing here] I didn’t even buy any of this green fabric at Barry’s in the end…
I finally made a jumpsuit (or two) at the end of the year, it’s the Cressida by Sew Me Something Patterns.
I made this second one to wear at the first Lamazi open day in November. It was so much fun to be a part of and I really hope there will be the opportunity to hold more events during 2022 because it so good to meet up with people in person and to just chat about sewing all day.This was fun outing to the V&A that actually happened rather than being cancelled like so many others, it was an in-person talk by Oscar-winning costume designer Sandy Powell and it was absolutely fascinating. I’ve really missed these talks in the lecture theatre and it was great to be back.Being an actual grown-up at a fun event! I splashed out on this unusual quilted fabric from Merchant and Mills and sewed it up into their Fielder top plus I wrote up a blog post on how I made the too-wide elastic fit around the neckline.These Eve pants are also a Merchant and Mills pattern and they became my second-favourite trousers of the year, made in their Elinore checked linen and worn with a long-sleeved Holiday shirt in Swiss Dot. This second Hug hoodie of the year by Made It Patterns is definitely one of my favourite makes of the year. It looks tricky but is very straightforward to sew and the style lines look very effective.
For quite a while I had wanted to organise an informal sewing event and they were finally able to happen in October and November with #HertsSewcial It was such a joy to be reunited with my Sew Over 50 stalwart friends Ruth and Kate, along with meeting several other online friends like Bev and Elke in real life for the first time. We had so much fun sewing and chatting together, the time flew past far too quickly and I very much hope I can organise some more in the New Year, current situations permitting.
Can you tell that Ruth, Kate and me are happy to see each other again after far too long!?
And my final sewing treat of the year was being able to meet up with Judith Staley in her hometown of Edinburgh!! It was much too brief but absolutely better than nothing, we had so much we could have talked about but that will have to wait until our oft-rescheduled and much looked forward to sewing get together next spring…fingers tightly crossed!
My final personal make of the year was another Maven Somerset top in this celestial jersey I bought at the Lamazi open day. It’s festive without screaming CHRISTMAS!
And so ends another year of sewing and other stuff, as well as the new garments I’ve sewn for myself there were many other occasions when I wore, and re-wore, favourites which didn’t need to be photographed! I fervently hope 2022 brings better times for everyone and that we can adapt to our new or changed ways of living. Sewing will continue be a big part of my life and I hope there will be some new and exciting projects and opportunities during the year. There are so many wonderful people in this community and the support and encouragement that swirls around has been so important during another trying year-I hope I will get a chance to meet up with more of you in person during the next twelve months.
Until then, thank you for reading my wafflings, happy sewing and a very happy New Year,
I’ve been dithering for aaages about sewing myself a jumpsuit for various reasons. The main one is because I’m haunted by the memory of an ill-advised white cotton get-up purchased one lunchtime from Leather Lane market in about 1986….ah the folly of youth. Of course I was channelling Pepsi and Shirlie and thought I looked the bees knees but I’m just grateful there’s no photographic evidence to prove very much the opposite was true!
I digress. My other reasons are simple enough; what about when I need the loo? (which is often) and, will my bum look big in it? [Of course the size of my bum should never be up for discussion but decades of reading articles in magazines telling a woman what she can wear because of her age/ weight/ height etc etc can’t be unlearnt overnight]
I know there are some cracking patterns for jumpsuits (and I cannot bring myself to call it a boiler suit because that just makes me think I should be in the inspection pit under a Class A4 Pacific locomotive with a monkey wrench in my hand) and I’ve even got as far as buying and printing the uber-popular Paper Theory Zadie but that’s where it ended.
Anyhoo, I went to the recent Knitting and Stitching Show at Ally Pally and while I was at the Sew Me Something stand I signed up to receive their newsletter. The upshot was my name was randomly chosen and I won a pattern of my choice from their selection. [You might know that one of my favourite tops is their Imogen blouse which I’ve reviewed here in the past] This time I decided to go mad and choose their Cressida jumpsuit. It is a simple shape with short grown-on sleeves, a collar and rever, bust darts, a waist seam, hip pockets, slightly cropped length and an optional belt. I received mine as a paper pattern but it is also available as a PDF, plus PDF with a printing service too if required.
Because this was a completely new type of garment for me I decided to make a toile version first so I used some medium weight denim I bought in Hitchin market. I made the slightly rash decision not to pre-wash it because I was in a hurry to get started so I gave it a really good steam press instead. With hindsight this probably wasn’t entirely wise because the colour came off on my hands terribly and there was some shrinkage when I eventually washed it, although fortunately not enough to make it unwearable.
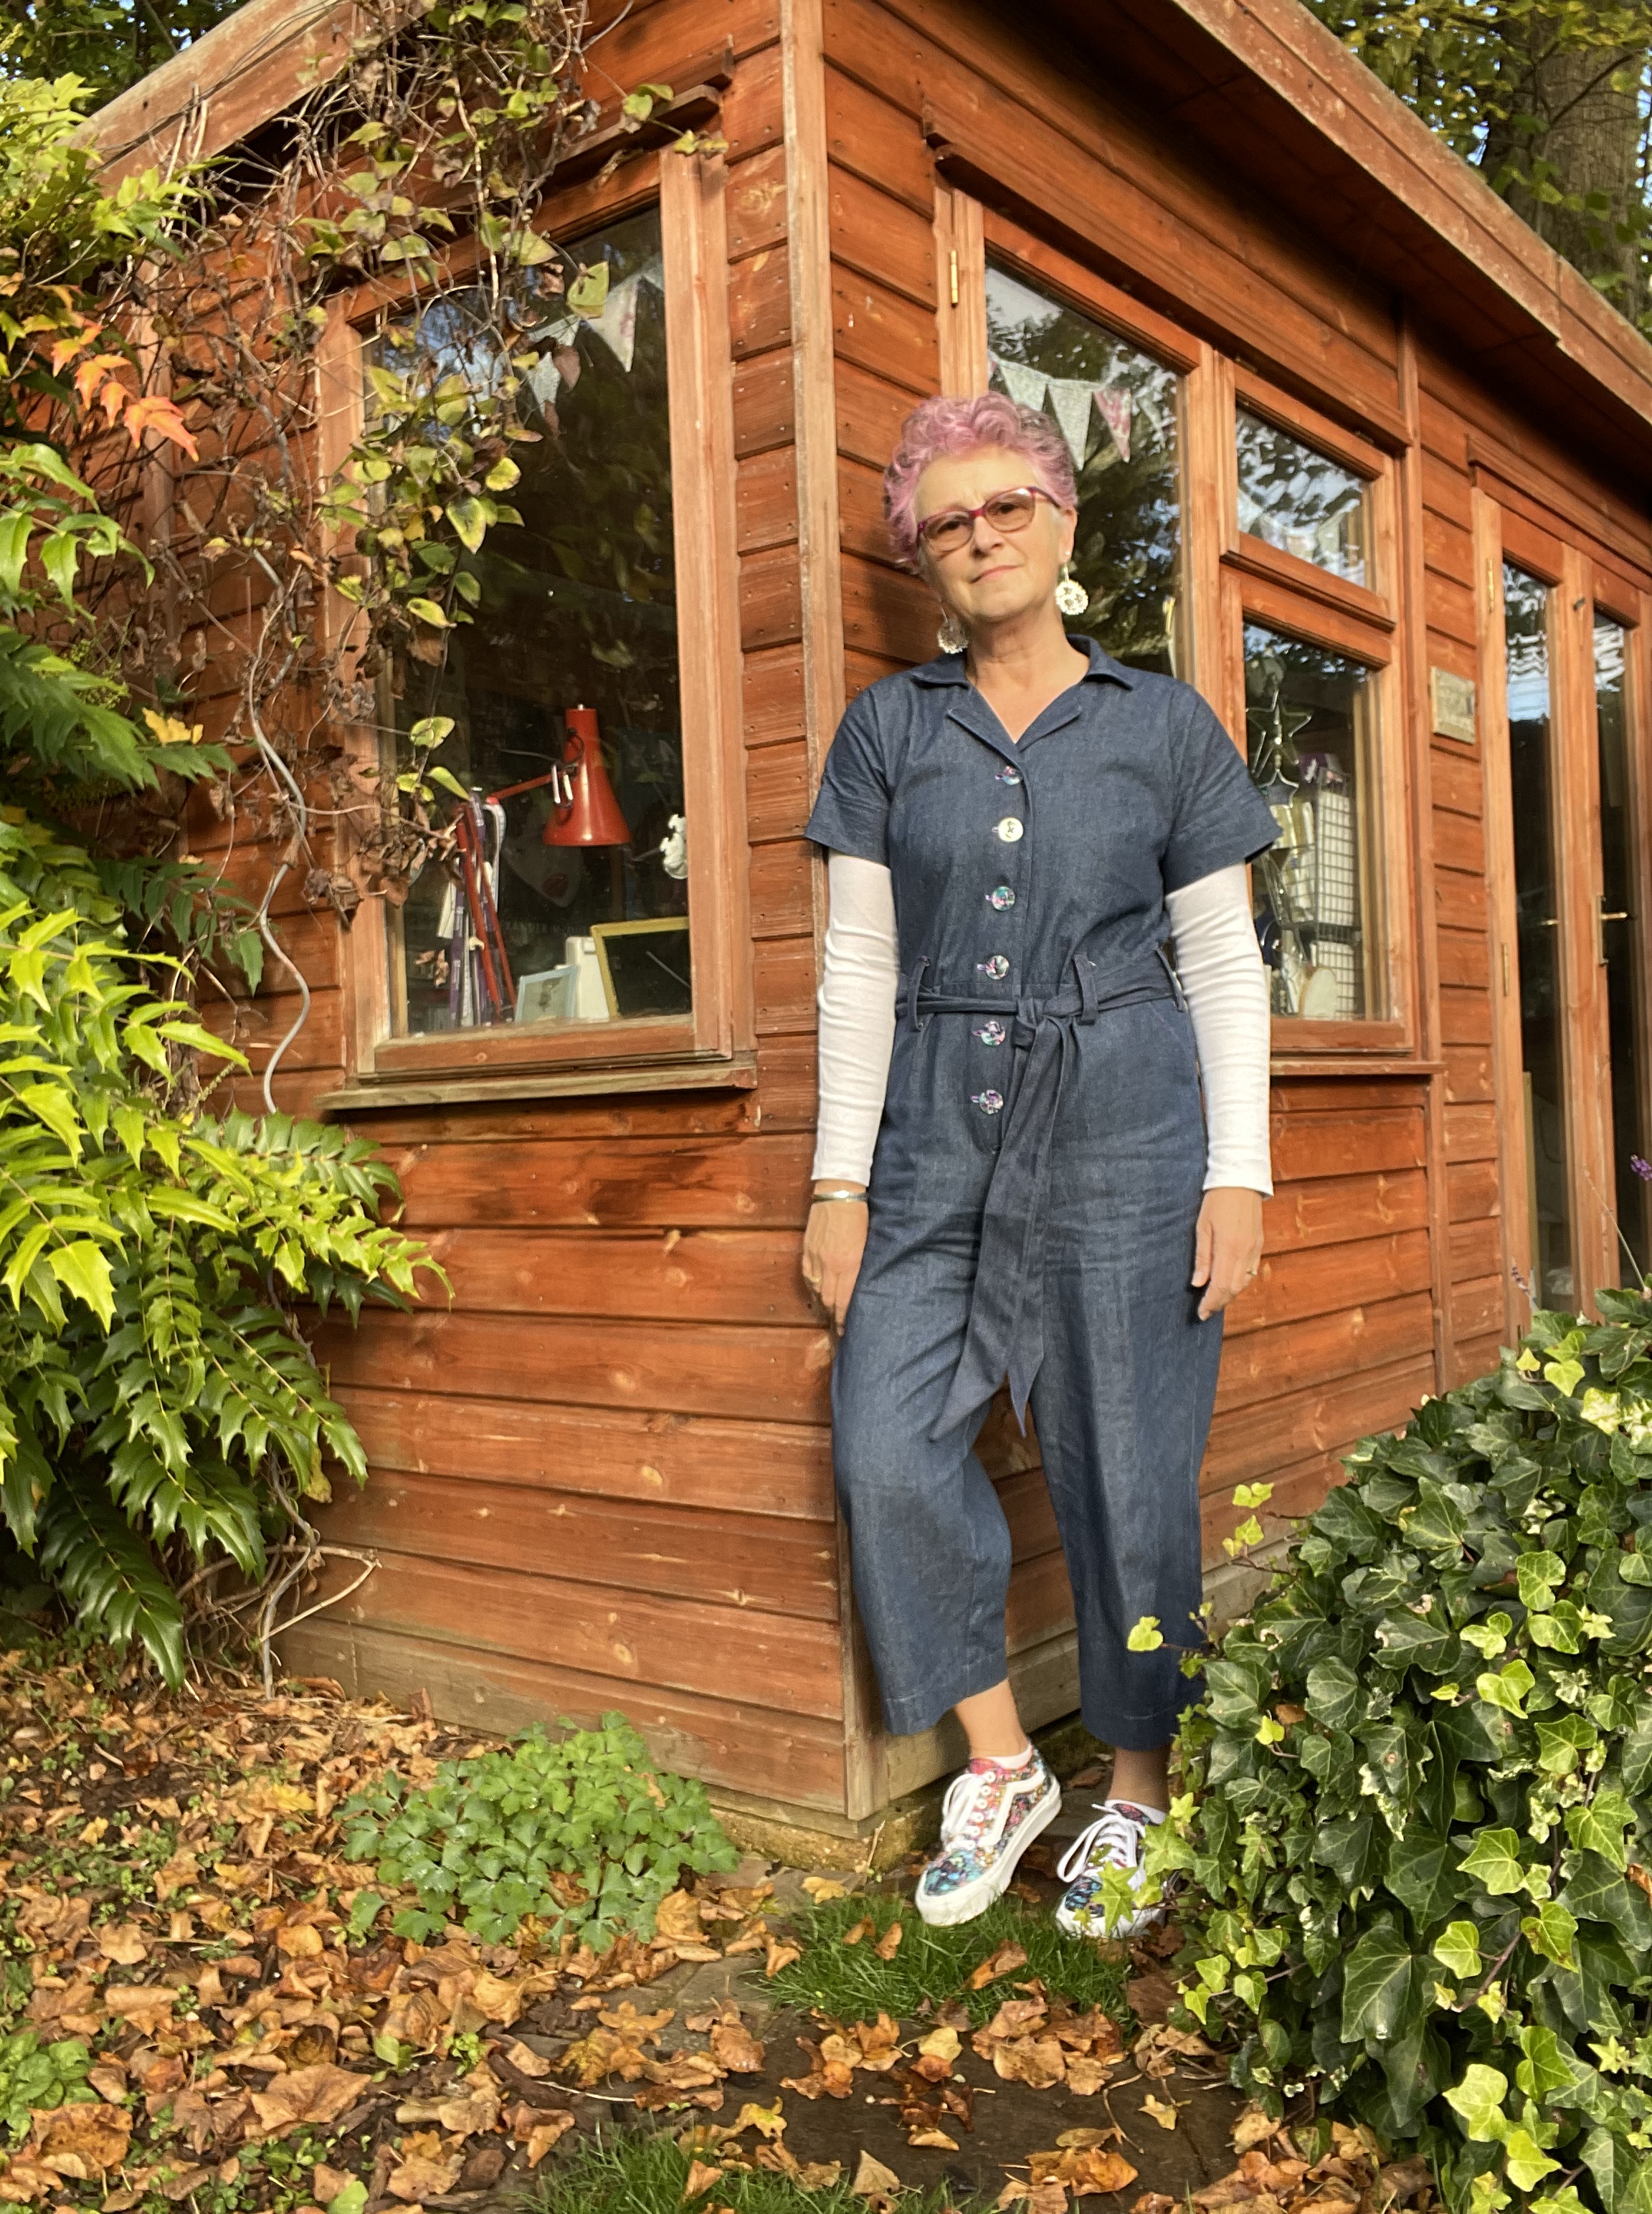
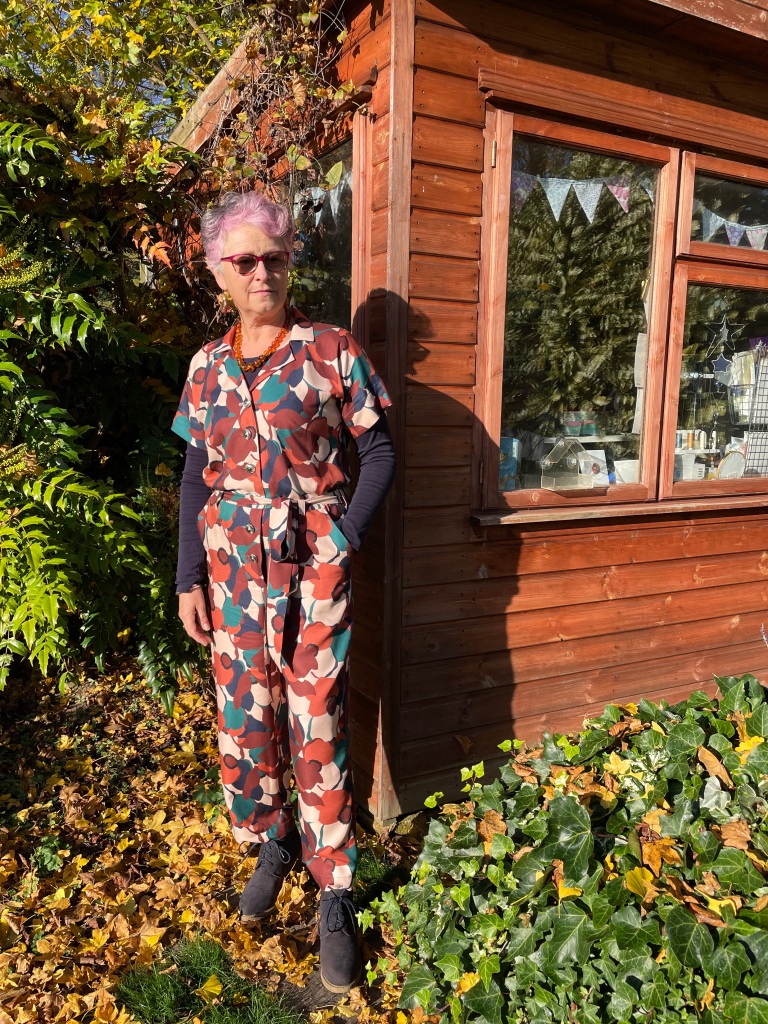
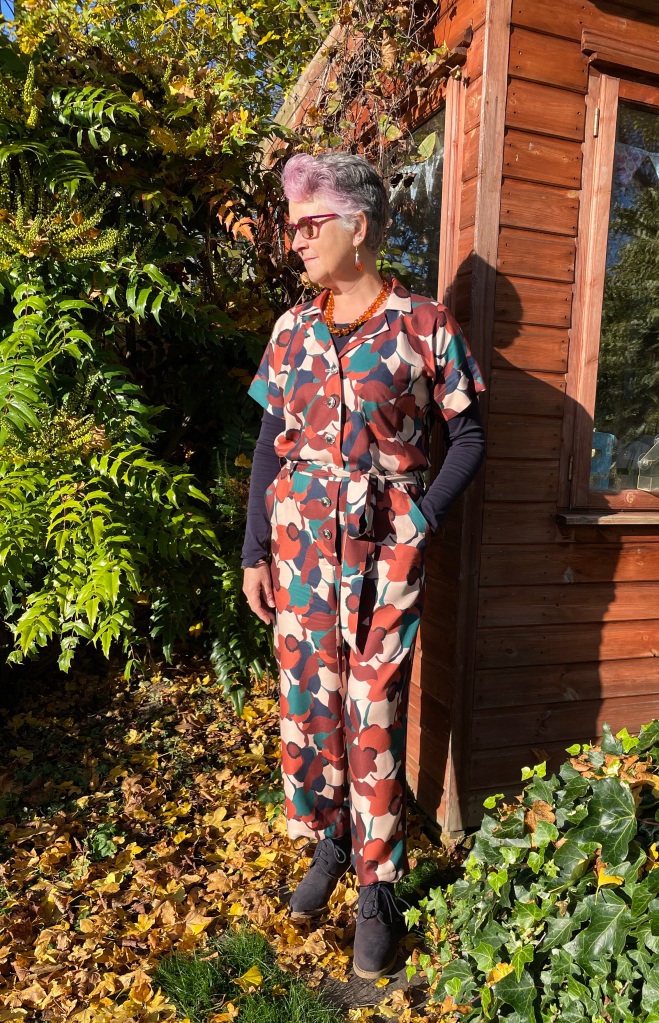
Based on my body measurements and the finished garment measurements I opted to make a UK size 12. Aside from my own foolishness with the fabric shrinkage I’ve found the 12 to be a good fit. The body length was just right which means I can sit or move comfortably in it, the only change I made was to the second version which I made using some beautiful Cousette viscose twill provided for me by Lamazi Fabrics to wear at their very first open day in mid-November. I decided to add 1.5cms to the bodice using the lengthen/shorten lines marked on the pattern. However, I probably didn’t need to have done so because I was making that decision based on the slight shrinkage of the denim! Not to worry, it means that getting in and out of the jumpsuit is a bit easier because of the extra wiggle room.
A couple of details I tried out on the denim jumpsuit were to use a variegated sewing thread for the decorative top stitching and buttonholes which I bought from William Gee. I also added belt loops which aren’t included as part of the pattern but I wanted these so that the belt sat in roughly the right place and covered the seam. By the way, I felt the included belt pattern piece was very long so I shortened it quite considerably, by at least 50cms. I had recently bought some gorgeous buttons from Pigeonwishes, also at the K&S Show and these were exactly the right colour, size and quantity I needed-perfect!
Southend-on-Sea buttons by PigeonWishesButtons, belt loops and variegated top stitching complete
Overall I was very pleased with my denim Cressida so I was happy to go ahead with the viscose twill version. As I said earlier I added a little bit of length but possibly didn’t need to, being a button front opening does mean that I’ve given myself just a little bit more space to get the sleeves up and down from my shoulders. Because we’re heading into winter in the UK now I have opted to wear a long-sleeved T-shirt underneath at present (both ancient RTW ones) Although I made the fabric belts for both I can put a leather one through the loops instead and it looks good.
worn with a leather belt
I have found the instructions for Sew Me Something patterns to be very thorough and clear and the Cressida is no different, the pattern goes together very well. Jules uses a slightly different method for sewing the collar together which I haven’t used before but it gives a very nice end result. I would rate this pattern as a moderate level of difficulty because of the buttonstand at the front but otherwise there’s nothing here to scare the horses particularly.
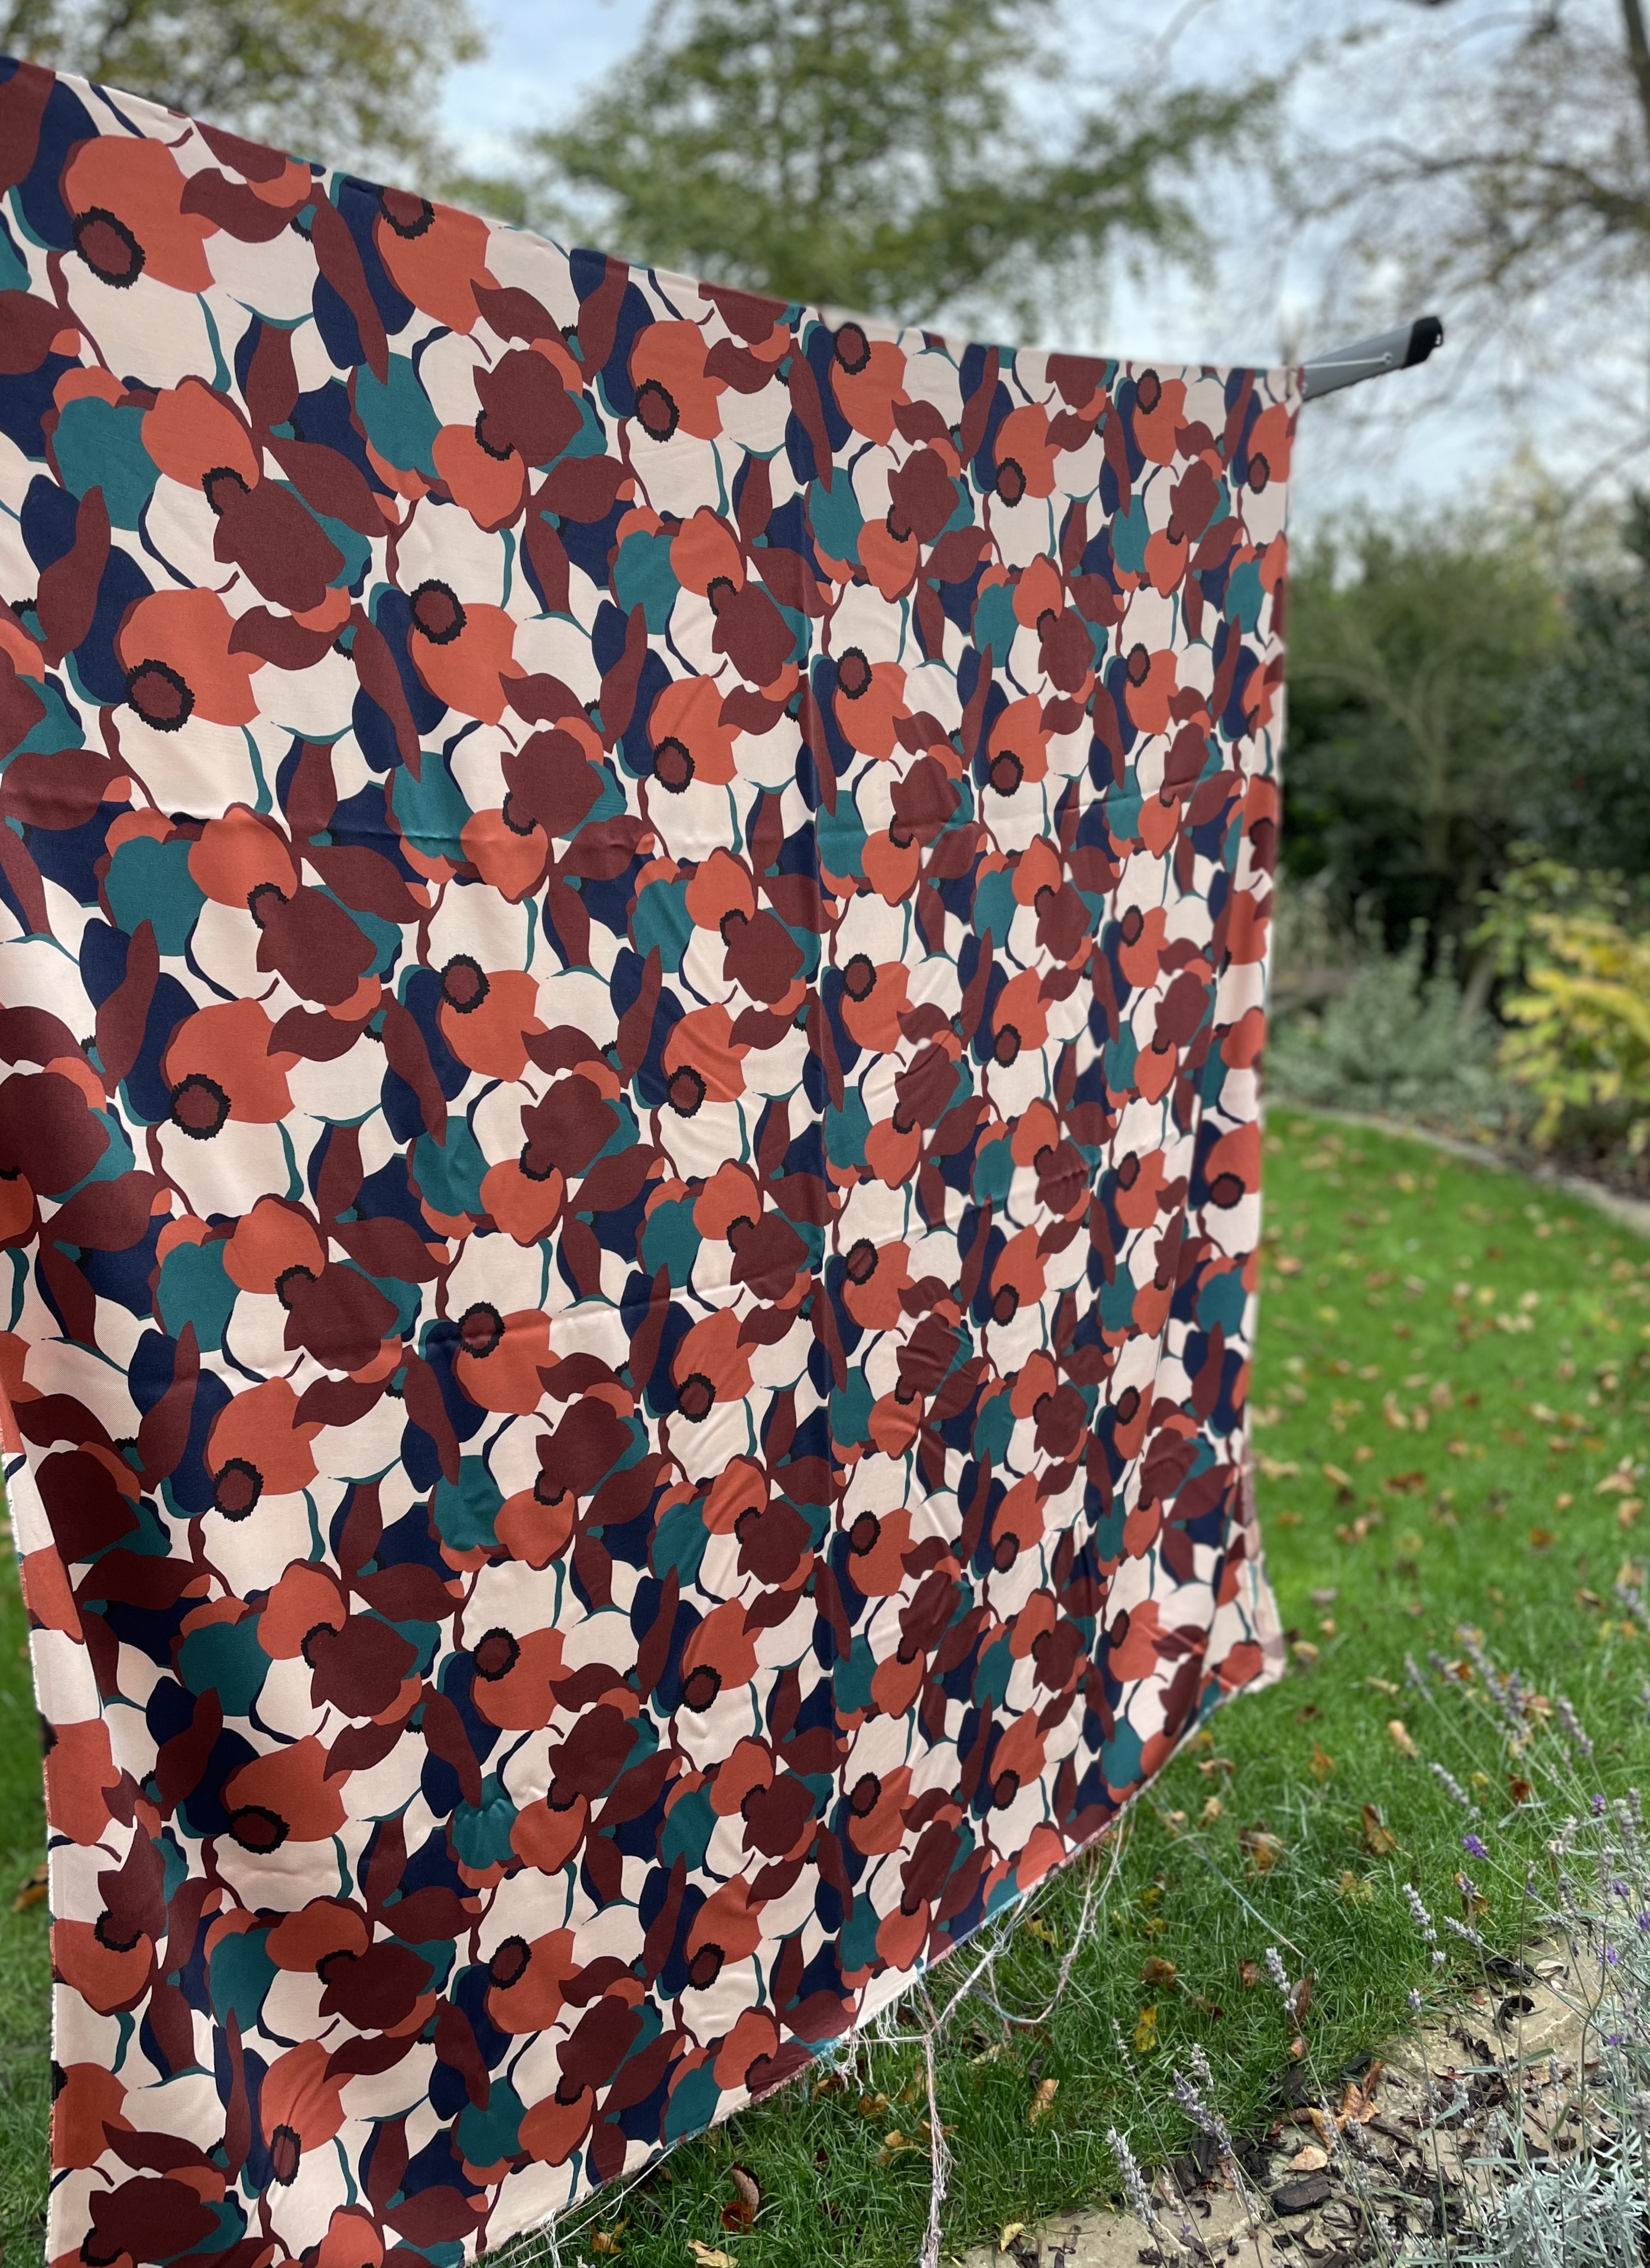
When I made the second Cressida in the viscose twill I didn’t make the same mistake twice and pre-washed the fabric first! The viscose has a beautiful weight and drape to it and I love the autumnal colours. It has a lovely soft handle too, you just need to be as careful as possible when sewing it together because viscose twill does have a reputation for snagging which can result in slight ‘catches’ or runs in the print which is irritating and disappointing. My advice would be to make sure you use a new fine needle, possibly a Microtex, and certainly no larger than 70/75 size to try and minimise any risk. Also, viscose is often known for creasing a lot but I didn’t find this twill to be too bad-damning with faint praise possibly but I’ve come across far worse.
I made the decision to sew the buttonholes in a variety of colours so that they weren’t quite so obtrusive and you can also see that I used a twin needle to sew the cuffs of the sleeves.
As I mentioned earlier, I made the Cousette viscose jumpsuit to wear at the recent Lamazi open day, I’ve been one of their blogger team for some time now so it was lovely to have the chance to visit their new premises (they aren’t a retail shop but check here for their visiting arrangements) fellow blogger Sharlene Oldroydwas also there having travelled especially from Northern Ireland so it a real treat to finally meet her in real life.
getting stuck in to stroking all the fabrics!Because there was no shrinkage of the fabric this time, and also because I added 1.5cms to the body length, the legs seem quite a bit longer than the denim version. I’m not sure if they are right this length so I’ll probably shorten them at the hem slightly-they are neither long enough nor short enough just now! there are two patch pockets on the back in addition to the hip pockets. I didn’t attempt to pattern-match them because the print is busy enough, and no one is likely to notice anyway.I nearly came unstuck at the last hurdle because I didn’t think I had any suitable buttons. Cousette don’t make matching buttons and my local store had a useless ‘selection’ if you could even call it that. I didn’t want to spend a lot of time trawling online either but eventually I found 6 matching buttons amongst my button boxes and I think they will do adequately well.
So there we are, a lucky win from Sew Me Something and a generous gift of fabric from Lamazi means that I’ve broken my long-held suspicion of jumpsuits. Both have been worn a few times already and, because of the short sleeves, they will get worn in the summer months too. Taking into account my worries of getting in and out of the jumpsuit, it hasn’t been too much of an issue. The denim one is a little more tricky to get over my shoulders because the overall length is slightly less but I haven’t had a problem with the viscose edition.
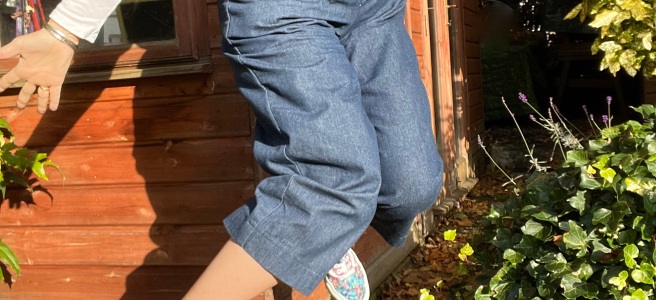
And you can actually jump in it too!
The Cressida would also look lovely made up in a variety of fabrics including linen or crepe, or even a luxurious silk-type perhaps?
Did you know that linen jersey was even a thing? It’s an unusual fabric which you don’t see often, we all know knits are available in most other fibre types-cotton, wool, silk or man-mades for example- but I’ve never worked with it before so when Liana invited me to sew my next Lamazi project using it, and to pass on any hints and tips for sewing it, I was up for the challenge.
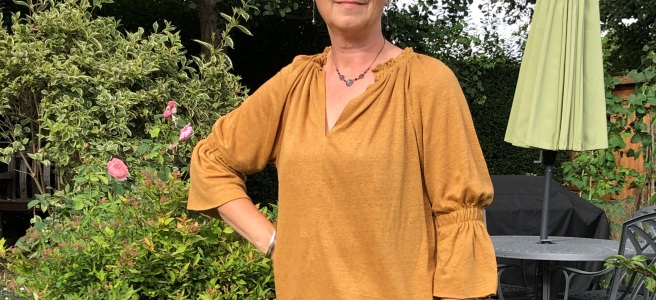
This 100% linen jersey comes from Mind the Maker in a range of colours and I picked the Dry Mustard shade which is a lovely vibrant ochre. The fabric has a beautiful lustrous sheen on the right side, the reverse is duller so it makes it much easier to tell the difference between the two. It has lovely light drapey quality too and is slightly sheer.
Linen fabric is not a textile known for its inherent stretch qualities and this jersey does feel slightly different from other knits because it has only a small amount of stretch along its length and quite a lot of stretch across the width but it has very little recovery so once it’s been stretched out it will stay like that at least until it’s washed again. During construction the application of plenty of steam will encourage some of this accidental stretching to be eased back into position so, coupled with its sheerness, this means that you need to think carefully about what garment to sew with it.
Plenty of steam will help remove most unwanted bagginess like this
The properties of linen fabric itself [cool in warm weather, warm in cold weather] mean that it would be ideal for loose-fitting leisure or exercise wear, for yoga or Pilates for example. I would definitely say it’s better to avoid anything that is particularly close fitting because areas like the elbows or wrists would become stretched or baggy with little recovery. However the fabric has a lovely drape and its fine gauge allows it to be gathered up successfully so these properties could be exploited instead.
Bearing all these factors in mind I decided to make (another) Sewing Revival Heron dress which I would hack into a blouse. The pattern has a neckline which is gathered using elastic along with raglan sleeves with deep elasticated cuffs. To mix it up further I decided to pull the hemline in onto elastic rather than have a wide smock silhouette.
First things first, I washed the fabric by hand to remove any risk of excessive shrinkage or twisting in the machine. If you want to wash it in the machine then it might be an idea to overlock the cut ends together first to form a long loop and place it into a large washing bag to protect it further. Alternatively you could press it on your ironing board with plenty of steam instead. If at all possible it is better to dry the fabric flat, and certainly don’t wring or twist it. All of this might sound off-putting, and it is clearly not as straightforward as chucking a nice stable cotton into the machine but this is a luxurious fabric and deserves to be treated and handled carefully in the preparation. When it comes to cutting out your pattern pieces lay the fabric as flat as possible, handle it gently and don’t pull it about too much, especially if you decide to fold it. I made a whole back pattern piece for my top so that I could cut it flat, another appeal of the Heron pattern for me is that it has just three pieces so it’s a relatively quick sew usually.
After cutting all the pieces the first thing I did was stabilise all the raglan shoulder seams using some iron-on seam tape, I did this to prevent any unwanted stretching before I sewed the sleeves in later on. I added small squares of iron-on interfacing to reinforce the bottom of the opening on the centre front seam too. I also decided to press all the folded parts of the casings/ruffles for the neckline, sleeves and hem before sewing anything together, just so that I was handling the cut-out pieces as little as possible, again to prevent unwanted stretching before they got joined together. I also tacked these folded parts into position temporarily. All this might sound excessive but I wasn’t in a rush, and I found the slow and considered processes very soothing at quite a difficult time.
iron-on stay tape to prevent unwanted stretching of the raglan seams
the pinned raglan seams showing the slight excess to be absorbed
the finished seams inside the garment
I pressed and tacked casing/ruffles before joining the sections together later onreinforcing the bottom of the neck opening with small squares of iron-on interfacing.
Something else I did before commencing was check on fabric scraps which needle and stitch-type would give me the best results. A ballpoint needle suitable for stretch/knits/jersey is essential to prevent snagging which could lead to laddering of this delicate fabric, and I found a short straight stitch was better than a narrow zigzag but you must do what works best on your own machine. You could sew a garment together entirely on an overlocker but be aware of the lack of rebound this fabric has so if it gets stretched or misshapen while it’s being sewn then it’s probably like that permanently. I also tested the overlocker finish before diving in for the same reasons. If you don’t have an overlocker this fabric is fine enough that where possible you could probably sew self-neatening French seams, or a wide zigzag might work but just be careful it doesn’t chew up the edges. If you have an overlock stitch option on your sewing machine and/or a special foot to sew an overlock-style stitch then definitely use them. Test all options before making your choice, the time taken could save you upsets later on. I slipped some folded strips of paper underneath the seam allowances when I pressed them to minimise any chance of the seam showing through on the front
testing stitches and overlockingI popped two strips of folded paper under the centre front seam while I pressed it so that there was no show-through or unwanted shininess on the right side.
If you have a walking foot for your machine this is definitely a fabric worth using it for, even if you don’t it’s a good idea to use plenty of pins. I’m not a fan of mini-clips because I think they are too heavy and get in the way, this fabric is lightweight and I think mini-clips could distort it while you’re sewing but it’s up to you. Tacking seams is always an option too of course, any technique that prevents the fabric shifting while you sew basically.
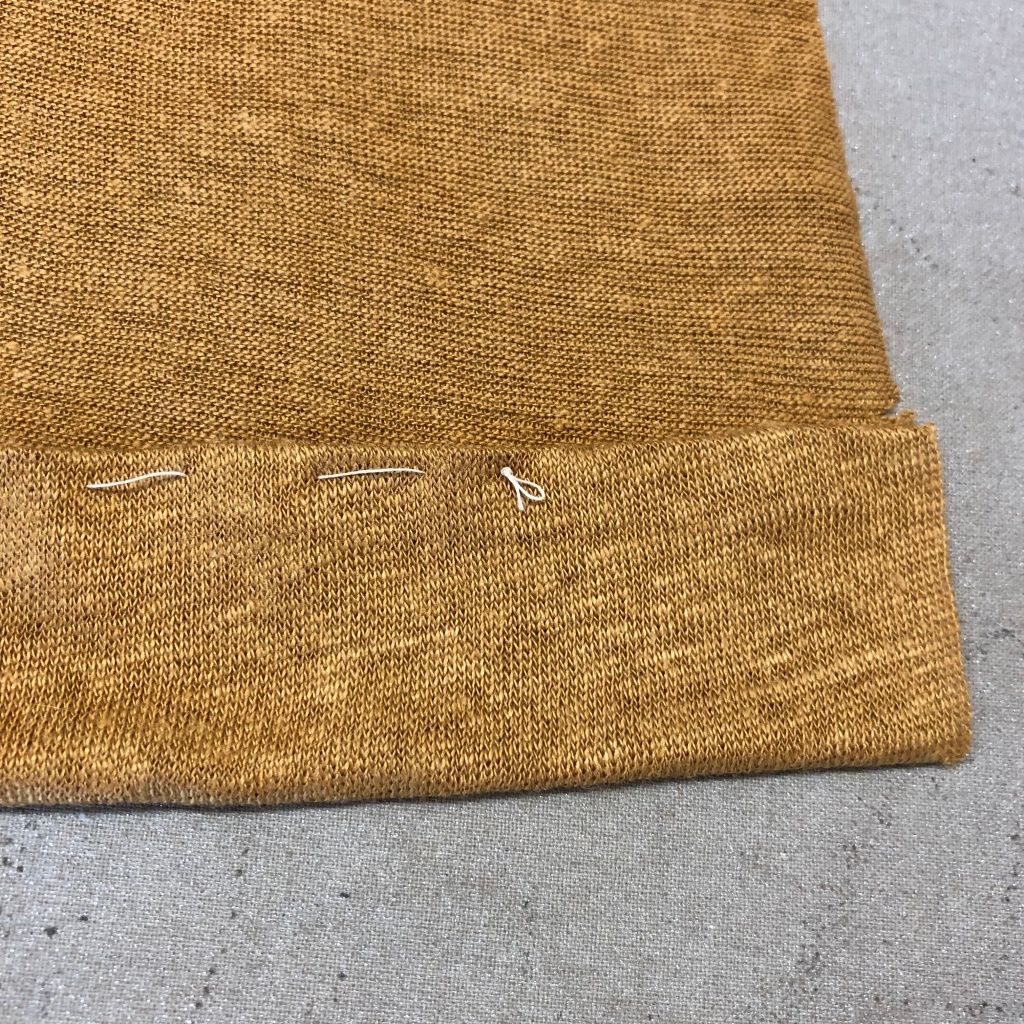
If you’ve followed my blog for a while you’ll know I’ve made a few Herons before so the construction was straightforward, the only area I did differently was to create the ruffled hem with a wide elastic casing. I couldn’t decide between my planned 2cms or 1cm wide elastic initially so I tested with the two widths to see which I preferred-I chose to stay with the 2cms width as planned.
testing which elastic width I preferred for the hem, this was the narrow one (the fabric scrap is wrong side out!)and this is wider width, it’s the one I used at the hem in the end. using a bodkin to insert the narrow elastic in the neck casing.checking the gathered neckline on the standI used this quilting attachment on my machine so that I sewed an accurate parallel width for the elastic casingclose up of the elasticated hem casing
To sum up, I’m really pleased with how my first experience of sewing with linen jersey has gone, I’ll admit I was a little nervous because Liana was putting her trust in me with an expensive fabric but taking the time to plan and test, and use my existing knowledge of working with knits definitely helped. Because of the sheerness of the fabric Lamazi also provided me with a metre of Atelier Brunette crepe viscose in Ochre to make a camisole to wear underneath, I used the Simone camisole and trousers pattern by Maven which is a very quick make and a very useful garment to wear on its own or underneath other garments. The crepe viscose is a beautiful quality fabric with lovely handle and drape but be aware that there’s a disappointing amount of creasing, you might want to take that into account when planning, for example if you’re making something you’ll spend a lot of time sitting in.
all finished
As always, I hope you find my hints and tips helpful if you choose this lovely fabric, I wouldn’t recommend it to a novice sewer because some experience of sewing with other similar fabrics is definitely an advantage, plus it would be shame to end up with a costly mistake, but if you’re looking for a new challenge to add to your repertoire this could be a good start. I’ll launder the finished garment either by hand or in a wash bag on a gentle cycle in the machine. I’ll dry it flat too and store it that way, I don’t want a coat hanger to make it misshapen. If you’re a person who prefers not to worry too much about their clothes or their maintenance then this might strike you as overkill, and that’s fair enough, but I don’t think it hurts to have a few special things in our wardrobes which were worth the effort to make for ourselves.
I’m looking forward to wearing this top as autumn is fast approaching (did summer ever arrive!?) thank you to Lamazi for providing me with the fabric to review.
There’s been quite a lull in my sewing and blogging of late due to a distinct lack of motivation and generally feeling meh about everything. I don’t know about you but I’m utterly cheesed off with the persistence of the ‘Rona and, whilst I really try to find the positives as much as I can, there comes a time when I’m all out of good thoughts.
Anyhoo, I’ve finally managed to get my act together and to cut out and sew something which is worth blogging about!
You’ll know I use The Sewing Revival patterns a lot, and especially because they are SewOver50-friendly in their representation. Janine kindly offered me a copy of the new and improved Kingfisher top recently so here are my thoughts on it. The original version was one of the first in the Sewing Revival collection and it now features extra variations including 3 sleeve lengths and additional ruffles and frills to gussy it up.
Initially I’d settled on using a length of fabric I bought recently but in the end, whilst searching-sorry-shopping, my stash I came across a length of batik-printed lightweight cotton which had originally been a dress. I bought it as a remnant which was in two different-sized pieces pieces so I joined them right across the weft to make it useable. From that I turned it into a simple ‘pillowcase’ dress with a gathered drawstring top and hemmed at the bottom. Needless to say, this being England, I didn’t get a massive amount of wear from it because our climate is so unreliable. Sadly I don’t seem to have a photo of it now so you’ll just have to believe me.
The Kingfisher has raglan sleeves which are always so nice to make because they are simple and quick to construct. One of The Sewing Revival’s trademarks is to mix a stretch neck band, cuffs or hem with a woven fabric and this top features a ribbed, rounded neck band. But first I had to get all the pieces out of a length of fabric with a join across it at about 50cms in, plus a tear at right angles to the selvedge in another place AND a small hole just near that! I calculated that I could get a pair of 3/4 length sleeves but one would have to have the seam running horizontally across it. Another new feature of the Kingfisher is additional small ruffles to add so, instead of placing them vertically on the sleeves, I opted to cover the seam with horizontal ruffles, that way way both sleeves would look the same. After a bit of pattern Tetris I got everything I needed out including the ruffles. I started by making the sleeves.
Inside the sleeve with the exisiting join running horizontally
Because of the limitations of the fabric the ruffles were only 5cms wide so, in order to lose as little of their width as possible, I finished each edge with a rolled-hem finish on the overlocker. Check your instruction booklet because I’m sure many models will offer this feature, it will involve a few simple adjustments to the settings to achieve. A rolled hem is a quick and attractive way of neatening fine or lightweight fabrics when you can’t afford to lose too much off the edges.
Each ruffle was cut twice as long as the width of the sleeve because the fabric is quite fine and will gather up well. If you are limited for fabric (mine were cut on the straight grain) or if your fabric is quite stiff or thick, then 1.5x the width will be fine. I sewed a rolled hem on both edges of the sleeve ruffles and then ran two rows of a long gathering stitch along the centre line. Make sure the gathers are evenly distributed before sewing the ruffle down, I used a zigzag stitch to sew the ruffle in place.
I created a cuff to finish the sleeve ends by cutting two pieces of fabric from along the selvedge and sewing them on. My original plan was to create an elasticated cuff using a casing but then inspiration struck(!) and I sewed three rows of shirring instead.
Shirring works best on lighter-weight fabrics such as soft cotton-types [lawn, batiste, voile, Swiss Dot, pique, poplin if it isn’t too stiff] also most viscose/rayons, many silks, and fine woollens such as challis. This isn’t a definitive list by any means, basically nothing too thick, or stiff or overly ‘bouncy’. As with anything you’re unsure about I’d strongly suggest sewing a few samples first to see how it goes.
To begin (and these are very much my own thoughts on shirring, you will find many others which might vary to these-trial and error before you startis the best plan of action) you ideally need a bare minimum of 1.5x the eventual finished measurement but as a rule of thumb I would say at least 2 or 2.5x your finished measurement, especially if the fabric is very fine. I also wrote advice on shirring the back of a sundress in a previous blog post which you can still read here.
Gently windshirring elastic onto your bobbin by hand, do not stretch it as you wind, you will use regular sewing thread on the top as normal. Set your stitch length as long as possible and, sewing on the right side of the work, make sure you backstitch at the start to secure your threads then sew your first row of stitching. Do not backstitch at the end of the row, carefully remove the sewing by gently pulling the elastic out so that there’s enough to tie off the ends eventually. Repeat by sewing parallel to the first row of stitch as many times as you require, I’ve just done three for the cuff. You could draw on the lines using a marker pen or chalk if it will help, I just keep the edge of the foot in line with the previous row of stitching. The work will gradually start to pucker up as you increase the rows. The photo above shows you what it looks like on the reverse. This is the right side of the cuff, wherever possible work with the fabric flat and then joint it in a seam or to the next piece it’s connected with. It won’t be gathered up enough to start with so hover your hot iron with plenty of steam over the area and it will pucker up a lot more. When it’s gathered as much as it’s going to tie off or backstitch the threads/elastic to secure.In the photo above, the top cuff is before the steam was applied and the lower cuff is afterwards, you should be able to see that the stitching is a fair bit tighter-looking. Next I added small ruffles to the front raglan seams, also neatened with the rolled hem finish just on one edge. The rest of the Kingfisher was very straightforward, the ribbing band went on neatly and gives the neckline a nice finish. You could also use bias binding or make facings if you don’t want to deal with stretch but I like it like this. Close-up of the finished neckline, I think I bought the navy ribbing from Lamazi Fabrics a little while ago. Sleeve ruffle
I cut this top in a UK10 so it’s a closer fit than some tops I’ve generally made but I’m really happy with the fit, there’s still ample room for comfort and movement. From a fabric that was languishing in a box I’ve concocted a casual top I can wear in warmer or cooler weather.
Thank you to Janine for providing me with the pattern, I hope my review will be helpful, for a such a simple shape there are so many possibilities with it. If you haven’t tried any Sewing Revival patterns I’d definitely suggest you pop over there and take a look, and if you choose to follow any link I’ve created in this post or previous TSR ones, and you then make a purchase, I will receive a modest fee from it. You can also read my previous reviews for the Sidewinder pants, the Heron dress plus a hack, the Bellbird top and the Fantail top and it’s follow-up. If you want any more inspiration use the hashtag #KingfisherTop on Instagram or Facebook. I’ve got plans for a deep-cuff version later in the year, just so long as I don’t have another creative slump…!
Welcome back and thanks for reading this far, I’ll try not to leave it so long next time!
In 2019 I decided to try something different to dresses from the Simple Sew pattern collection for my blog post so I chose the wide-legged Palazzo pants.
I always have a look at any posts or reviews about a particular Simple Sew pattern first to check if there are any pitfalls I should look out for which might influence my decision, or how I tackle making it, and the overall opinion of trousers was positive. I sorted out some fabric from deep in the stash, it’s a viscose from the now-defunct Adam Ross fabrics which has a good drapey quality, although I know it will crease so I’ll wear these permanently standing up!
There are only 4 pattern pieces to the trousers-front/back/waistband/pocket- which makes them very simple to lay up and cut out, you could even leave out the pockets if you’re short on fabric but why would you leave out pockets?!
I checked my measurements against the chart to decide my size, I also measured the pattern pieces to get some idea of the ease involved but I was optimistic they would be generally OK. If you’re very unsure, or between sizes, I’d suggest you make a toile that’s about mid-thigh in length to check the fit and comfort around your waist, hips and body length. Leave out the pockets at this stage, there are darts in the back and the front is flat, you could insert a zip in the back if it makes things easier to fit yourself but I didn’t bother. Always sew a toile as accurately as you would the garment itself because if you don’t bother cutting properly or following the seam allowances how will you know where the problems lie? That’s the whole point of a toile! Make any adjustments on the toile and transfer the changes to the pattern pieces. There are no lengthening/shortening lines marked on the midriff area of the pattern so I suggest, if you need to make either of these changes, drawing a line at a right angle to the grainline at a point midway between the waist and crotch level. Fold out or add in length through this line. There is a lengthening/shortening line for the leg length however.
It wouldn’t be a Simple Sew pattern if there weren’t some errors or anomalies to keep you on your toes and this is no different. On the back piece the pocket placement notches are only printed on size 8 and none of the others. Either transfer the markings to your size or remember to snip them when you’re cutting out the back.
The notches don’t feature on all the size lines so transfer them across as required.
The lay plan for cutting out shows the main pieces interlocking, which is fine if you have plain or multi-directional fabric but don’t forget to keep the pieces running the same way if you have a distinct one-way print. Also, I didn’t cut out the waistband until I was happy with the fit of my trousers as it’s very shaped piece and if it’s too big or too small you’ll probably need to cut another. Don’t forget to make a snip for the centre point on the waistband, it could have done with a notch for the side seam position though as there isn’t one so it’s a bit of guesswork.
I’m not normally an advocate of overlocking the edges until they’re sewn up [because if you aren’t careful you can easily lose too much seam allowance in the trimming and when you join pieces together you could start to make the garment too small, plus your notches disappear] but, as many of the pieces here require the seams pressed open and flat, I overlocked most pieces first this time.
You will find that for instructions 4 and 6 the words don’t match the diagrams but the drawings are correct
Next the pockets go in (unless you wish to check the waist/hip fit first in which case tack or machine baste the side seams and leave the back open where the zip will be inserted in order to try the trousers on) The description for the pocket insertion is a bit vague, I’ve made a second pair since writing this piece originally and found it quite unsatisfactory which is why I have updated my advice.
Neaten the lower edge of the pocket bags first then pin to the trouser fronts matching the ‘opening’ notches. Next stitch in place from the waist to the bottom edge of the pocket bag using a 12mm seam allowance (see my notes on the photo above) Repeat with the trouser backs, then neaten the seam edges all the way down enclosing the pocket edges too. On the front only, understitch the pocket opening. Now you can pin the fronts to the backs and sew the side seams shut using a 1.5cms seam allowance, not forgetting to leave the pocket opening unstitched! Finally, carefully sew the bottom edge of each pocket bag closed otherwise your sweets will fall out inside your trouser leg!
After I’d assessed the waist size (comfortable to loose) and crotch length (comfortable) at this point I cut and interfaced the corresponding waistband [for some reason there were two waistbands printed out but I could find no discernible difference between them so just ignore one and cut a pair in fabric plus one interfacing]
The reason the waistband goes on before the zip insertion is because the zip runs right up into the waistband to finish at the top, there’s no overlap allowed with button or hooks and eyes. You could use the overlap method if you prefer but you’ll need to add some extra length to the waistband on one end to allow for the overlap.
The lack of indication of the side seams on the waistband means you’ll need to pin carefully to evenly absorb any fullness of the trousers to ensure a good smooth fit to the waistband. [the side seam is probably at the halfway point but not necessarily, especially if you’ve made any fit adjustments to the waist]
With the benefit of hindsight I would make the waistband in two pieces, a front and two backs with the join at the side seam. This is for two reasons, first, it will allow you to make adjustments for fit more easily and, secondly, I’ve found the centre back has become slightly pointy and misshapen both times I’ve made these now. I believe this could be because the length and curve of the waistband means that it the centre back is very off grain, usually the centre back seam would be cut on the straight grain which gives it stability.
The instructions and illustrations for inserting the zip are reasonably clear however there seems to be a contradiction with an earlier instruction which tells you to sew up the back crotch seam. Illustrations 13-15 appear to have the CB seam unsewn and 16 tells you to sew it up after inserting the zip but previous diagram 6 tells you to sew it up! No wonder I got in a muddle!! My suggestion would be, if you’re using an invisible zip as suggested, leave the CB seam unsewn AND ignore instruction 11 to sew up the inseam until after you’ve inserted the zip. Alternatively, use your preferred method of inserting an invisible zip. Before sewing the waistband down I added two hanging tapes to each side seam so that I had an additional means to hang the trousers up if needs be.
On my second pair I’ve added a small button and loop inside the waistband because I found the zip a bit of a faff to do up without anything at the top of it.
you can also see here how the waistband rises to a slight point on each side in spite of it being fully interfaced. It isn’t the end of the world but I’m a bit cross it’s happened a second time, CBA to fiddle with it too much though…
Hopefully you’ve now arrived at a finished pair of trousers which simply need hemming. After checking the length wearing shoes (they come up pretty long) you could use the simple rolled hem finish as per the instructions or, as I did, leave a sizeable hem of about 5cms to give weight to the very flared leg width. I overlocked the edges to neaten and then used my blindhem stitch with the appropriate foot on the machine to finish [incidentally the photo is of a different project] I don’t use this technique often but it’s a good, and quick, finish on hems that don’t have too much, if any, curve. You could also slip hem by hand of course.
Different project but still blind-hemming set up
The Palazzo pants are worth persevering with as they have a pleasing smooth fit over the waist and hips which is very comfortable and the leg is wide without being crazy-big. You could shorten them to culotte length very easily, they would work well in a variety of fabrics including linen, chambray or crepe, fabrics with a bit of drape and fluidity will look nicest as you don’t want to look like Coco the Clown!
I’m wearing them here with a top made from broderie anglaise that I found in a whole collection of fabric I was given by a friend. Her mother had been a wonderful dressmaker and I found the fabric pre-cut as this simple top which so I just sewed it up.
I’m wearing them here with one of my trusty Camber Set tops from Merchant & Mills
Same Camber, different trousers!
I cut this pair slightly shorter overall so that they aren’t so long if I wear them with flat shoes.
Overall I’m pleased with these trousers, they are a good fit and make a nice alternative to a skirt or close fitting trousers especially in warm weather.
I noticed that this particular post gets a huge amount of traffic so I hope this update clarifies any issues you might have had with the pattern. In fairness, it might have been updated and corrected since my copy was produced in which case you may be able to disregard some/all of what I’ve written!
It’s a new year (apparently?) so it’s time for my next Lamazi blog and I’m sewing something for Mr Y! I don’t know about you but I’ve felt I needed to work on something a little different to most of my other recent makes, I’ve made myself some lovely garments that I’m now frustrated not to be able to wear much as I want but Tony has been in need of some new clothes for a while now so it’s his turn to be on the receiving end!
I don’t know what you think but I’ve found that men’s wear patterns and suitable fabrics are definitely a bit harder to come by than women’s or children’s, they are out there if you’re prepared to look but it’s not easy. I’ve made him some nice shirts in the past which you can read about here, and I had made him a couple of Thread Theory Finlayson sweatshirts recently and then my good friend Claire told me about their Carmanah top which was quite a new pattern. It has several options so you can individualise it, for example with full length or quarter zip, hood or collar, and with or without kangaroo pockets.
Lamazi offers a range of co-ordinating See You at Six fabrics with plain and patterned French terry, and ribbing, all dyed to be a perfect match so we chose the ‘Clouds’ design in Bistro Green.
I’ve never purchased ribbing fabric before so I was unsure how much to buy, initially I requested far too much because the pattern instructions made no sense to me. Liana at Lamazi and fellow-blogger Sharlene advised me so I had 1metre in the end to be on the safe side and that was sufficient for an adult garment. If you find yourself in a similar situation I suggest you measure the appropriate pattern pieces to get an idea, or try contacting the fabric seller and I’m sure they would be happy to advise. For an adult garment it almost certainly needs joins whilst something for a child probably wouldn’t.
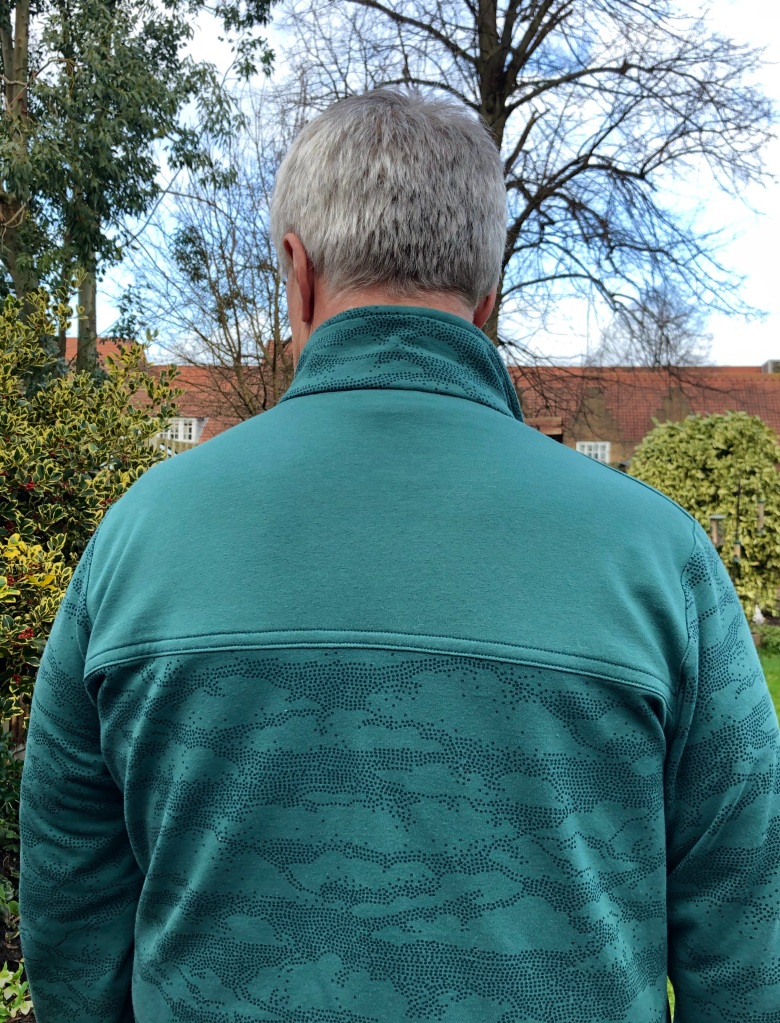
Based on T’s measurements (he’s 6’3” and, although he’s lost about 28lbs during lockdown, he’s not skinny) I cut him a size large but I added about 2cms at the CF and CB folds at the bottom because the previous version was just a little snug at that point. He likes the body length which comes down to about hip level, and the sleeves are nice and long too so I didn’t need to add any length to them.
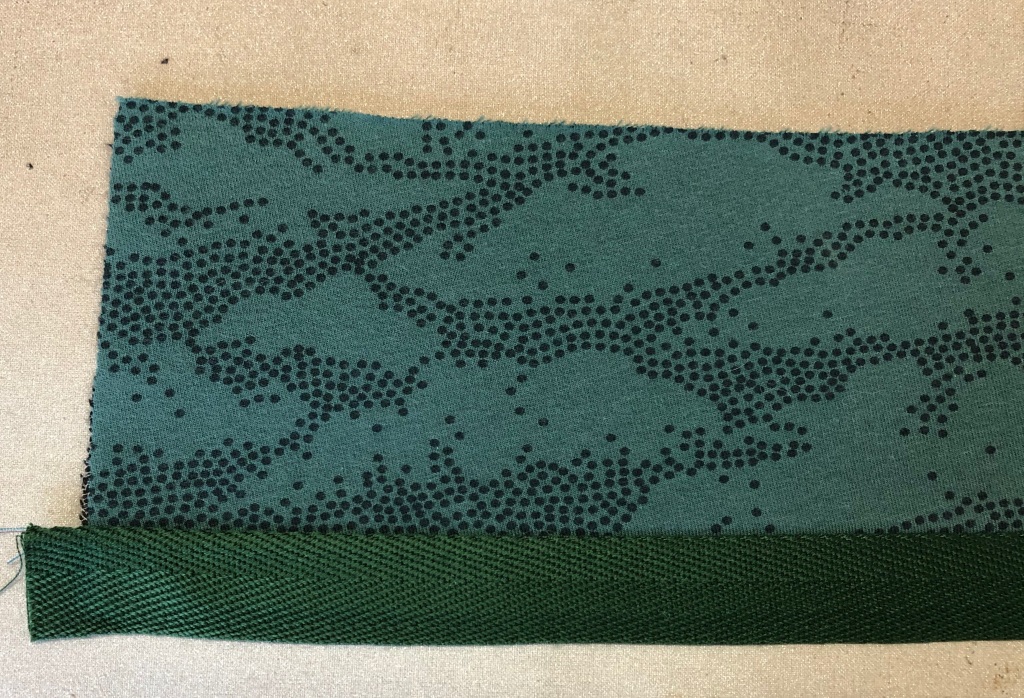
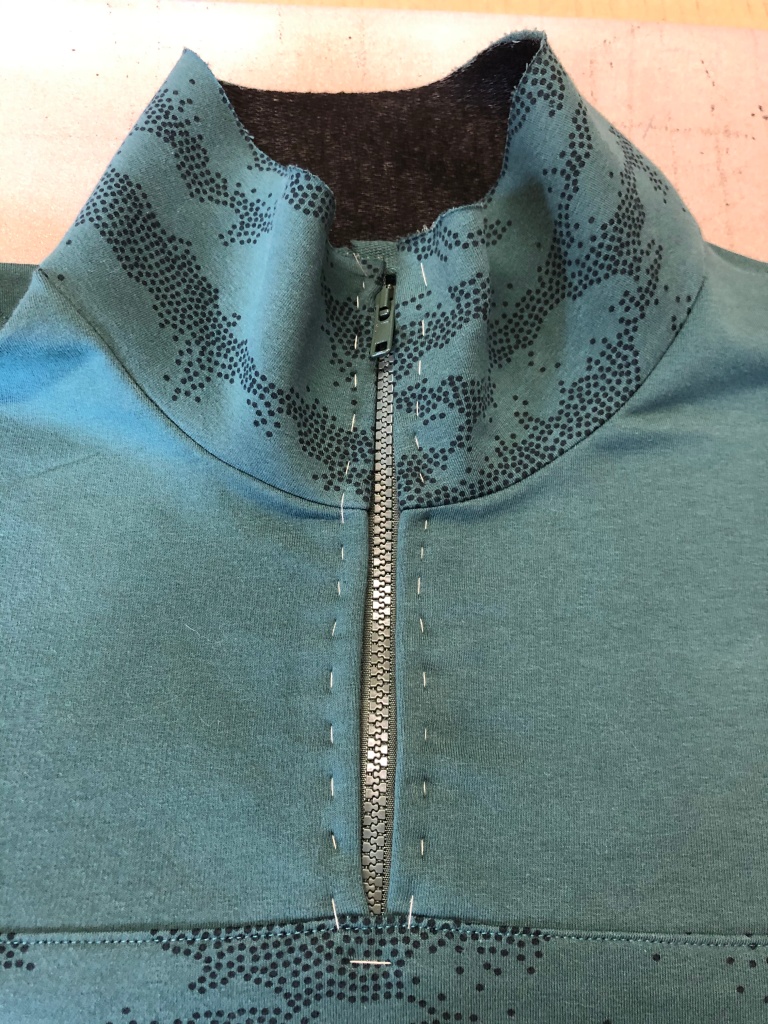
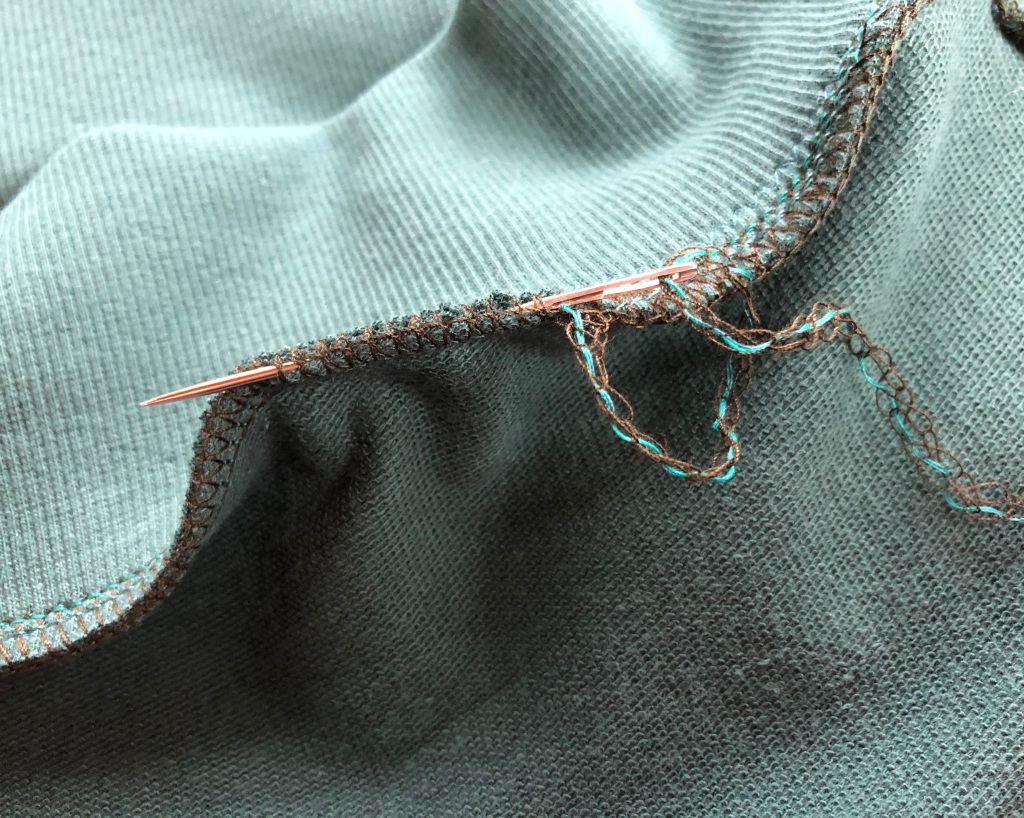
The making up instructions and diagrams are quite clear, I got into a bit of a pickle using the twill tape neatening method though, partly because I printed off the booklet a bit small so I couldn’t easily read the instructions(!) and partly because the green twill tape I had managed to buy was wider than required! Anyway, I persevered and it looks OK in the end. This tape method wasn’t essential and overlocking is perfectly satisfactory, I just thought I would try it for a nice finish on the inside, it definitely adds more complexity if you want to up-skill though. The collar version has a nice detail of the chin guard over the zip which is worth adding for a quality finish.
I put the twill tape on the wrong piece of collar initially! This is the outer collar and the tape should have been sewn to the inner collar. Incidentally, I added iron-on interfacing to the top collar to give it a little more body. It doesn’t call for it in the instructions but I felt the first version could have done with a bit more structure. Have a look at the photo below to see what I mean.
This first version was made with cable knit bought from 1st for Fabrics I think the collar is collapsing a bit although it’s not really a problem
I added twill tape to neaten the front edges before inserting the zip
I tacked the zip into the opening before topstitching in place.
second attempt at the tape trim! the tacking you can see is holding the fold at the top of the collar in the correct place until I’m ready to top stitch it later on.
The tape I bought was too wide so I sewed it on higher than the instructions and then trimmed away the excess in order to turn it up and sink stitch from the right side.
The finished collar from the inside. The green is a very difficult colour to photograph and the zip and tape are a slightly better match than they appear here. I bought both of those from Frumble Fabrics, they have a wide selection of all sorts of haberdashery that I haven’t seen elsewhere.
I finish overlocking by putting the threads on a large-eyed tapestry needle and slot it back through the stitching for a couple of centimetres like this which keeps it secure and tidy.
This fabric is quite pricey but, in my opinion, it’s really lovely quality and it sewed together beautifully. There’s just enough stretch and it would be a good weight for sweatpants or a sweater dress too if you’re tempted. This is the first time I’ve used a range of co-ordinating fabrics and the finished result is really pleasing. Equally you could mix and match colours or prints using remnants for this pattern too, because of the way it’s cut in segments, especially if you go for the full zip version.
T has gallantly modelled the finished result-he’s delighted with it-he’s usually my slightly impatient photographer so the boot was on the other foot today!
Have you sewn anything for the men or boys in your life? How do they feel about it? Luckily T isn’t very demanding where his threads are concerned and he’s always been very happy with the items I’ve made him so far…..I haven’t attempted trousers in years though so perhaps that will be next? I’d interested in which patterns or fabrics for men you have been able to source, I think it’s an area for improvement in sewing terms.
It’s been such a tough time for so many and being a part of the wider sewing community has been a very real lifeline for many people. Those of us that enjoy making our own clothes already realise the obvious benefits this can give us; total freedom to choose types, colours and patterns of fabrics as we wish, the ability to emulate high-end or high street fashion at the price-point we can afford and the skill to make clothes fit our own particular body type, to name but a few. It shouldn’t then come as a surprise that the wider world, whilst searching for activities to entertain and occupy them during the long weeks and months of lockdown, discovered (or rediscovered) that home sewing can be creative, absorbing and rewarding which is a VERY GOOD THING! Who knew there was a link between doing a creative activity and a more balanced sense of well-being??
To be honest it doesn’t matter what that activity is, or whether you’re really any good at it, the fact that it can take your mind away to other less stressful places for a time is what matters.
But at the start of the year none of that was of much interest to most. I was extremely fortunate in January to go on a cruise to the Caribbean so I made a couple of new things to fills ‘gaps’ but mostly I took old favourites…cue multiple photos of 3 versions of The Maker’s Atelier Holiday shirt on heavy rotation! One new item was the Trend Square dress I made in fabric given to me by Dibs from Selvedges and Bolts the previous year, I got a lot more wear later on in the summer.
Within a couple of weeks of getting back, Judith Staley and I hosted the very first Sew Over 50 meet-up in London. We very much hoped, and expected, that it would be the start of many more such meet-ups between followers of the @SewOver50 account all over the world but it wasn’t to be…not yet anyway.
If you’ve been reading my blogs for a while you’ll know that as well as meeting up for sewcials with fellow sewers I really enjoy my visits to exhibitions and galleries. At the end of February I caught up with Janet Poole who is a fellow Lamazi blogger at the Stitch Festival in London, I had such a lovely day shopping and chatting with her, and her friend Great British Sewing Bee winner Juliet too. We didn’t realise it then but we were very fortunate to be able to attend the event at all and I wouldn’t be surprised if others who went didn’t catch the-virus-that-shall-not-be-named because it was so crowded.
About a week after this I was able to go to the stunning new Kimono show at the V&A and, although we didn’t know it at the time, that was to be the final outing for several months…
So then we entered the first long lockdown and that’s when sewing (and some baking) became my primary occupation. During this time I had some blogging commitments for Simple Sew Patterns and Lamazi fabrics to complete. For my first Lamazi post I made a Trend patterns Bias T-shirt dress which was a tough make, not because the pattern was difficult but because I was making the dress for a wedding that never took place. And worse than that, I was making the Bride’s gown too so I still have an almost-finished dress waiting for the day that the wedding can happen.
In all honesty I hated how I looked in this dress because I had piled on weight and felt very self-conscious in a fitted dress. It was a lovely pattern made in beautiful fabric but I felt I was doing both a disservice. Eventually I did wear it in September by which time I had lost weight and it was a delight to wear! I’m sure I’m not the only one whose state of mind has fluctuated wildly this year and my self-confidence was rockbottom when this picture was taken.
I know I’m very blessed in that I have little to actually complain about in my life but that does not mean that these months of lockdown didn’t take their toll mentally so, when the call to help make scrubs came, it was something I could actually do! Eventually I made 10 sets, I believe they were headed to a maternity department in a London hospital.
I continued to keep busy by doing a few refashioning projects because the desire to make new things that weren’t going to be worn outside the house was just too depressing. I love the act of making clothes, the planning, the cutting out, the sewing, because that was taking my mind off what was happening in the real world but how could I justify making new clothes that I had little use for? Even dressmaking was starting to become a negative because I felt guilty about it. By doing some refashioning projects using things I already had, other than new fabric, I made a few items including pyjamas for my final Simple Sew post and another pair using the PJ pattern in the Great British Sewing Bee book written by Alex and Caroline of Selkie patterns and for which I had made a couple of samples. I used 4 old work shirts of my husband’s which were very well worn! I also made (eventually) two pouffes as well which took care of loads of scraps and off-cut furnishing fabrics and were extremely satisfying! I also refashioned a very old and redundant heavyweight cotton curtain into a Dawson coatigan by Thrifty Stitcher.
Early on in lockdown I had the pleasure of talking to Maria Theoharous for her Sew Organised Style podcast on a couple of occasions. I’ve set up a separate page so you can access this to be able to listen to her inspiring SewOver50 guests every week. One of our chats revolved around how we each arrive at our fabric choicesfor specific purposes or projects, I wrote this topic up as a post which you can read here, and I also wrote a further post which came from when I was guest editor on the @SewOver50 account and we talked about our cutting out processes-did we cut and make one thing at a time, or cut several things and have multiple projects on the go? Scissors or rotary cutter? Pins or weights? It was wide ranging and fascinating with so many excellent ideas and practices. I hosted another discussion about a variety of hem finishes later in the year and you can read that one here. Incidentally, by the end of this year @SewOver50 has reached an incredible 25,600 followers!!
hem finishesbatch cutting, or not?
One of my stranger tasks this year was to carry out a socially-distanced dress fitting on a doorstep! Before lockdown started I had been commissioned to make a dress for a work colleague of my daughter Katie. Thankfully I’d opted to make a toile of the bodice which I’d fitted just before lockdown kicked off so I managed to get the dress to a good stage of completion. However, I got to a point where I definitely needed her to try it on because even if she couldn’t wear it for the event she had hoped to, it would be nice for her to take delivery and wear it around the house!! So I went to their place of work and handed the dress over at arms length to Tracey to put on in the staff toilet, then she came out onto the porch where Katie, under my direction, pinned the dress for me. I took a few photos for reference too. From that I was able to finish and deliver the dress and my client was delighted with it…phew
One of the regular sewing highlights of the last 4 years for me has been the Sewing Weekender which generally takes place in Cambridge, UK in August. The organisers took the bold decision to put the whole event online instead which meant that many more people could ‘attend’ from all over the world. Myself and Judith Staley were delighted to be asked to contribute a video message each which was very nerve-racking but it turned out alright in the end. I published a transcript of mine here, along with the original video (you’ll notice that I had abandoned my signature pink hair by this time because, quite frankly, what was the point of bothering!) The Online Weekender also raised a significant amount of money which was divided between 4 charities.
As lockdown started to ease in the summer I was able to get out and about a couple of times. I joined an al fresco rag-rugging workshop in Hertfordshire run by Elspeth Jackson of Ragged Life which was so enjoyable, and I visited a couple of exhibitions in London including the Kimono show again, plus Andy Warhol at Tate Modern and Tricia Guild at the Fashion and Textiles museum both on the same day. Since then though things have been shut down then reopened, then shut down again. My heart goes out to everyone who is trying to run a business or an organisation that relies on visitors through their doors to make them viable, their future is very uncertain.
I’ve made a few other garments during the autumn which I’ve been really pleased with including the Prada-inspired shirt dress and a pair of Utility pants by Trend Patterns (not blogged yet) but I feel I’ve run out of steam with my sewing right now and I never thought I’d say that. My own teaching classes restarted for a total of 5 weeks in October but they’ve stopped again. I know some have adapted by using Zoom or other platforms but it just wouldn’t work for me, I feel dressmaking is too hands-on and needs real assistance for tricky bits, holding things up to the camera isn’t good enough sometimes. And being part of a group and all that shared enjoyment is a huge part of it too. I’ve had fairly regular online catch-ups with some of my lovely sewing friends and that has been a joy, albeit not as good as seeing them in the flesh.
Mr Y was the lucky recipient of a few handmade garments too during 2020 when I made him another two Kwik Sew 3422 shirts, and not one but two Thread Theory Finlayson sweatshirts! I’m happy to say he’s delighted with all of them and I’ve got plans for another sweatshirt for him in the new year.
I’m working on my own pattern which I’ve self-drafted so hopefully that will be something positive for the new year but I need occasional assistance from more expert friends and that’s making it a drawn-out process which would have been so much more fun person-to-person.
One final project I was commissioned by a friend to make was a Christmas chasuble for her to wear as she presides over her Christmas services in church. A chasuble is essentially a fancy poncho which the priest wears over their other vestments and Wendy wanted me to create one with a Nativity scene on it. She sourced the base fabric with my advice, and a printed quilting cotton Nativity which was sent from the US. This was square so I carefully cut it into approximate thirds with the central third featuring the stable scene and the star for the front, another third with Bethlehem for the back and the remaining third I cut into two parts to use on the stole, which is the long scarf priests wear around their necks. All of these I attached by appliquéing around the black outlines (I was literally making it up as I went along!) Wendy is delighted with the finished result (thankfully) and I’m sure she will enjoy using them during the Christmas season.
As I finish writing this (2 days before Christmas) we have no idea what lies ahead…some countries seem to be slowly recovering whilst the UK as a whole seems to be sliding further and further into disaster, or maybe not? I should try to think more positively as scientists have worked tirelessly to make a vaccine which will gradually be rolled out. Personally I’m a long way down the list for it but that’s absolutely fine, we must protect the most vulnerable first.
I’m making an effort to look cheerful in this most recent Lamazi blog make, but the wine was slightly off watered down Rosé from my daughter’s fridge and it was 10.30 in the morning! I’m genuinely pleased with the dress though and in spite of everything I’ll wear it on Christmas Day because there’s plenty of room for expansion!!
This has probably ended up not being a-not-entirely-coherent post but that’s kind-of appropriate I reckon! Wherever you are and whatever the new year brings for all of us I’d like to thank so many of you for reading my posts, sending me lovely or encouraging messages. Being a part of the online sewing community and Sew Over 50 in particular has been an absolute joy and a lifeline at times. We need to lift each other up more often, call out injustices when we see them but not to the extent that it becomes bullying of individuals, that isn’t right either. 2020 has been a year of huge upheaval, I plan to restart 2021 with fresh sewing plans to help me to feel more positive about it…it’s going to be a bumpy ride!