After struggling to get the ASDM to work in GNS3 I thought it would be a good idea to write a blog post on how to get the ASA and ASDM working within GNS3.
Below is the ASAv image I am using and also the version of GNS3. Note if you want to run an ASAv image you must run it in GNS3VM and not in the GNS3 local.
ASA image: asav952-204.qcow2 (VIRL image)
GNS3VM Version: 2.0.0b3 on Windows
The GNS3 team have a great video showing you how to import the ASAv image into GNS3.
https://gns3.com/discussions/gns3-talks-gns3-asa-setup-import
I would strongly recommend that you view that video.
They also recommend that you use the ASAv directly from Cisco’s VIRL software. A google search will get you the image you need.
I had a few issues getting the ASDM GUI working initially, note that you do NOT have to import the ASDM .bin file onto the ASA it is already on there even if you can’t see it when you do a dir, trust me it is!
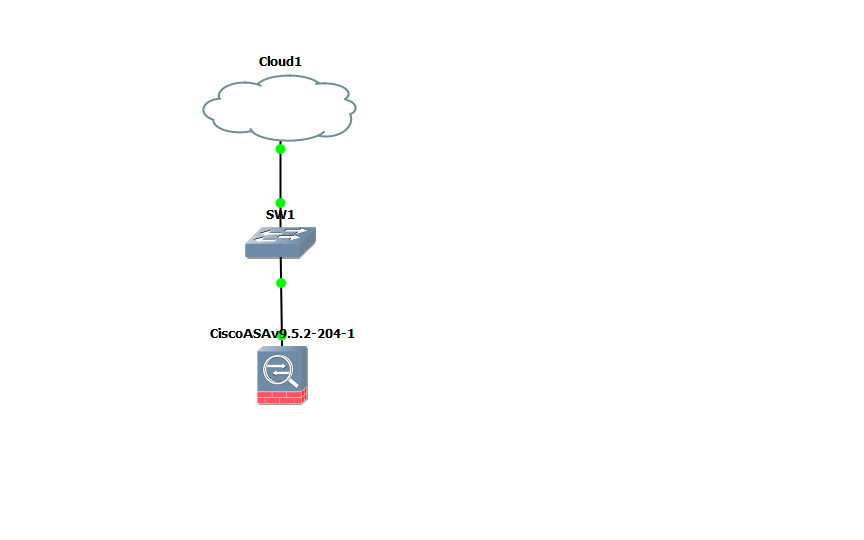
Below is the topology I am using. Drag your newly imported ASAv image onto the workspace along with the GNS3 Ethernet Switch and the Cloud object. Connect the ASA Management 0/0 interface to the switch and then using another port on the switch connect it to the Cloud and select eth1 as the interface on the cloud, the eth1 interface should be bridged from VMware to your local machine.
Next, you need to configure the ASAv to get an IP address via DHCP and also activate the http server on the ASA and allow the IP that you get from DHCP to access the http server on the ASA.
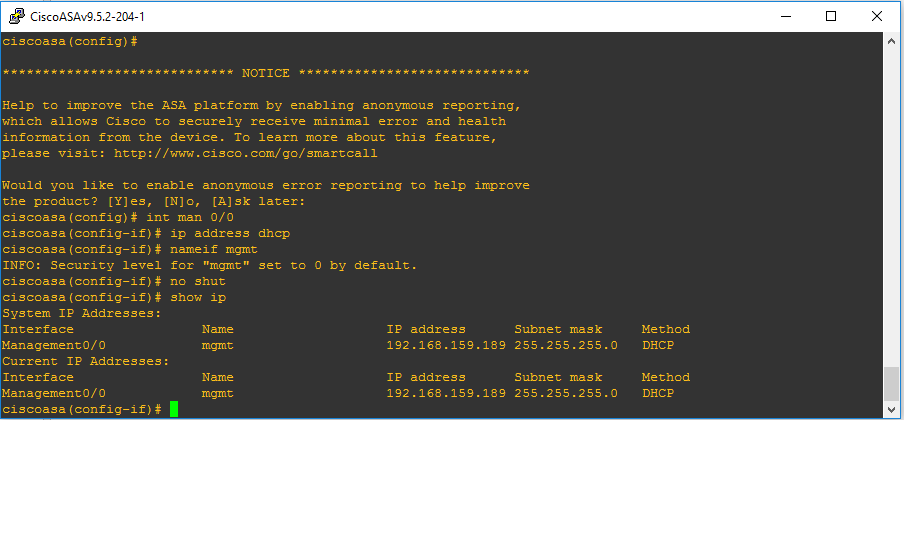
When you go into enable mode it will ask you for a password don’t panic as you just press enter and it will continue into enable mode this is the default behaviour of the ASA. Go into configuration mode and configure the management interface as shown above.
Wait a minute and then run the #show ip command. As you can see in my setup I’ve been given an IP address of 192.168.159.189.
Next, we need to enable http servers on the ASA to allow us to access it via the ASDM GUI.
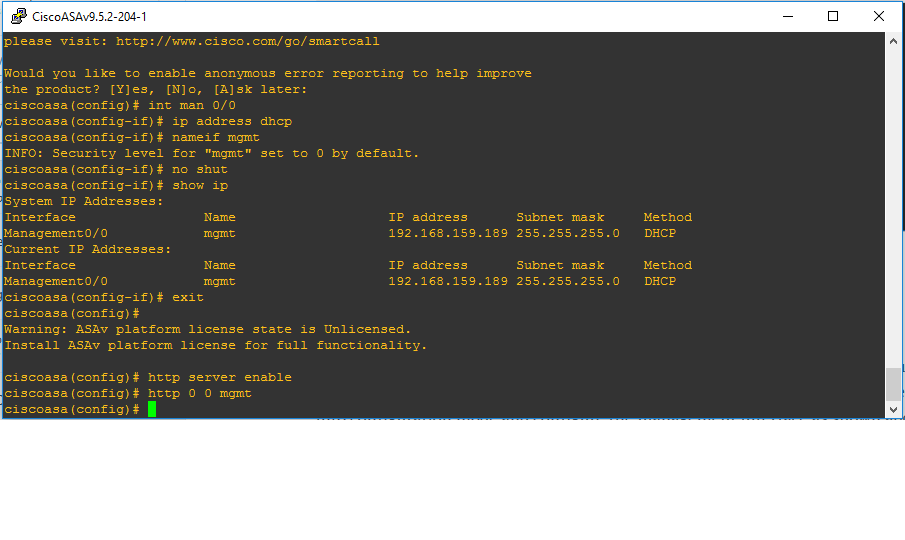
The commands to do this are #http server enable and #http 0 0 mgmt. I cheated a bit by using the http 0 0 mgmt command. I could have said only allow the IP address or subnet of 192.168.159.0 access the ASA via the ASDM. The command I used above is basically allowing any IP to connect to the ASA because this is just a lab that is fine you wouldn’t want to do this on a production ASA.
So you are all set now to access the ASA via the ASDM GUI. Open a webpage and enter the IP address that was assigned to your management interface via DHCP. NOTE you must use HTTPS:// after all it is a security device we are accessing here.
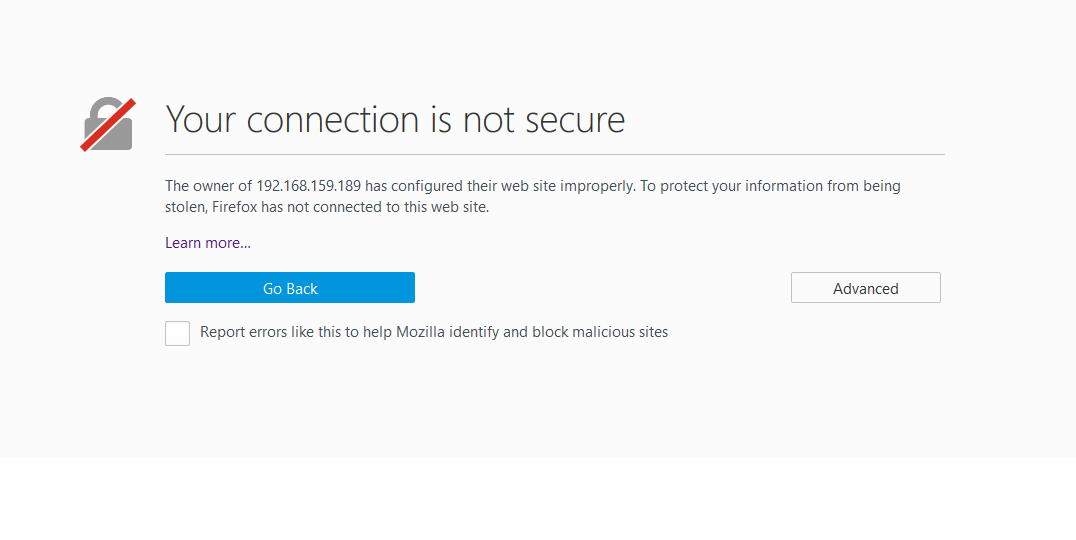 You will get a warning message when you first try to connect to it saying that it isn’t secure as the certificate is a self-signed certificate from the ASA and your browser will not recognise it as a trusted site. Just click on Advanced and add exception.
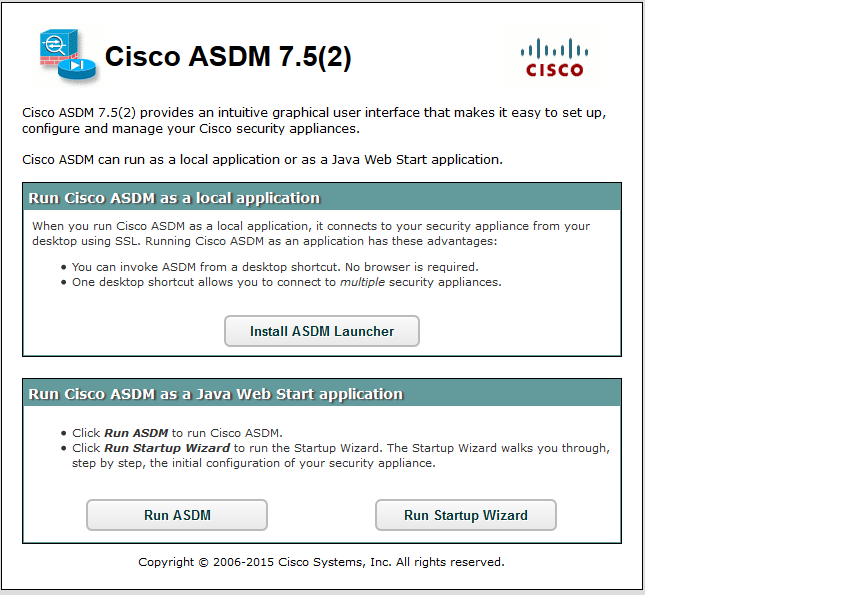
At this stage, you should get the following screen. Note you’ll need to have java installed on your machine to be able to run the ASDM. Select Install ASDM Launcher this will install an icon on your desktop so you can run the ASDM directly from there which will save you having to go via a webpage each time. When you start the ASDM launcher you’ll be asked to put in the IP address which will be the IP address that was assigned to the management interface. I didn’t set a username or password just click on connect.
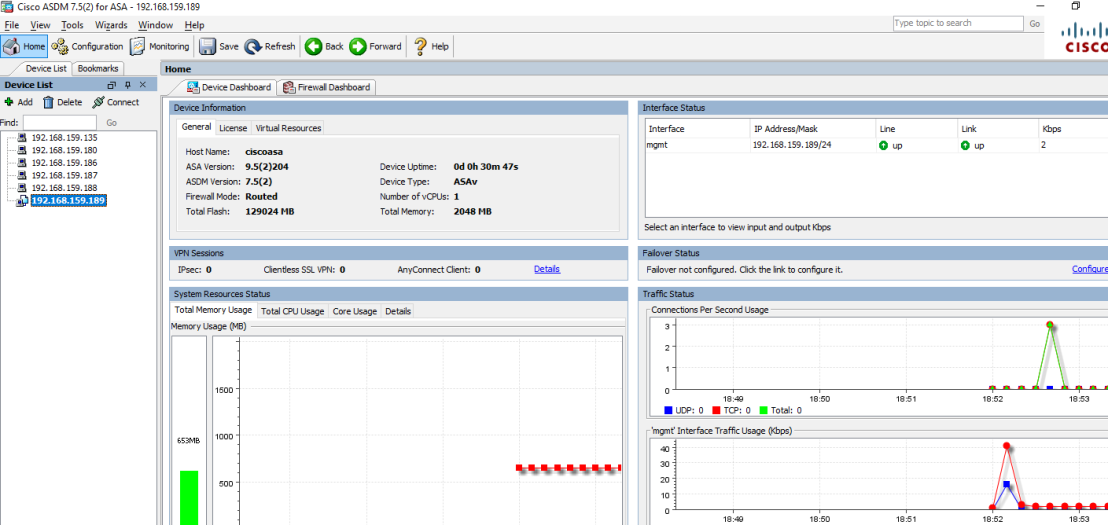
You should be now logged in 🙂

Very good tutorial, sir! In my setup I had to adapt the cloud connections a bit by using the GNS3 VM server cloud and connecting to eth0, but after that it worked quite nicely. Thanks for posting!
LikeLike
No problem at all, I’m glad it helped.
LikeLike
Simple and straightforward! Worked first time! Great work!
LikeLike
Super ! Glad it worked for you.
LikeLike
thank you been frustrateda ll week
LikeLike
I’m glad it has helped you out.
LikeLike