
Drawing ASCII art can be challanging and many of the tools are outdated or no longer supported. Today we will go through all the steps necessary to get you started with making amazing ASCII art in Microsoft Word.

If you don’t have Word check out the other articles on this website to do it without.
We will begin by stretching around an image of your choosing to get used to ASCII art and the basics.
STEP 1: Choosing an image

Choose any image from the internet or from your desktop. It should have no background and not too many little parts. Comic-figures work best.
Choose a simple image to start with. Try searching Google for images of whatever it is you want to draw followed by “cartoon” to get an easy design to follow.

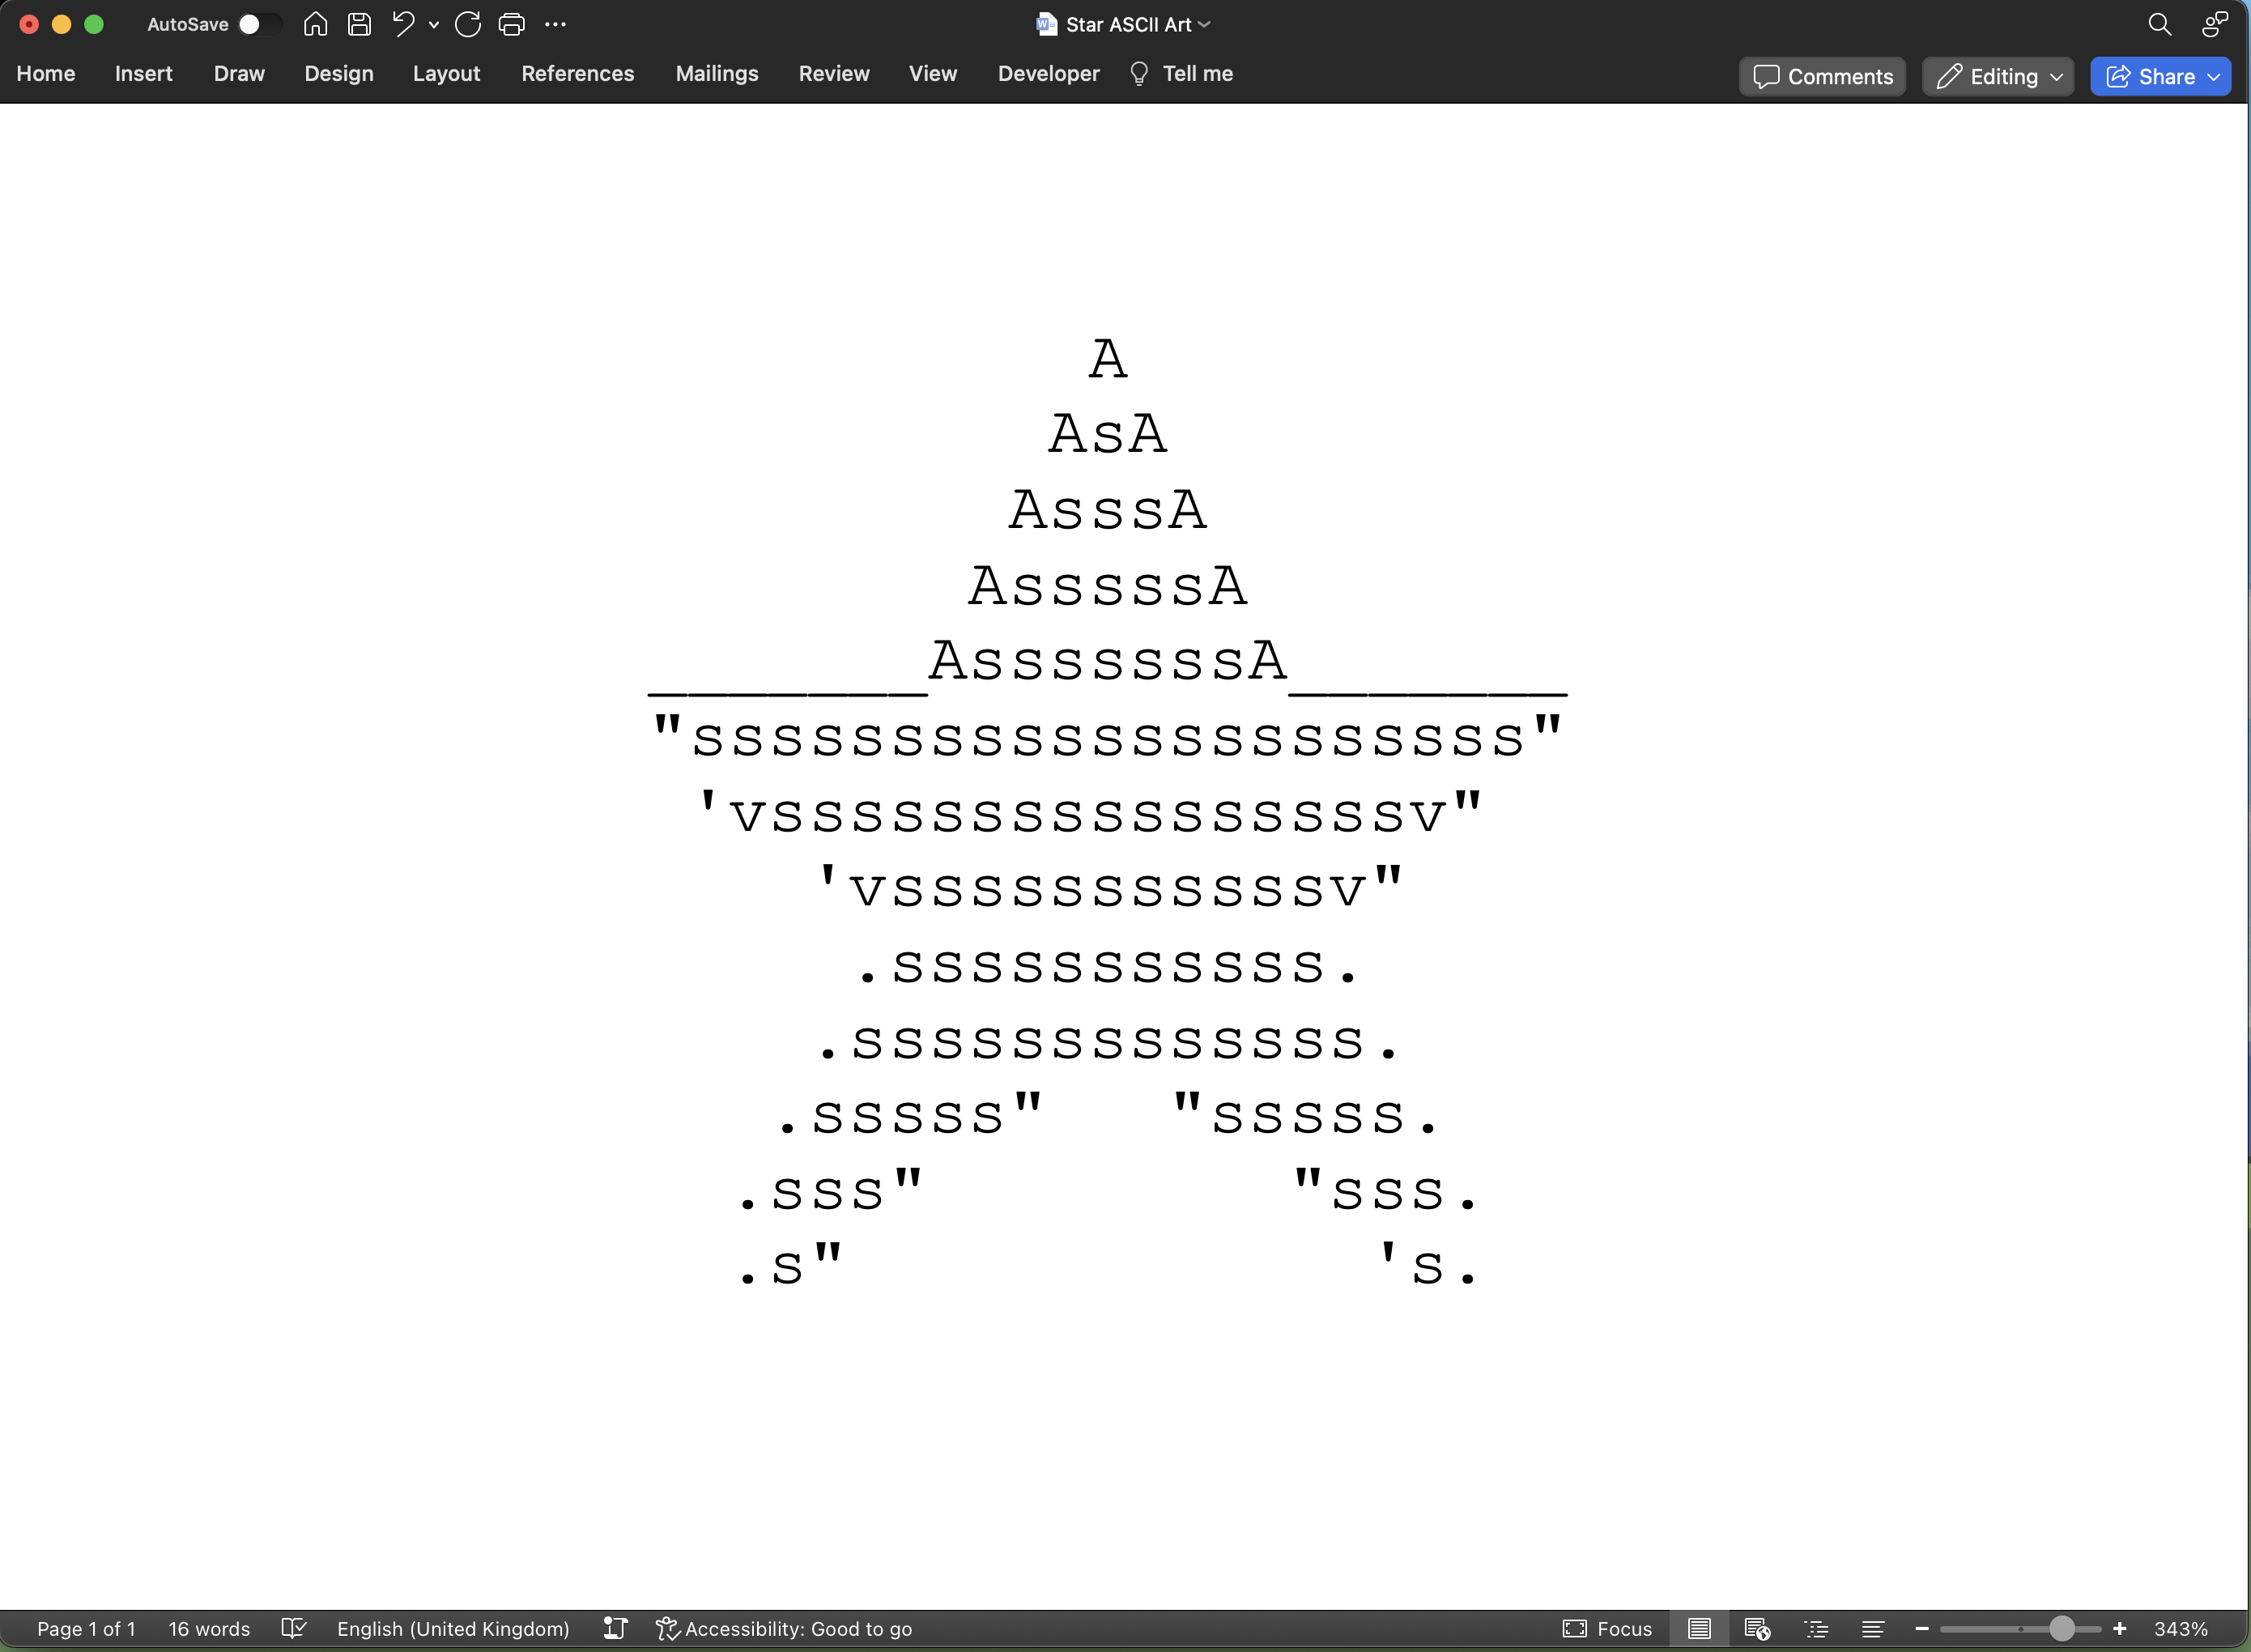
For example, I am using this star for this example feel free to download it here and follow along using that or any other image you want.
STEP 2: Copy the Picture Into Word

Open a new Word document and you can either copy and paste the image from the web or if you have it save “Insert” the image.
STEP 3: Resizing the image

Right-click on the image and select “Size and Position…” this will bring up the “Advanced Layout” menu below. I recommend setting the image to 10cm for this example but feel free to play around with this depending on your image.
The larger you make the image the more detail and characters the ASCII art will have.
STEP 4: Set the Image Properties


With the “Advanced Layout” menu still open change the tab at the top to “Text Wrapping“. In this menu, the image will be set to square by default.
Change this to “Behind text” instead to allow us to write over the top of the image without it moving around.
STEP 5: Set the Image Colour/Transparency
Now we can type over the images and start our art but it’s not very easy to see our text so let us fix that.
Right-click on the image again and click on the “Format Picture…” option. This will open a menu on the right side of the screen. Here we have two options.
Option 1 – Greyscale

We are going to change:
Brightness to 70%
Saturation to 0%
This will give us a black-and-white image that we can use for this basic tutorial and get the image’s outline to trace the outline.
Option 2 – Transparency

We are going to change:
Transparency to 70%
This will give us a faded image that you can use to trace more advanced art. This will allow you to see all the colours of the original image and use different characters for each colour but we won’t be looking at that today 🙂
STEP 6: Set the Font & AutoCorrect OFF

Set the font to “Courier New” and the size to 12. Download below ⤵
~~~~~~~~~~~~~~~~~~~~~~~~~~~~~~~~~~~~~~~~~~~~~~~~~~~~~~
You need to turn off auto capitation in Word otherwise you will. have to go back over your work time and time again to correct the “helpful” changes that Word makes to our art.
File → Options → Proofing → AutoCorrect Options → Auto Capitalization Options ❌
Make sure you turn this off.
STEP 7: Lets Paint!

Now type over the image, line by line blocking out the rough shape.
Let’s use spaces to fill in the blank space and then start filling the start with text.
I will be using “S” as my fill. you can use any letter depending on your preference and the density of that letter.
Each letter has a different density and can make the image look darker or lighter. For example:
For slightly coloured areas use letters like ! or l.
!!!!!!!!!!!!!!!!!!!!!!!
IIIIIIIIIIIIIIIIIIIIIIII

For normally coloured areas use letters like C, E or F.
CCCCCCCCCCC
EEEEEEEEEEEEE
FFFFFFFFFFFFF

For dark colored use Ms and Ws.

MMMMMMMMM
WWWWWWWWW

For the edges you can use (, ), V, A, Y, d, b and so on.

    A
 V    Y
(        )
The goal is to try and capture the image as best as possible.
STEP 7: Adding detail

Now is when the image really comes together. This is the part you can spend the most time on. Adding the little details and fleshing out the image as much as you can.
Here we will try and fill any small spaces and use commas periods and any other character that fits the space.
You can really play around with her and get it to look just how you want it.
STEP 8: Finish

Finally, remove the image from the background and you’ve made a brilliant ASCII Star.
Screenshot it and send it to a friend. Then Copy and paste it around the internet for all to see and then let’s try something a bit more complex 🙂
Leave a Reply